


An artful installation of handmade tiles by Pasadena Craftsman Tile is the centerpiece of an old-house kitchen. Liner tiles frame a relief tile in a backsplash of field tile.
Courtesy Pasadena Craftsman Tile
Art tile is in fact art, and the cost can be steep if a project calls for many square feet of tile. There are ways, however, to combine affordable production tile with handcrafted tile for a custom look. The big manufacturers make wall, floor, and decorative tile in sizes and styles that simulate historical tile. With some imagination, even big tile projects like floors and bathrooms can be affordable. Create a border for an otherwise plain tile floor. In the bathroom, create the look of a wainscot, fill, and border frieze by using two different sizes of production tile along with some liners.
But be forewarned: mixing production tile with handcrafted decos gets tricky, because the tiles’ actual sizes (whatever the dimensions given), depths, and edge characteristics will be different. It can be done, but it’s wise to have your expert tiler in on the project from the beginning, approving purchases and the design. The same goes for mixing tile from more than one studio.
It’s even trickier these days. Today’s bathrooms, for example, may feature installations combining marble, granite, clay, terra cotta, metal, or porcelain tile; and the popular wave of glass tile has yet to recede. New kitchens are likely to have glass tile backsplashes, often consisting of narrow tile applied on the horizontal. Even old-house kitchens and baths see their share of mixed materials; the variety of colors, surface finishes, and reflective qualities is too tempting to resist, as is the allure of time-honored materials and craftsmanship.
“Today, there are so many different products made from a variety of materials, that you can do things not possible in the past,” says Tony Arpino, president of Associated Stone and Tile Installers of Waltham, Massachusetts. “The thing is, all of those materials come in different thicknesses.”
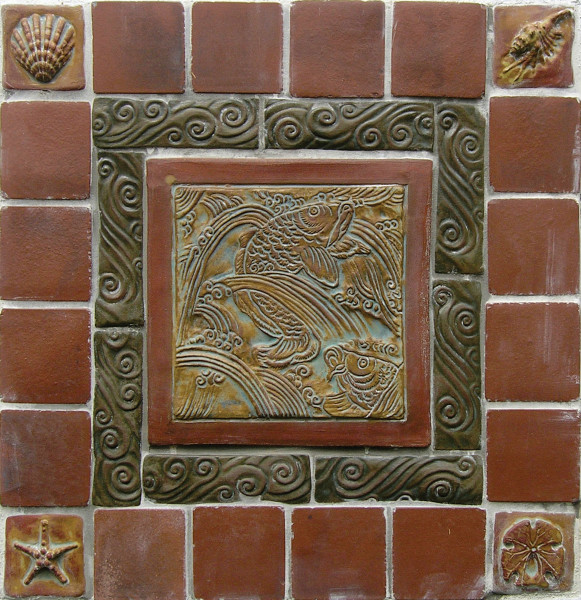
Field tiles and multiple relief decos create another framed panel, also by Pasadena Craftsman Tile.
Courtesy Pasadena Craftsman Tile
But they can be combined for a custom design, he says, if proper installation procedures are followed. Invaluable before you start, he says, is a plan in which every element of the installation has been carefully measured.
Next, “Sort and group all tiles to be installed in the artwork according to tile thickness,” Arpino says.
“Then, mix white latex-modified thin-set mortar for adhering the tiles to the substrate. Use a white color to avoid color bleeding through the tile, should the tiles be translucent.
“Start installing the tiles using the thickest tile available—this becomes your reference height point. Install the rest of the tiles, using your reference point to ensure a flat installation, and follow the following procedures:
1 Depending on the size of your artwork, you will need a straight flat straightedge tool (example: a level).
2 After having installed your thickest tile, proceed with the rest of the installation, making sure the finish surface is flat and level with your reference point.
3 Place the level over every newly installed tile and your reference tile.
4 If your level reading is not level, then you will need to remove the newly installed tile, add additional cement mortar between the bottom of the tile and your substrate, and re-install. Once you have achieved a level reading and there is no air space between the bottom of your level and the face of your tiles, you can proceed with the next tile.”
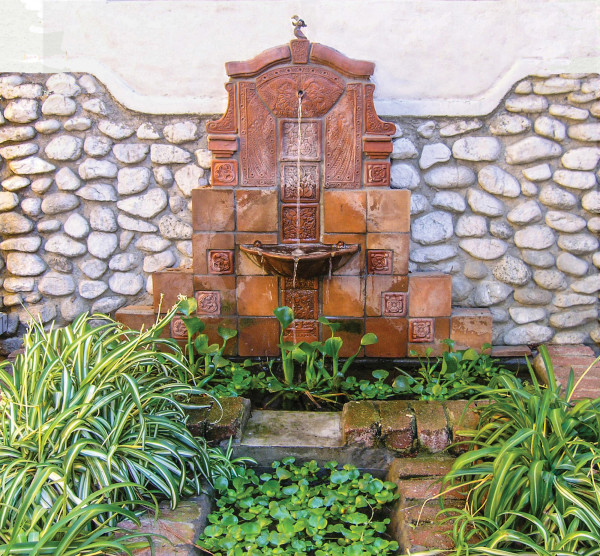
Fountain created with art tile.
Courtesy Pasadena Craftsman Tile
Another issue created when irregular art tiles are combined with production tiles is that grout lines vary.
“Whereas grout joints of a production tile are usually preferred to be very tight (1/16″), for irregular hand-moulded tiles lines should be between 3/16″ and 3/8″,” Arpino points out. The answer, he says, is camouflage.
“As tiles are installed, you will need to adjust grout joint sizing between each tile according to the tile size. Hand-moulded tiles will not be square; therefore the grout joint will vary within the same joint. Some joints will be very tight, some
3/16″ and some as much as 3/8″.
“Although you might want to keep somewhat of a straight line, the result will most likely be one of distorted grout lines and a not-so- pretty installation. Select a grout color to blend with the color of the tiles. After grouting, the grout joint will no longer be the focus. The grout blends with the tiles. You will appreciate the tile and the overall installation, and not see the differences in the grout line dimensions.”
Arpino says that many tile materials lend themselves to a variety of applications. “The important part is the installation. Tiles that crack do so because they are improperly installed. Even glass tile can work very well for flooring; it all has to do with how abrasive they are.”
Thin, highly polished porcelain tiles are easy to clean, Arpino says. However, he points out, shiny floors evoke ice, especially for Northern homeowners: “They may not be conscious of it, but people walk differently when they think the floor is slippery. That actually makes them more apt to fall.”
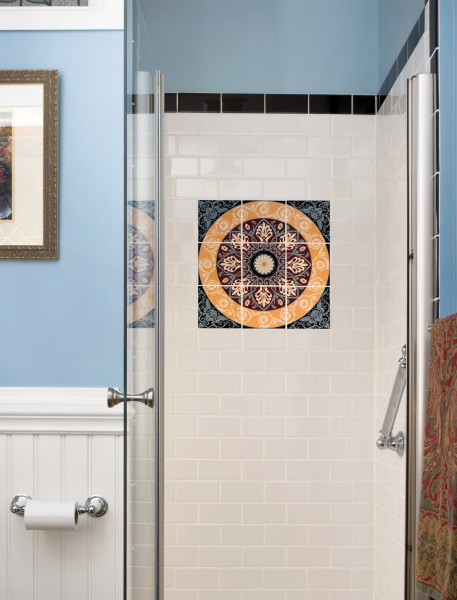
Bang for the tile buck: Tiles making up the decorative panel were purchased at a steep discount during a store move, to complement white subway field tiles in the shower.
Bruce Buck
The Historic Tile Panel
A dramatic way to use ceramic tile is to paint a picture, using individual tiles that together create a pattern, a panel, or even a mural. In this way you can create a focal point, celebrate a favorite motif, frame a permanent “painting,” or define a space (as by using floor tiles to suggest a rug in a seating area or niche). Tile pictures are used in kitchen backsplashes, in bathroom shower stalls, on exterior walls, even on floors. Tile panels, patterns, and small murals are also a historical treatment for fireplace surrounds. Many of these locations see water, weathering, and dirt, which is why tile is such a perfect decorative surface in such cases.
Today, murals can be used on their own, or combined with a variety of liner tiles—plain, flat, or moulded—to fill a larger space. Panels of four to 16 (or even more) decorative tiles that make up a picture can be used to accent tile installations, with or without “picture framing,” the use of plain or decorative liners and other tiles to expand the size of the original piece. Simple panels can be developed by picture-framing an area of interest, then filling around it with a tile in a coordinating color but in a different size or shape, set in a different pattern. —Mary Ellen Polson


