

When turning a Victorian tower or turret into a home office, instead of fighting barrel-shaped walls with a rectangular desk, consider furniture with an arc. (Photo: Rinne Allen)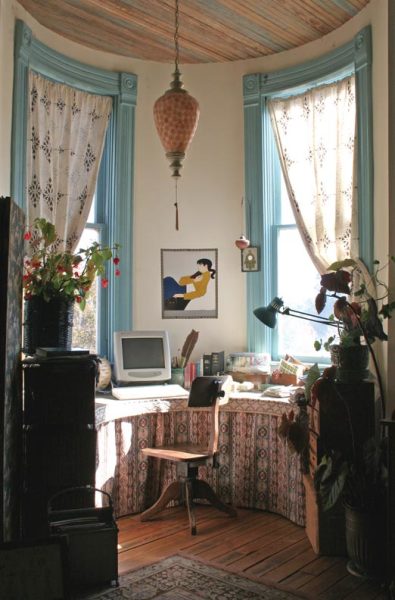
Right angles are a rarity in most old houses. Like living things, they’ve bent, shifted, and settled out of square over the years, making tasks from repairing framing to hanging patterned wallpaper an extra effort.
Yet the real puzzles are the circular spaces designed and built without right angles in the first place. During the Victorian era, towers and turrets, with their many windows, were a fashionable way to bring extra light and air into a house, as well as showplaces for displaying unusual pieces of furniture. Today, such circular and polygonal rooms come with their own decorating and restoration challenges, as we have learned the hard way. Our old house has two turrets and five turret rooms, all of which required creative problem-solving to restore. Here are some of the ideas we used to help to deal with the many curves turret and tower rooms can throw.
Malleable Moldings
Installing wood moldings in circular spaces is tricky because you either have to make the molding in the round with a router and bandsaw (a process beyond the scope of this article) or coax a length of straight molding stock into a curve. The latter is the most common option for short runs in restoration projects, and there are three basic approaches.
1. Kerfing. In this technique, the back of the molding is crosscut at calculated intervals, so that the saw slots or kerfs allow the wood to bend. While kerfing can work for making both inside and outside curves, the molding has to be thick enough to carry kerfs, and the kerfs have to be shallow enough not to weaken the molding or show on the finished side.
2. Segmenting. Another method is to divide the molding into relatively short pieces, or segments of the curve (say, 6 or under), using angled cuts. Then build the segments up into the curve one by one, lapping the ends to make a smooth transition.
3. Steaming. For small, thin moldings it’s sometimes practical to soften the wood fiber with moisture and heat until it becomes pliable. In some cases, extended soaking in hot water will fit the bill, but otherwise the job requires steaming—the process boat-builders use to form ribs and other curved components.
Moldings such as these window headers and chair rails can be coaxed into a curve with clever carpentry techniques. Curved (or slumped) window glass, though, must be specially ordered. (Photo: Rinne Allen)
Depending upon the size and thickness of the molding and the skills of the user, moldings might be steamed with equipment ranging from a wallpaper steamer (rented from a home center) to a steam box made from an open-ended length of PVC pipe and a steam source such as a tea kettle on a hot plate (using open flames in a shop can be dangerous). You will need to tightly connect the steam source to the PVC with a tube and fittings, and should either stuff a rag into the pipe’s open end or cover it with a PVC end cap drilled with a couple of holes. Both methods allow steam to build up inside the pipe but also release the pressure of accumulating steam before it can explode. (For more on steaming, see here.) As a general rule, wood needs to be steamed one hour per inch of thickness to be pliable enough to manipulate. Whatever steaming method you choose, before beginning, follow proper safety precautions like wearing work gloves and eye protection, because steam is hot and can be caustic.
Rubenesque Glass
Humans started making glass thousands of years ago, and historic examples still survive. Unfortunately, owners of curved windows often aren’t as lucky. When glass on a radius window breaks, replacing it can be quite a project. Curved glass, or what the industry calls slumped glass, is still manufactured for storefronts and curio cabinets as well as houses, but it is a special-order product made by placing a sheet of glass on a form of the proper curvature, then heating it in an oven until it wilts. Although ordering slumped glass isn’t cheap, at $250 to $500 for a 24″-square pane, the cost is not devastating. To start, you need to pull the sash and sketch its radius on a piece of paper, then take exact measurements before placing your order with a company that specializes in slumped glass. Do not assume that the curvature of your room will match the curvature of your glass.
Towers and turrets with a small radius are often built with radial sashes and curved glass. (Photo: Andy Olenick)
Glass shops in historic towns are another source. Because curved glass is so prevalent on historic buildings, it’s likely a glass shop will either stock it or know who does. The good news is that they’ll probably handle shipping and installation as part of the package; the bad news is that your window may not wind up looking exactly as it was. Modern slumped glass may not have the wavy look of your original old glass (probably produced by the cylinder method). Architectural salvage is an option, too.
Still another solution is to do away with the curvature altogether. Replacing a curved window with a conventional flat-sash window frame isn’t that difficult technically, but before you proceed, weigh the impact on your building’s authenticity, and any affect on local preservation regulations or tax incentives. For an interim fix, it’s also possible to use Plexiglass. While relatively easy to cut and bend, plastic is not an original material in most old houses, and it scratches and ages relatively quickly. Also, check local fire codes to make sure they permit plastic as a window material.
Warping Walls
Plaster and lath were great for building curved surfaces. Drywall is designed for flat planes, but some restorers say that 1/4″ drywall can handle most curved walls, too-especially if you use a few tricks to make it bend. After ordering the drywall (most lumberyards only stock 3/8″ and larger thicknesses), carefully and very evenly moisten the sheet using a spray bottle or a wet cloth. Be sure not to saturate the drywall, as this can make it impossible to handle. Experiment with a scrap piece first, and consider laminating two layers of drywall rather than using just one, to obtain a stronger, smoother finished surface.
An alternate method is to try scoring through the paper on the back—much like kerfing—then bending the sheet to the curve. Skim-coating with drywall compound or veneer plaster completes the job. For a wood finish, there’s high-quality 1/8″ plywood that can handle most tower curves as well. It’s made in a variety of finished wood surfaces for building boats or aircraft.
Making Tiles Turn
At the Babcock House in Manistee, Michigan, the dining room’s period decor takes its cue from the windows, with multiple, identical curtain treatments and mirror-image china cabinets. (Photo: David Yarnell)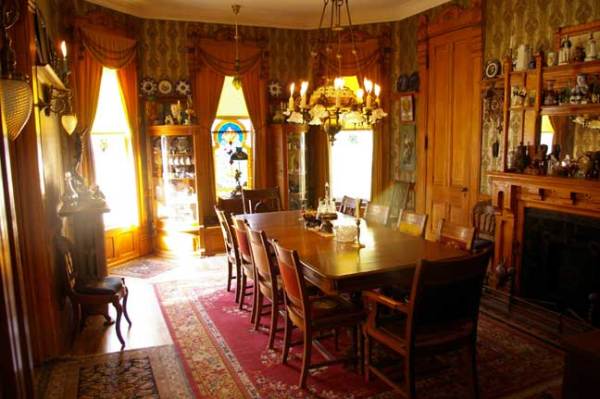
Turret walls curve; tile doesn’t. Understanding this can avoid many problems. For starters, the smaller the tiles used, the better—6″ is about the maximum tile width that will work successfully on a curved room. Even at that, the walls of a turret with a typical 9′ radius will leave about a 1/4″ space behind the tile where it doesn’t sit flat on the surface, so you’ll need more than the normal quantity of mastic to fill the gap. That’s especially true for decorative and accent pieces, which require an abundance of sticky stuff in order to stay put.
A big mistake with turret rooms is to try and offset tile, or begin each new row half a width over from the one below it. While this approach can be visually appealing in conventional rooms, on a curved wall tiles need to march above each other in lockstep, or parts will protrude and look horribly uneven.
Curtain Calls
The most important aspect of a turret room is the drama of its surprising, focusing shape, so it’s best for draperies to emphasize window curvature. While putting separate curtains on each window can work well, a single window treatment that sweeps over everything can be spectacular. Given that curtain rods tend to be straight, this may seem like a tall order, but we recently found two companies online that offer curved rods as well. Continental Window Fashions can custom-make curved curtain rods, and Zarin Fabrics offers curved extension rods in two adjustable lengths.
In our house, we discovered that old-fashioned armored BX cable is a superb material for making curved curtain rods. The cable is tough, fairly stiff, and can bend to meet virtually any curve found in a turret. Even though BX isn’t pretty, no one will see it-most of the length will be covered by the window treatment. The ends of the cable will be covered, too, by the finial that would go on a conventional curtain rod.
Whether the room is circular or polygonal, a good way to design built-ins like window seats is with a series of angled panels. (Photo: Courtesy of Legendary Inns of Newport)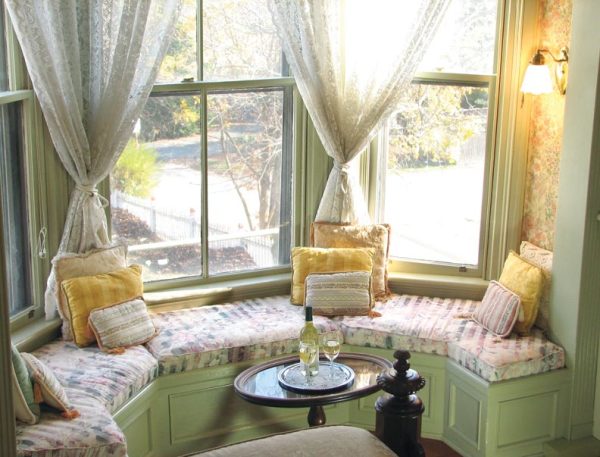
Making Matching Built-ins
Built-in furniture, like a window seat, is a common feature in many styles of old houses, but it is especially attractive in turret rooms because it makes the most of available spaces while accentuating the curves. Other ideas for built-ins include desks or work areas, bookcases, and china cabinets.
If you plan to create your own built-ins, remember that the room’s curves will eat up plenty of material, so you’ll need significant overage. As with tile, one suggestion is to use a faceted radius approach. For example, when making a curved window seat, design it as of a series of flat surfaces that are akin to a polygon. A good working dimension for panels is around 12″ wide, and remember to bevel edges accurately so the panels meet up properly.
The trouble with most circular rooms is the shortage of continuous wall space, but a bed or clawfoot tub can make up for it with floor area. (Photo: Jumping Rocks Photography/Swift House Inn)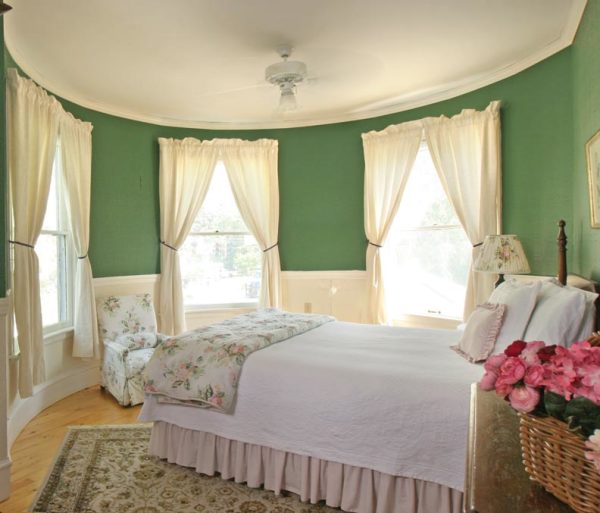
Repurposing Curved Spaces
Turret rooms may be spectacular, but they’re often small by modern standards, so it’s well within reason to change what was originally, say, a tiny bedroom to a great bathroom or a very useful office. Before you convert a round room, though, consider what’s there and what you will need. Besides floor space, crucial criteria include the number and placement of doors, closets, and windows; access to plumbing lines; and the availability of open wall space.
Regarding doors, remember that an extra doorway might be converted into additional wall space, since one exit is usually sufficient. Wall space can be crucial for bathrooms because bathtubs are traditionally mounted against walls. Many turret rooms lack the continuous wall space for a 5′ built-in tub, but luckily there is a very period-appropriate solution: a claw-foot tub that stands alone in the middle of the room, using a shower curtain ring to keep things dry. Remember that whatever approaches you take on your restoration, your round room will always be special—the kind of space few homes have today.


