

Historical wallpapers look, feel and smell different from the pre-pasted papers you buy at the hardware store. Most makers offer design services to help you with your scheme. (Photo:
If the idea of hanging wallpaper strikes fear into your heart, you’re not alone. “There’s a certain octopus-wrestling factor that comes with handling paper,” admits Beverly Phillips, the customer service manager for Bradbury & Bradbury Art Wallpapers. She suggests moving quickly, but with determination. “You can’t let the paper intimidate you.”
Most residential wallpapers come pre-pasted and without the selvedges that appear on silk-screened papers. Still, there’s no getting around the fact that even a pre-pasted paper must be soaked before it’s ready to hang. You should be aware of other, subtler differences that apply to period wallpapers, whether you want to pick up hanging skills yourself or hire a professional paperhanger.
It may sound obvious, but it’s very important to follow your specific manufacturer’s installation instructions. They will tell you what type of adhesive to use, how much time the paper needs to rest after the adhesive is applied, and even the preferred cutting method (razor blade or shears) for the paper.
It’s essential that the wall be properly prepared. Most manufacturers advise starting with a surface as clean and smooth as new wallboard. Walls in older homes may be roughened plaster, with or without multiple coats of paint (including old formulations like calcimine, which tend to blister); wall prep in itself may require days of work.
[caption]A plain frieze above the picture molding becomes part of the ceiling in a house with Arts & Crafts and Colonial Revival details; paper is Morris & Co. ‘Windrush,’ reproduced by
Remove all old wallcoverings and fill any holes or cracks, smoothing them down with sandpaper. Once the prepped wall is dry, prime the wall and allow it to dry completely. Bradbury & Bradbury recommends hanging a liner paper for the best results. If you’re working with an absorbent surface such as plaster or new drywall, apply wallpaper sizing, advises Stuart Stark of Historic Style. (He, too, provides helpful suggestions on his website.)
Surfaces covered with oil paint must be thoroughly rubbed with sandpaper to provide “grip.” If you’ll be hanging a dark paper, it’s also a good idea to paint the wall a dark color before you begin. Once paper is on the wall, it may shrink slightly; a dark color underneath avoids the appearance of white lines between strips.
Before you order the wallpaper, make a layout plan for the room on graph paper to calculate how much paper you need. (Full instructions can be found on manufacturers’ websites.) Order at least 15 percent extra for pattern match-up, mistakes, and later patching.
Before You Start
Gather tools and set up a workspace. Once the wall to be papered is properly primed and dry, you’ll need:
a long work table, covered in plastic or dropcloth
a 5′-6′ straightedge
a package of straight-edge razor blades, or long-blade wallpaper scissors
a compatible adhesive (always follow paper manufacturer’s suggestions)
a short-nap (3/8″) paint roller
a wallpaper brush
a wooden wallpaper seam roller (Don’t use a plastic burnisher; these are designed for vinyl wallcoverings and will harm the surface of historical papers.)
a damp sponge or soft, damp towel and rinse water
[caption]A paper frieze designed by David Berman of
If you are working with a hand-printed paper with trim edges (the selvedge), practice making long, straight cuts on a paper scrap with your straightedge and razor or wallpaper scissors, or on the selvedge itself. Bradbury & Bradbury recommends using disposable razor blades and changing them frequently. “As soon as it starts to drag, get rid of it,” says Phillips.
Measure the length of the wall from ceiling to baseboard (or wainscot) and cut the paper to length, allowing an additional 2″ to 4″ at the top and bottom so you can adjust for pattern matching.
Apply the adhesive to the paper in a thin, even coat using a paint roller. Start in the center and work your way outward, feathering the adhesive to the side. Now you’re ready to “book” the paper—that is, take the edges of the sticky paper and fold them towards the middle, pasted sides together. “You’re making a burrito,” says Phillips.
The idea is to roll the paper up loosely and let it sit for the prescribed period of time—anywhere from just a few minutes to as long as 15, depending on instructions and humidity conditions—so that it can soak up the water and begin to relax. “The paper expands when it’s wet,” Phillips says, “and it has to expand completely before it goes on the wall.” If the paper expands once on the wall, it will create bubbles under the surface; with additional stretch, the design will be “off.”
To hang the first drop, or length of wallpaper, grab the top, and the pasted sides should unpeel from each other about halfway (leave the other half folded against itself for now). If you’ve booked the paper properly, you should be working with a section no more than 4′ long.
To attach the paper, use a smoothing brush. Work up, down, across, and then diagonally.
Once the paper is on the wall, brush out any air bubbles under the surface by working from one side to the other. “Set the seam first and then brush away from the seam,” Phillips says. Some manufacturers also recommend pressing down the seam edges with a wood roller.
[caption]Paper borders were used to “panelize” walls, a popular treatment in the 1840s, in this historic dining room. (Photo: Greg Premru)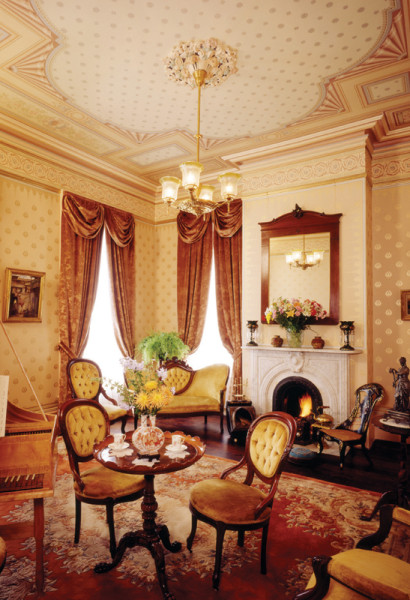
Before You Start
If the sheet is misaligned, the wet paper is forgiving enough that it’s possible to pull the corner all the way back, reposition it, and start smoothing again. Once the top half of the wallpaper sheet is attached, pull down the other half and repeat the same process. To trim any excess, press the wallpaper into the molding or ceiling edge, pull it back gently from the wall, and cut the creased edge with scissors. (It may tear if you use a straightedge.) Once the full drop is installed, wipe adhesive from the surface using a damp sponge or damp towel.
When working around corners, hang the first drop so that there is about ½” extra to wrap around the corner. Hang the next piece so that it slightly overlaps the first. Borders and friezes can be laid directly on top of fill paper, or with a slight overlap.


