

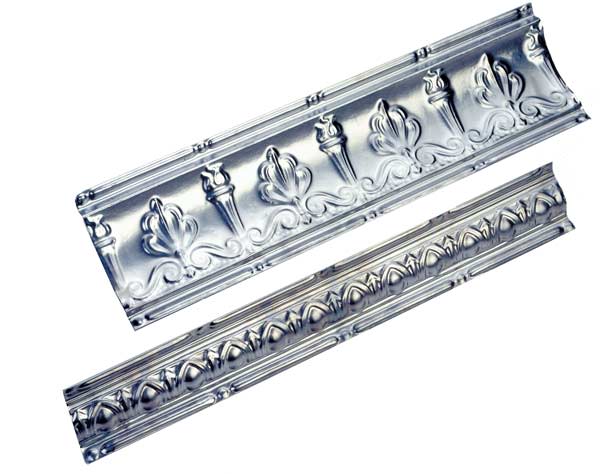
Metal cornices can be 10″ high and project 12″ from the wall, or be modest little strips less than 2″ each way. You can nail narrow cornice to your wall’s top plate; nail deeper cornice to the studs.
Courtesy of AA Abbingdon
Sally Edwards needed to replace some ugly acoustical tiles that hid plumbing in the ceiling of her early 20th-century Virginia farmhouse. Leery of past furnace failures that led to broken pipes, she wanted quick access to them should they freeze again. Drop-in white metal ceiling panels proved an elegant and easy solution.
When Albany, New York, photographer Mike Babcock turned a bedroom in his Queen Anne into a studio, he hoped to at least echo the pressed-metal ceiling that had been installed in his parlor in the 1930s. He did even better, finding the exact match cast from the original die.
History of the Decorative Metal Ceiling
Practical, decorative, and often faithfully reproduced, pressed-metal ceilings are also easy to install. Peaking in popularity right around the turn of the last century, they were available from more than three dozen manufacturers, some offering hundreds of patterns, from about 1880 to 1930. Corrugated iron was used on ceilings as early as 1868. That makes metal ceilings historically appropriate for at least a half century of house styles.
Don’t have a Queen Anne with 12′ ceilings and a double parlor? For a small space like Sally’s farmhouse kitchen, dealers will steer you toward repeats as small as 3″ and cornices as shallow as 1 1/2″. In big rooms you can choose grand designs designated Colonial, Gothic, Oriental, or Empire, or flaunting Deco motifs, often with matching central rosettes and other flourishes.
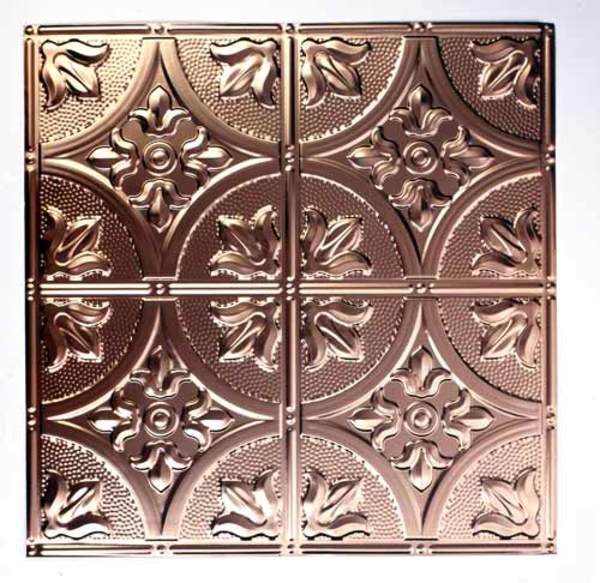
Pressed-metal ceiling panels come in patterns that range from repeats every 3″ to repeats of 12″ or 24″, which require ample room to strut their stuff. (Photo: Courtesy of AA Abbingdon)
Granted, they saw wider use in commercial establishments than in houses. But metal ceilings and even walls “just weren’t all that uncommon,” especially in the Victorian period, says Neal Quitno, vice president of W.F. Norman, which has been operating in the same building in Nevada, Missouri, for more than a century. Despite being off the beaten path, Norman gets a steady stream of people who want nothing more than to testify to the great condition of their 100-year-old ceilings and learn about how they were made, Neal says. Today he estimates that half of Norman’s sales are to residences.
Often called “tin” ceilings, they were never pure tin but steel coated with tin, like a tin can. “Tin was a generic name for sheet metal,” Neal says, “just as the people who worked with it were called tinsmiths.” In addition to bare steel, you can buy pressed metal today finished in copper, brass, chrome, and pre-painted white.
A century ago, people installed pressed metal because it was not only widely available, but also relatively inexpensive. Used on walls—commonly as high dadoes, but also in stairwells and even all the way to the ceiling—it could substitute for wainscoting or wallpaper. Some patterns imitated masonry such as stucco or brick. It’s still highly affordable today, starting at about $3 a square foot for field panels and $3 a running foot for cornices. It’s also fireproof and otherwise virtually indestructible unless your ceiling springs a huge leak.
Pressed-metal ceiling panels can be partnered with decorative cornices for a cohesive metal ceiling.
Andy Olenick
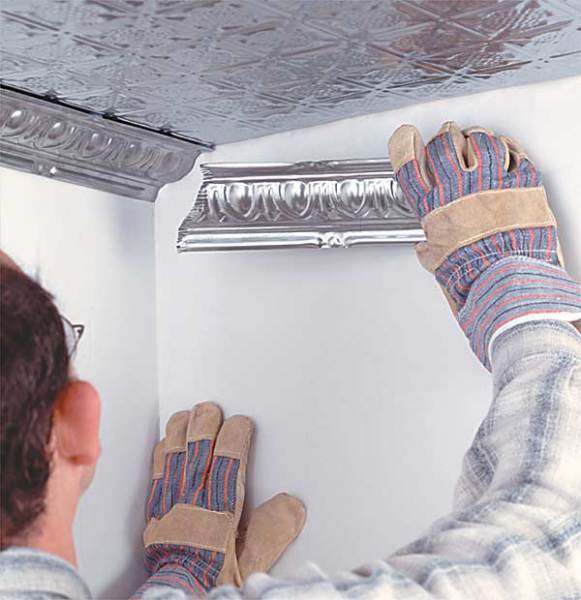
How to Install Pressed Metal Ceilings
The best news for the semiskilled is that pressed metal is a no-brainer to put up. The only tools you need are heavy gloves (edges can be razor sharp), a hammer, tin snips, a tape measure, and string and chalk for a chalk line. You probably want to buy nails with small or cone-shaped heads from the manufacturer to make sure they’re relatively invisible.
Tin ceiling panels won’t hold securely if nailed directly to plaster or wallboard. The time-honored installation method is to lay a grid of furring strips as a base, an approach you’ll need if you choose a design with deep coffering or if your ceiling is markedly uneven. Today many installers choose a substrate of plywood, which needs to be 3/8″ thick over an existing ceiling and 1/2″ thick over bare joists or rafters.
Most suppliers offer “drop in” ceiling panels that you can use if you already have a dropped ceiling or if you’re adding one to camouflage utilities as in Sally’s kitchen. Some of these come with an edge that falls below the metal ceiling grid to hide it; the other option is to paint the grid and tiles the same color.
Despite the almost blinding beauty of unfinished copper or chrome, in the past the panels often came pre-painted in grey, white, or red oxide. You can preserve the original metal glow under clear lacquer or oil-based polyurethane, or be more historically correct and paint the metal with oil-based paint; you’ll need to prime the panels but can do so before you install them. For steamy rooms like kitchens and bathrooms, priming the undersides is recommended.
Some metal ceiling owners accentuate their three-dimensional drama with fancier finish treatments, such as faux finishes or acid washing, or by applying multiple paint colors and wiping off part of the top layers to highlight the embossed designs. If you really get bitten by the decorative metal bug, you can use it to frame mirrors, cover bed headboards, or inset it into kitchen cabinets— “pretty much anything the imagination allows,” Neal says.


