

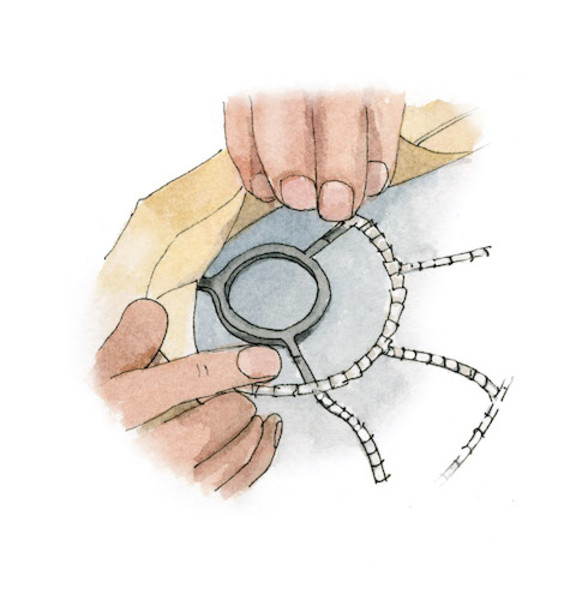
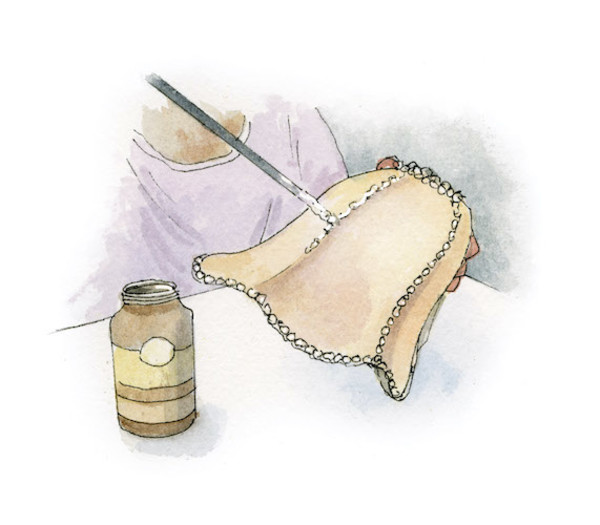
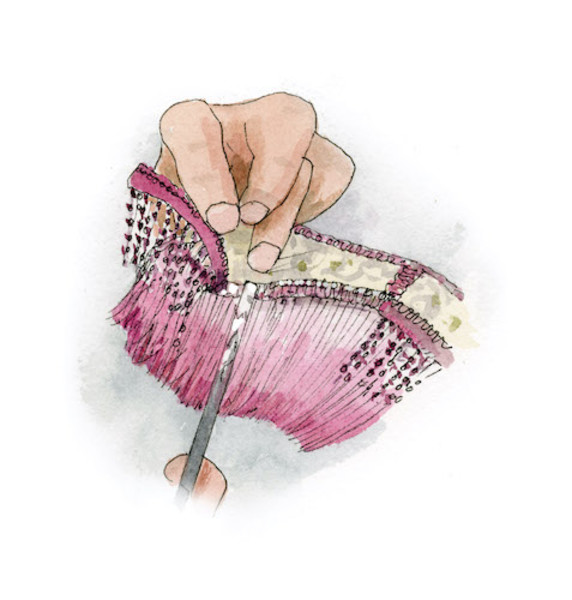
A closeup shows the meticulous details of a lampshade made by the homeowner, for the Ladies’ Parlor. (Photo: William Wright) Step 1. Rob Leanna Spray the wire frame with paint or lacquer. When dry, wrap the wire (except for the ring at top) with seam binding. You’ll need a length 1 times the length of each section to be wrapped. To start, fold the binding over the wire and wrap it (tightly) like a candy cane over the starting edge. Work in sections of the frame, finishing each with a dab of Aleene’s Tacky Glue on the end of the binding, sticking it to itself. Step 2. Rob Leanna Now pin your lining to the wrapped frame. (Silk is traditional but polyester charmeuse won’t rot.) Stretching the fabric, start with one pin at the top and then the bottom, one side and then the other, to anchor. Step 3. Rob Leanna Then pin every inch or so, stretching the fabric tight as a drum. This can be done over several sections at a time; here it’s half the shade. Sew with a simple overhand stitch, and remove pins. Don’t worry about how stitches look, because they will be covered with fabric and trim. Step 4. Rob Leanna To make an easy pattern for the decorative (top) fabric, take a paper towel, and use your fingernails run along the wire to form a creased impression. Cut it out, leaving about an inch of selvage, then cut fabric to match this pattern. Step 5. Rob Leanna Now glue the top fabric to the lined frame with Aleene’s Tacky Glue. It’s easier to apply glue with an old paintbrush or a chopstick, rather than from the bottle. Step 6. Rob Leanna Pull the fabric taut while the glue is still wet, and pin, as you did the lining, so the fabric is tight. When dry, remove pins and cut away the selvage. Step 7. Rob Leanna Leave bottom chain-stitching in place on the fringe and fold it to make it manageable. Dip-dye on the stove in hot dye water. You can use one color, dipping deep then again dipping not as deep and again dipping just the bottom, to create an ombre effect. Or use different colors for each dip, from light to dark. Drape wet fringe to dry. Step 8. Rob Leanna Glue the fringe on, pinned until it’s dry. Embellish with extra beaded fringe, if desired. Finally, cut the trim to outline each section, and glue it on. You’re done—unless you’d like to add even more applique and some tassels. See the inside of the author’s restored Beaux Arts mansion, complete with handmade lampshades.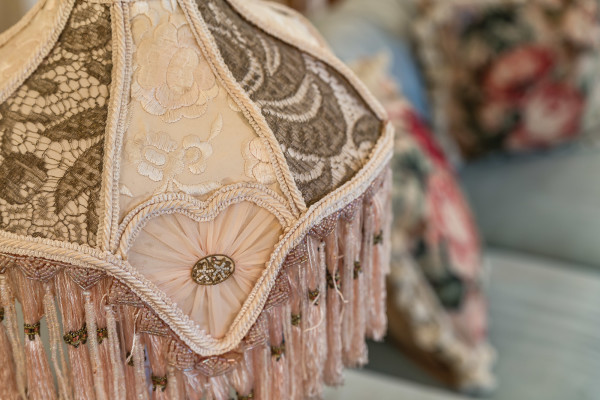

STEP 1
STEP 2
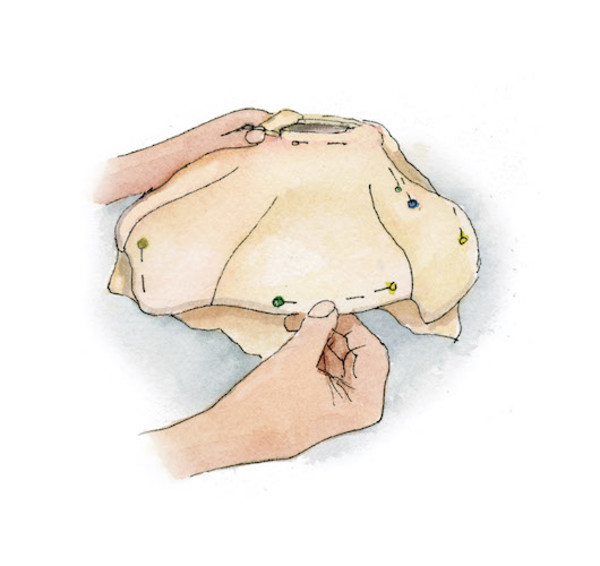
STEP 3
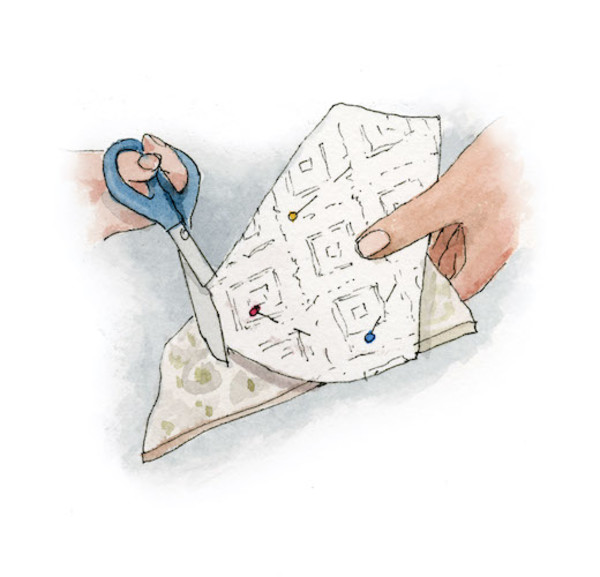
STEP 4
STEP 5
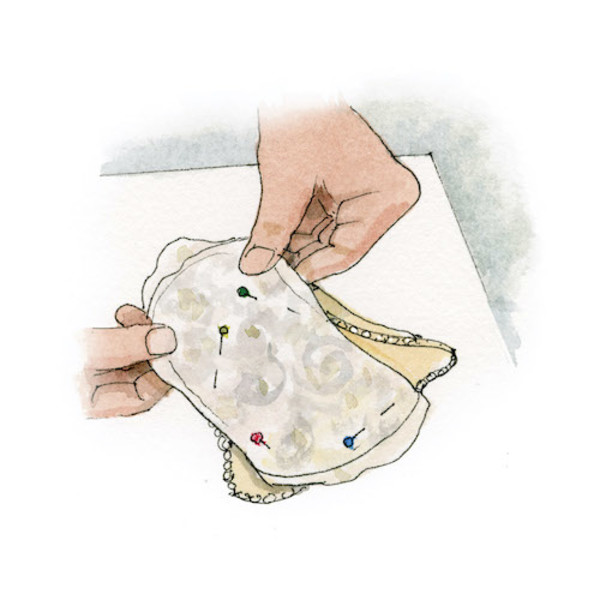
STEP 6
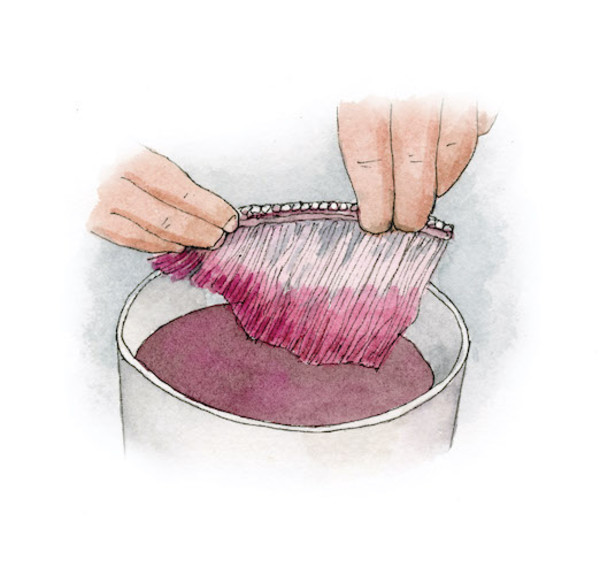
STEP 7
STEP 8
Sew Up a Fabric Lampshade
A fancy shade will dress up a thrift-store lamp.
Tags: lamps OHJ December 2020


