

As beautiful as original wood floors can be, if you’ve ever lived with one in an old-house kitchen or bathroom, you’re aware of the issues that inevitably crop up, from cupping and rot caused by spills or leaking plumbing to burn or chatter marks from cooking and dents from chair legs.
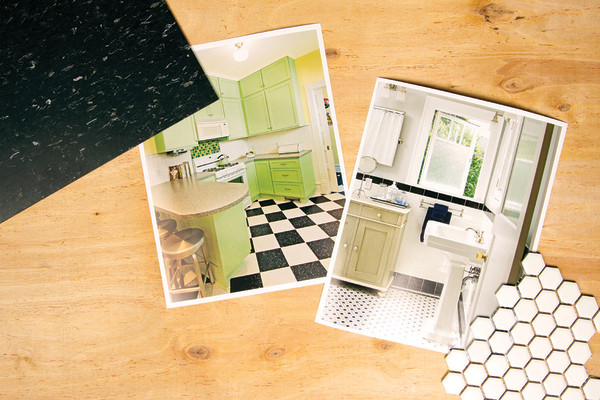
Although flooring choices run from ancient materials like stone to newer products like engineered floors, two of the best options remain: resilient materials including linoleum and cork, and ceramic and mosaic tile. For a variety of reasons, resilients work best in the kitchen, while tile is a natural in the bathroom.
Best bet… Resilient Flooring
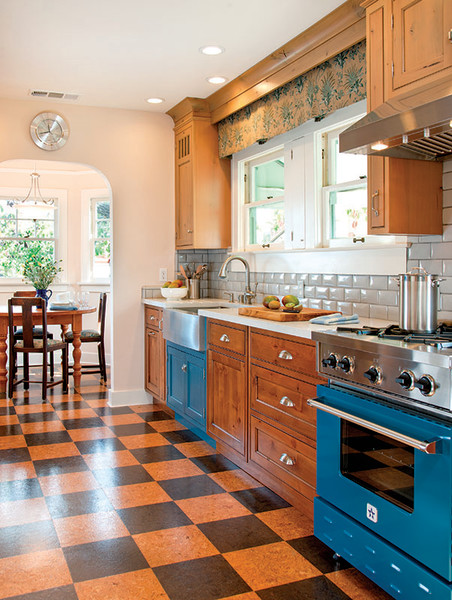
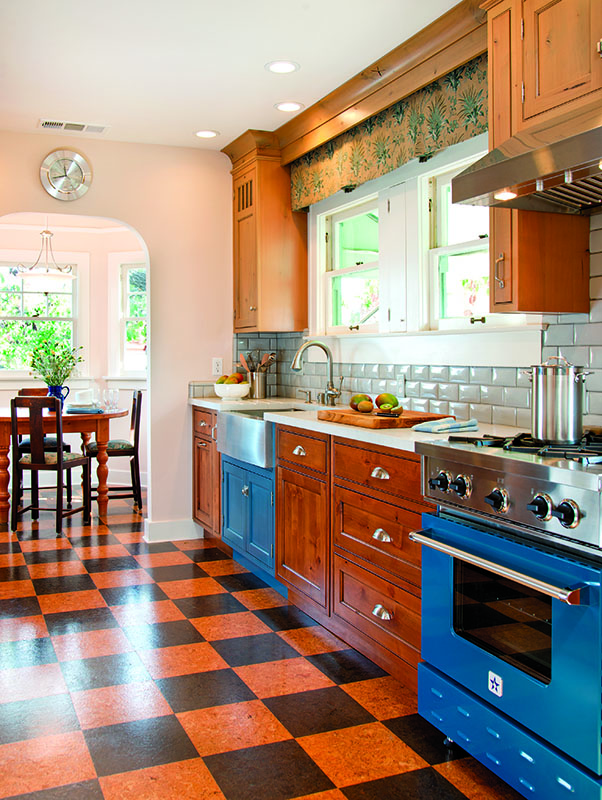
Linoleum, cork, and vinyl composition tile (VCT) are historically correct for kitchens in homes built from the late 19th century to the 1950s. Durable and easy on the feet, resilient floors can last for decades. Since the pattern goes all the way through the material, they also help conceal dirt and damage. Available as tile or sheet goods, all three also offer unlimited scope for patterns, from simple checkerboards to intricate inlays. Each has its quirks: vinyl tile can be much stiffer than linoleum, for instance, and cork needs to acclimate before it can be installed. Also, the seams in resilient flooring are vulnerable to water penetration, which is why they’re a better fit in kitchens than baths.
Pro tip: To protect a linoleum or cork floor, apply a good quality floor wax. The wax helps prevent water from entering the seams and weakening the adhesive. Clean with a vinegar and water solution. Damp-mop only to prevent water from penetrating into the seams. Since floor wax yellows over time, use a wax stripper occasionally and recoat with new wax.
How to in the Kitchen
Prep the Surface
Installing new vinyl, cork, or linoleum flooring in an old house usually means laying it over an existing floor. If that’s the case, don’t rip out the old floor if there’s any chance that it contains asbestos. Instead, lay down new 3⁄8″ smooth-face plywood before tackling the tiles or sheet goods (remove the kickboards from lower cabinets and scribe shallow cuts as necessary around door frames). Use a professional floor filler, such as Dependable, to fill and smooth out joints in the plywood before installing the new floor. If there’s not at least ½” of clearance between the existing floor and the bottom of your cabinets, you may be a candidate for a floating floor (see “It Floats!”).
Plan the Layout
Once the subfloor is smooth, level, and dry, you’re ready to plan the layout. If you envision a more ambitious floor—using tile in historically correct 9″ x 9″ squares or with an inlay design, for instance—you may want to opt for sheet goods to minimize waste.
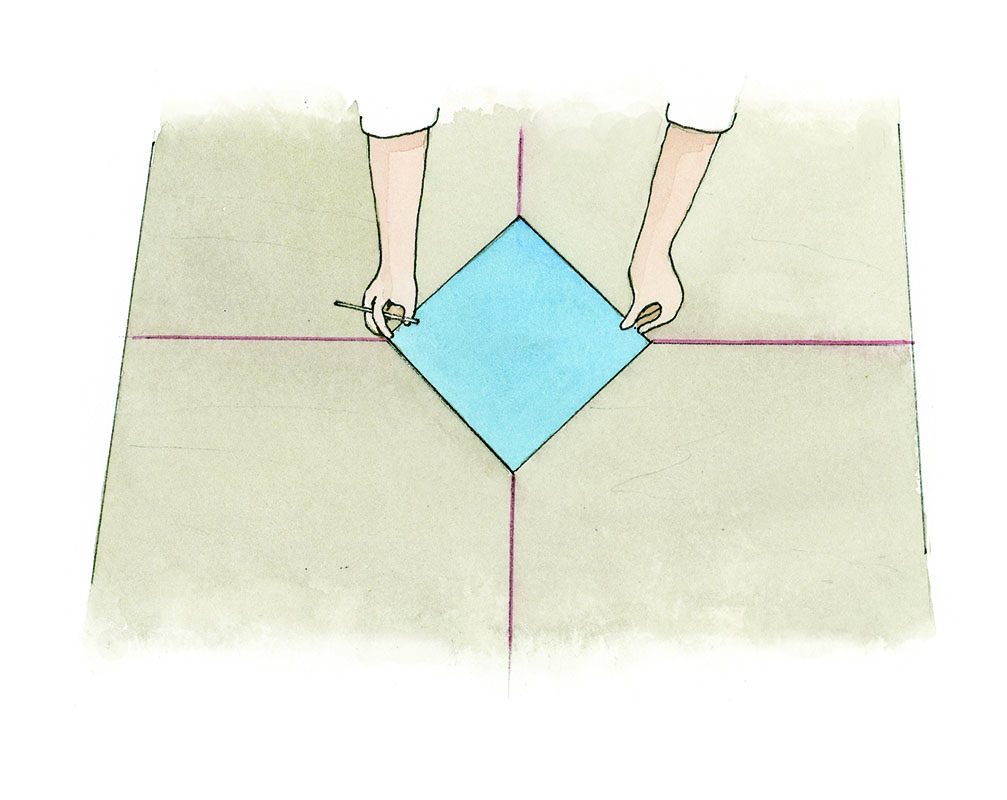
While there are many historic patterns to consider, one of the most classic is a diagonal pattern of contrasting colors. Begin by calculating a center point for the pattern in the room. Usually, this will be where the eye falls as you enter. (It’s also essential if you are planning a more elaborate design that includes a centerpiece or border.) Since the tiles will be turned on the diagonal, you want large or complete tiles to edge the most visible entrance into the kitchen. Then make an accurate template of the pattern on graph paper, taking care to include any odd bump–outs or –ins. Allow about 15 percent overage for a diagonal pattern.
Once you’ve decided on your focal point, snap a chalk line down the center of the subfloor near that starting point. You’ll use it to gauge whether the tiles are placed in alignment. It’s also helpful to snap a second chalk line that crosses the first at right angles. This is where you’ll lay your first tile. If you’ve never laid a tile floor before, try out the pattern with unglued tiles laid over about a quarter or so of the floor. It will help you plan how to lay the tiles most efficiently, and estimate where cuts will be needed.
Lay the Tile
Using your chalk lines for reference, line up the first or starter tile. Then lay down just enough adhesive to accommodate four tiles. If you’ve chosen variegated tiles in contrasting colors, lay them so that the pattern in the lighter tiles are at right angles to the pattern in the darker tiles. This is called quarter-turning.
Once the first tile is in place, align the next tile tight to the edges of the first and press down. Compression-fit the tiles to stay in alignment as necessary. After you’ve got a four-tile section down, stand up and give them a once-over before the adhesive is fully set. Make sure they butt up against each other in the correct pattern and line up with the main chalk line. If there’s any adhesive on the tile surface, wipe it off with a damp rag.
Use a rubber mallet to pound them into place. To remove a tile that’s going in the wrong direction after it’s set, insert a stiff putty knife under the tile and work it loose. Once you’ve applied adhesive to an area work quickly or it will begin to set up. As you lay tile, use the chalk lines and/or straight edge to make sure you are keeping the pattern in line.
Fill in the Edges
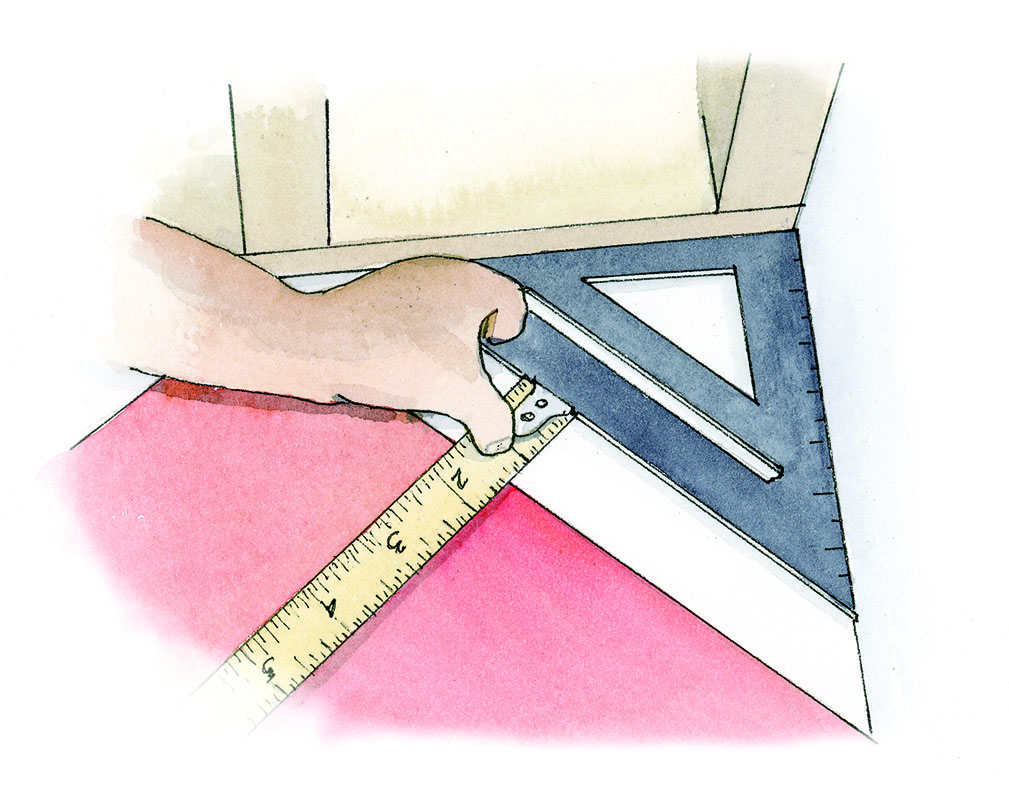
If you’ve chosen a diagonal layout, some tiles will come to a point against the wall, leaving triangle-shaped gaps of less than half a tile. To determine the size of the cut, slide a piece of paper into the corner over tiles you’ve already installed. Lay an architectural triangle or framing square over the paper and use it to mark at least three points where the ruler overlaps the installed tile underneath. Transfer the marks to a fresh tile (making sure the tile is facing in the proper direction). Make your cut very carefully along the line with a utility knife, then install and tap down as you would any other tile. Once the flooring is in, avoid walking on it for at least 24 hours.
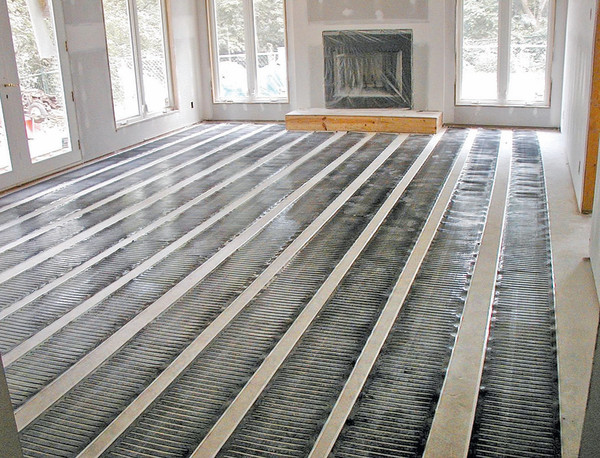
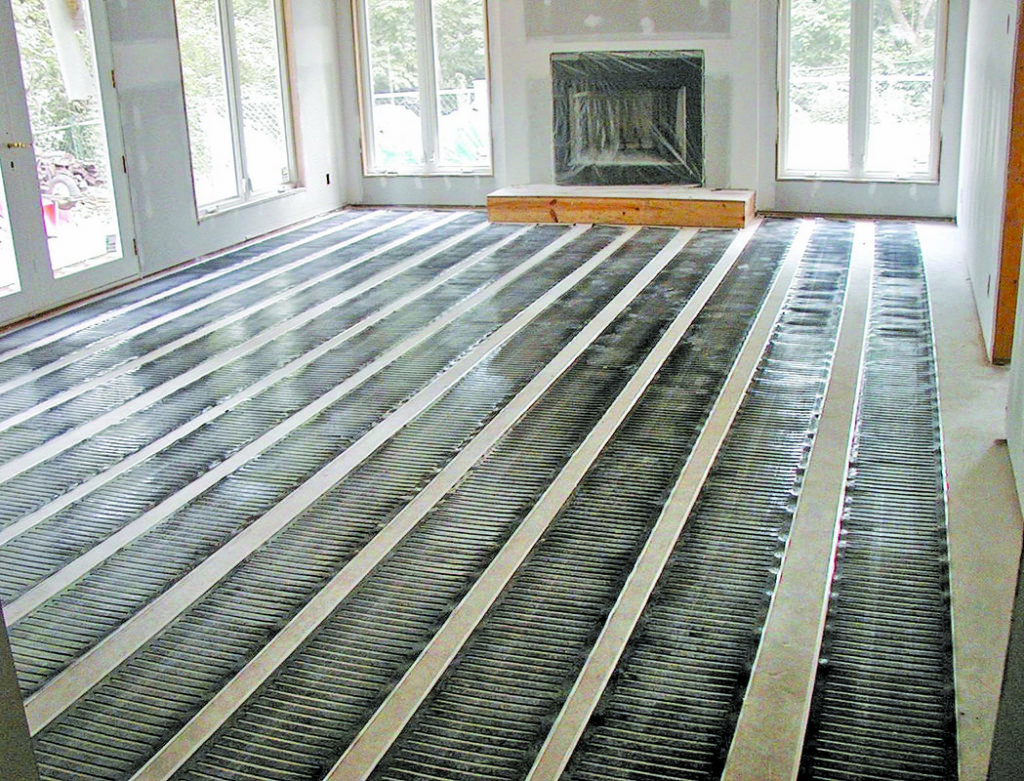
Radiant Heat: Almost Anywhere
For much of its history, under-floor radiant heating has been difficult to install and problematic as it ages.
No longer. There are now membrane-thin electric radiant heating elements that can slip underneath almost any floor. Some are even geared to retrofits, tacking up beneath existing floors with room to spare for insulation.
That said, there are some caveats about installing a real wood floor over an in-floor radiant system, or retrofitting underneath a wood floor. Most have to do with moisture and the specific characteristics of the wood itself.
That’s because radiant systems transmit warmth directly through the flooring material, usually at temperatures of 80 degrees or higher. Natural wood planks or strips can absorb and retain moisture, causing them to expand and contract when they’re heated. The dry heat from a radiant system can cause the floor to dry out quickly, leading to cupping, cracks between joints, and ultimately, surface damage.
Not all species and cuts of wood will adapt well to a radiant retrofit. Most vulnerable are soft woods like pine and hickory, especially if they’re flat-sawn. If you’re installing new flooring over radiant, opt for strip flooring rather than plank, and allow plenty of time for the wood to acclimate to the setting. Installing wood flooring with a high percentage of residual moisture over radiant heat can lead to early failure. For best results, look for a radiant product that puts out heat at a low, gentle setting, such as a low-voltage membrane.
It Floats!
Floating floors are actually named for the installment method—in which materials like resilient cork planks, vinyl tiles, or engineered wood strips snap or lock together—rather than a specific material. A floating floor gains its rigidity from the interlocking of the component pieces, which do not need to be bonded or glued to the substrate. That means that a floating floor can go down over just about any surface. They also work well over radiant heat. Many floating floors require a thin underlayment pad to prevent moisture transfer from the subfloor to the new flooring.


