

Twenty years ago, Nancy Heckler was renovating an old farmhouse. She had trouble finding suitable table lamps: most were boring—not stylish, well-made, or period-sensitive. So she began making her own, often reconstructing old lamps. She collected lampshades and eventually amassed thousands of parts, from finials to bases. Friends asked her to make them lamps and a business was born—not a repair shop, she notes, but a studio offering one-of-a-kind art lamps. It’s called Luminola Custom Vintage Lighting: facebook.com/luminolalightingdesign/
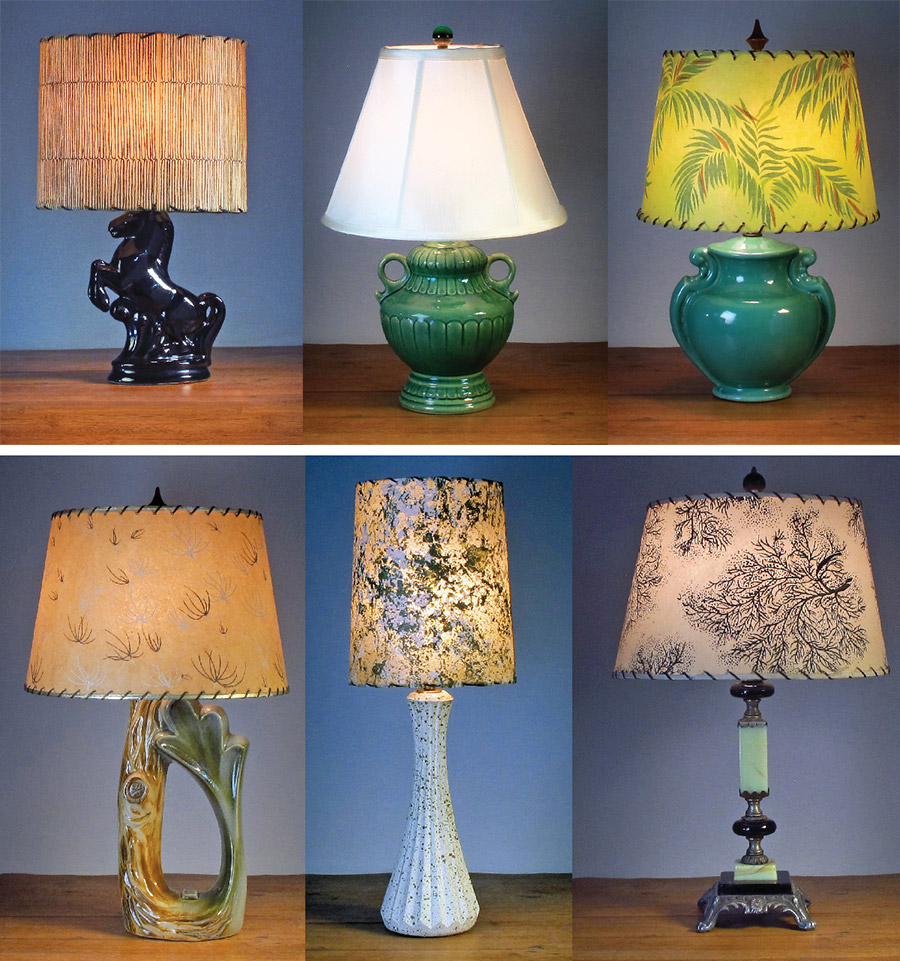
Heckler finds old, often broken lamps everywhere—at flea markets and antiques malls, at garage and estate sales. She won’t hesitate to buy beat-up old lamp if she can salvage one special part, whether it’s the prancing-horse base of a TV lamp, a Bakelite finial, or a period lampshade. She methodically takes each lamp apart, keeping components that will be useful, and organizes them by color, composition, and use.
Design begins with a tall, 3/8″-diameter wooden dowel that has been mounted vertically to a square base as a mockup tool. Heckler stacks and restacks items around the focal point on the stem, be that a jadite vase or a glass bauble. She then takes the model apart and restacks pieces onto 3/8″ OD table lamp pipe (1/8 IP-27 metal lamp pipe), which is securely attached from the lamp’s base to the top socket shell assembly. A harp is added to support the shade. Standard 18-gauge lamp wire (SPT-1) is run from the bottom through the pipe and attached to the socket. A final test run with a lightbulb ensures everything is working properly. Heckler finishes by selecting just the right shade, which might be fiberglass, parchment, paper, mica, or old glass.
She works with color, texture, and form to complement and balance the base, creating a new old lamp.
Rewiring Old Lamps: 7 Easy Steps
Rewiring an old lamp is straightforward; the simplest way is to buy a rewiring kit at the hardware store. It’ll contain
an 8′ minimum cord length lamp wire, a plug on the end of the wire, a harp, and a 660 watt/250 volt socket.
- Unplug the lamp and take off the shade and harp.
- Loosen the socket, unscrewing the side screw and turning it counterclockwise but leaving it in place.
- Cut off the electric cord at the bottom with the wire stripper, leaving about two inches, and pull out the socket.
- With a flathead screwdriver, pop open the outer socket shell and remove it from the socket to expose the inner socket.
- Push the new wire up through the metal stem, leaving six inches at the bottom, securing it with an underwriter’s knot.
- Strip the ends of the new wire and attach them to the terminals on the new socket with the screws: the silver screw is for the neutral (ribbed) wire, the brass screw is for the hot (smooth or copper-color) wire.
- Reassemble the socket shell around the socket and screw it into the stem, then pull the excess cord down
through the bottom.
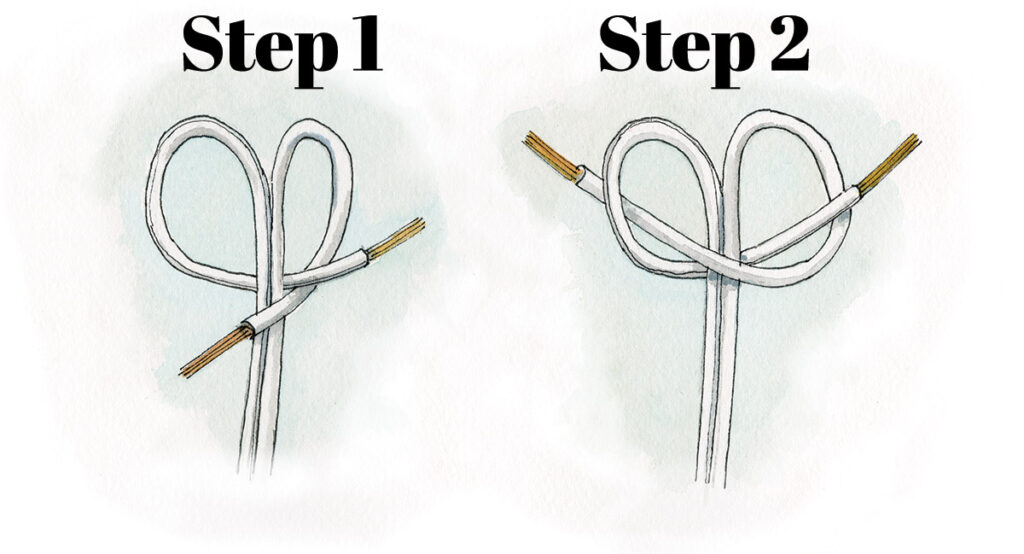
How to Tie an Underwriter’s Knot
This knot is used to reduce strain on the terminal screws and keeps the wires from breaking free of the socket.
Step One: Form a loop with one wire so that it passes behind the cord. With the second wire, form another loop that passes across the cord.
Step Two: Feed the end of the first loop through the second loop. Do the same with the end of the second loop through the first one. Pull both ends to tighten the knot.


