

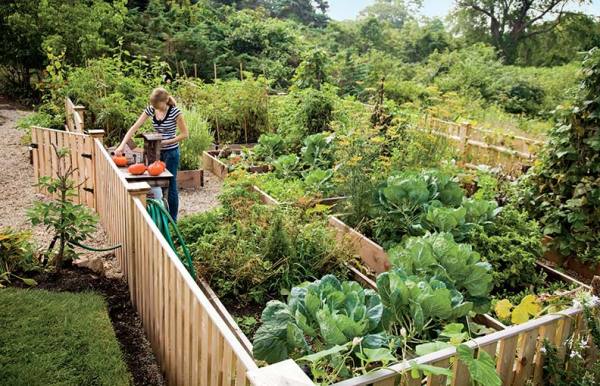
When creating a raised-bed garden, enclosing the space with fencing keeps deer at bay.
I have quite an extensive vegetable garden. It’s laid out in the traditional fashion, essentially a 70′ x 70′ square, fenced, with a wide brick path down the principal axis and another mulch path that intersects at the center. The soil is deep and rich, but there’s a problem. The area is low, and depending on the weather, often has standing water well into the late spring. One disastrous year, after eight inches of rain fell in two hours one June day, half the plot was under four inches of water for weeks.
Needless to say, after such a long submergence, the crops failed, and the garden was pretty much of a write-off. Lesson learned. So for next year, I’m contemplating a change in design, and the change I’m contemplating is creating a series of raised beds.
Growing vegetables in raised beds is a good idea for many reasons. Avoiding drainage problems like mine is one. Another is bypassing exceeding rocky or clay soil, or soil that has been contaminated in any way, such as by lead paint—a common problem in older urban areas. A third benefit is the depth of fertile soil the beds provide: if you want to grow long, thick, perfectly formed root crops like carrots, parsnips, or beets, you really need a foot or more of rich, rockless soil. A fourth: Raised beds warm faster in the spring, allowing for a longer growing season. Finally, for me, the principal advantage to raised beds is ease of use: Gardening is far more fun when you aren’t grubbing out weeds on your hands and knees.
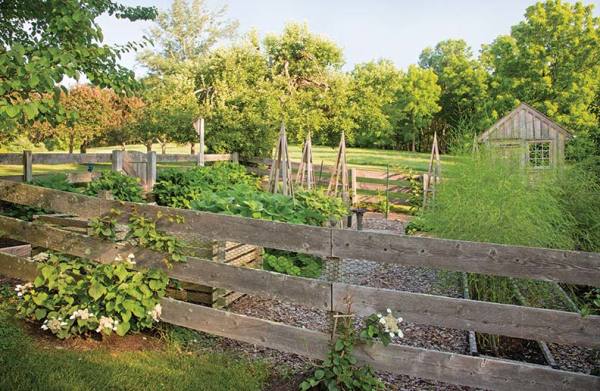
Your vegetable garden needs to be placed in an area that will receive full sun for eight hours.
Which leads us to the discussion of exactly how high raised beds should be. If I were going to pick an ideal height, it would be 24″ to 36″. In fact, the taller the better within that range. Why? No bending down! Harvesting, seeding, and even that bane of the gardener, weeding, become so much easier when you are sitting comfortably on a folding stool, slowly working your way down the row. (Another advantage is pest control.) In terms of width, 36″ to 48″ is the norm, again to allow you to comfortably reach the center of the bed from either side.
Bed construction techniques vary widely. Years ago—45 years ago now, when I first began vegetable gardening as a little boy—railroad ties were the choice of most gardeners. Then it was discovered that creosote, the wood preservative, was highly carcinogenic. I ate many a radish or tomato grown this way, and fortunately I’m still here to tell the tale, but needless to say, such timbers almost immediately disappeared from the market. Then, along came pressure-treated wood, which after a decade or so, suffered a similar fate: deemed unsuitable for food production. So lately, the trend has been to build the beds out of naturally rot-resistant woods like cedar (very expensive); or to use durable materials such as concrete block, stone, or brick (even more expensive); or to use other types of wood, and just acknowledge that the boards will rot in five to seven years and need to be replaced.
Personally, I’m considering using the latest generation of pressure-treated wood that is reported to be considerably less toxic, then lining the walls with UV-stabilized plastic to prevent any contact between garden soil and wood. Conversely, I may use some of the new plastic lumber products that have recently become widely available. This last is a pricey option, but avoids both the issues of rot and soil contamination.

Growing flowers next to vegetables will add interest to beds.
The real problem for most homeowners isn’t deciding on materials, but rather figuring out where to place and how to fill these beds. The first is easy: You need full sun, and that means nothing less than eight hours of uninterrupted sun per day, with no morning or afternoon shade. If you try to cheat this requirement, your experiment will be a failure, as vegetables won’t produce a bountiful harvest without the benefit of a long growing day. The second problem is trickier. Raised beds require an astounding amount of soil: to fill a single 24″ tall x 36″ wide x 6″ long bed, you would need 36 cubic feet of soil, the equivalent of 18 large bags of potting soil.
But here’s why planning for next year’s garden now is such a good idea. Build the bed walls this fall, and then collect every scrap of grass clippings, garden waste, compost, and every single leaf from your yard and dump everything into your newly constructed beds. Then, go to your neighbors and see if they want to donate some of their leaves to your project. Fill the beds to overflowing. Now granted, come springtime, this material will have condensed considerably (about two-thirds, in fact), but if your subsoil is decent enough, you can hand dig the beds (or use a mini-rototiller), mixing the soil and the new compost together, and plant directly in that. You won’t have filled your beds to the top for the first year, but it doesn’t really matter. If you repeat this process in subsequent seasons, you’ll have your beds filled with almost perfect growing matter in no time.
If you choose not to utilize the base soil, then you will still have to add imported soil in the spring, purchased either in bulk or by the bag, depending on the quantity required. One word of caution: If buying loam, avoid the “screened loam” often sold by many suppliers. Instead, opt for a loam/compost mix, which produces a much more satisfactory growing medium for vegetables.


