

Corroded patches may be worrisome, showing up on your old “tin ceiling” . . . or its embossed detail might be obscured by too many layers of paint. Maybe you just discovered an old one, too pretty to remove, beneath a dropped ceiling—but it’s seen better days. Take heart, as most cleaning and repair tasks are low-tech and do-it-yourself. Here’s a step-by-step guide to repairing and restoring metal ceilings.
Step 1: PREP + DE-RUST
A revival that started in the 1990s saw metal ceilings embracing their industrial essence—finished not with paint, but with a clear coating that allowed the steel, aluminum, or brass to shine. Historically, though, tin ceilings were painted so that the ornament might mimic decorative plasterwork. Sealing the surface as well as seams, paint also affords protection against rust.
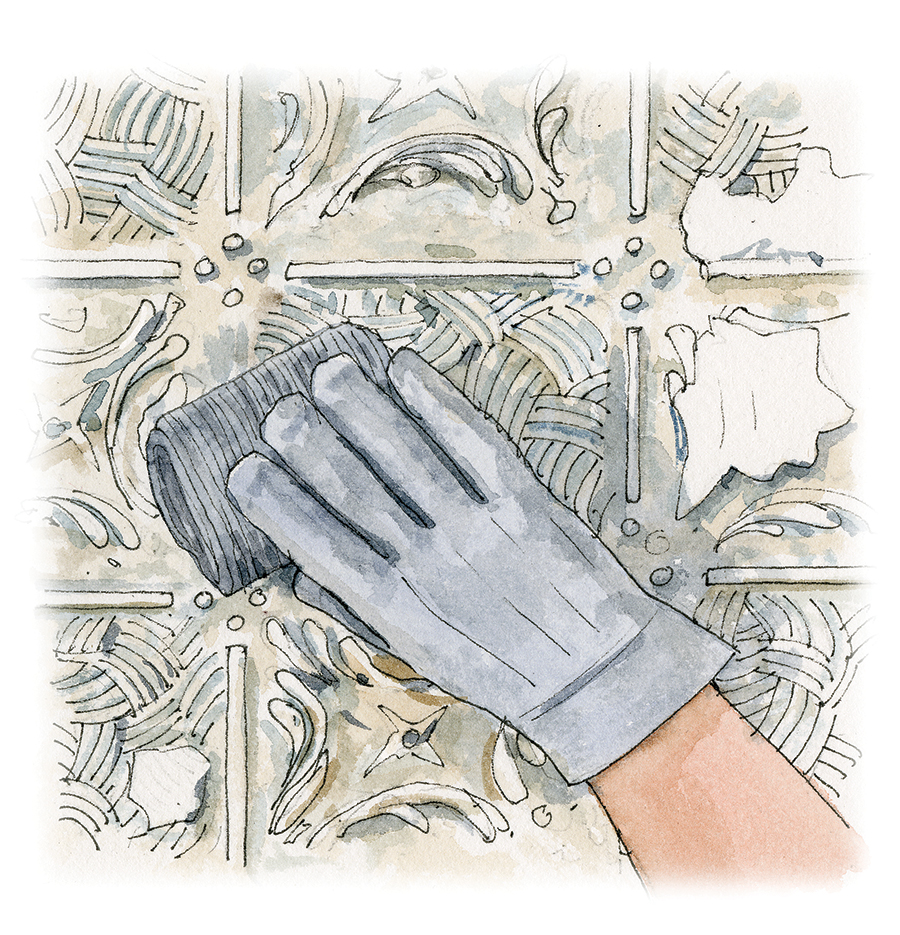
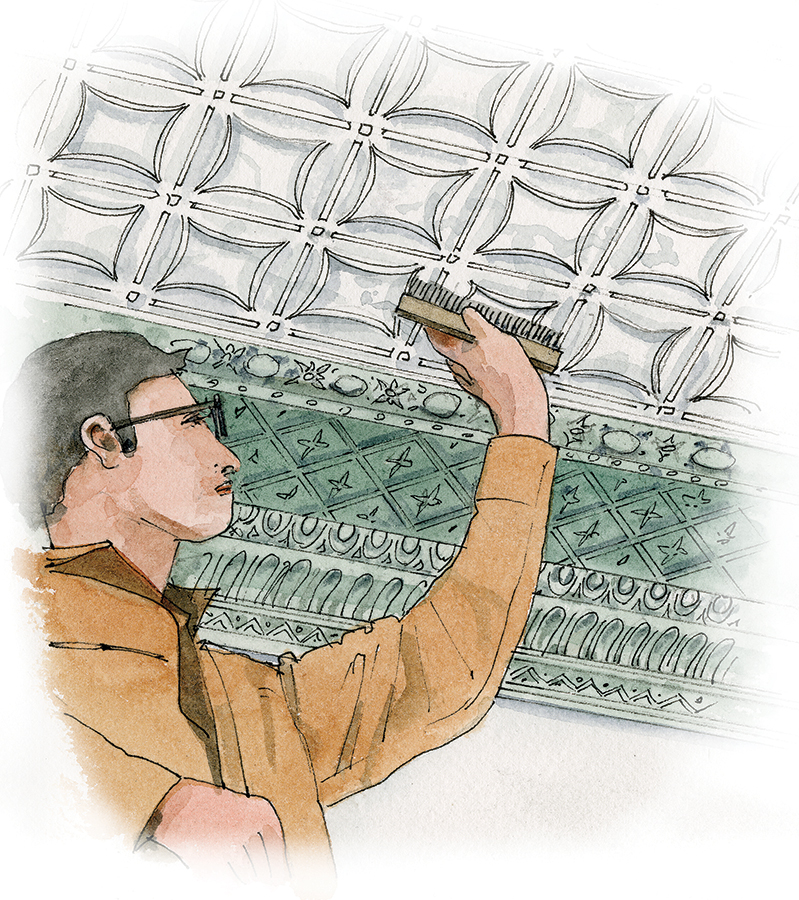
To remove a buildup of excess paint, try going over the surface with a wire brush. The metal is not particularly thick, so remove only loose material. Use a 1″ wire brush of medium stiffness, using just enough muscle to dislodge loose paint without gouging. You can try a medium-bristle rotary brush in a power drill, hand brushing in the corners.
Paint applied before 1971 probably contains lead, so take all precautions.
Another method is to use a wire loop, great for removing paint that isn’t well bonded to the steel. Make a loop at the end of length of flexible, 16-gauge construction wire, fastened at the bottom. This “bat” should be about the length of a flyswatter. Working in 2′ square sections, bat the ceiling with the tool, and loose paint should come down.
To remove rust, rub with medium steel wool or aluminum-oxide sandpaper.
Step 2: REPAIR + FILL
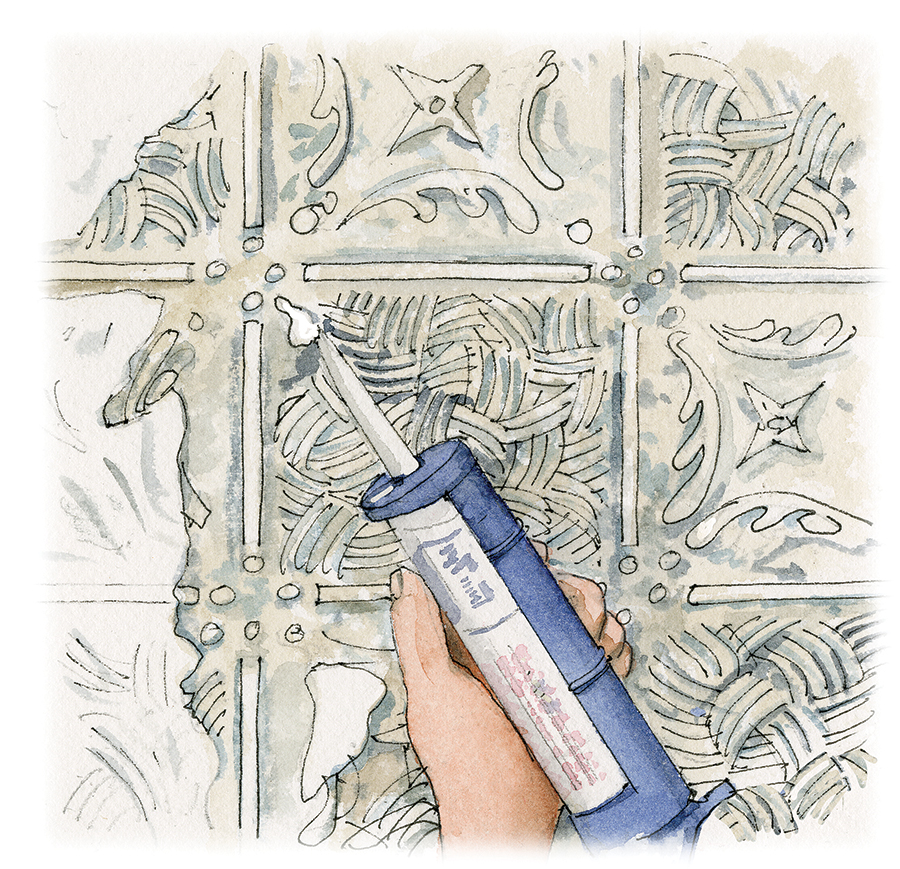
Fill separated seams and holes smaller than a dime with paintable acrylic-latex caulk that contains silicone. For larger holes, try repairing the damaged area with polyester auto-body filler, readily available at auto-supply and hardware stores. It’s a two-part material (but not an epoxy); after it has been mixed and applied, it will begin to set up. While it’s in the soft, rubbery state, you can shave and carve it with a “cheese-grater” blade, following the lines of ornament. When it has fully hardened, sand it smooth. Read the manufacturer’s directions and experiment with the filler before attempting any large or very visible repairs. (It’s possible to mold a small replacement section, using filler along with a mold-making kit from a hobby store, but you’ll need to experiment with techniques to cast and then attach the patch.)
Metal patching is another option. Use a piece of salvaged sheet metal or, in patterned areas, a scrap of ceiling. Make the patch about 2″ larger than the hole; fold the edges under ½” and cut corners off at an angle with tin snips. Affix the patch in place and attach with pop rivets.
Is the damage extensive? Many of the original patterns are still being made and sections may be ordered. (See our resources below)
Step 3: CLEAN + PRIME
Go over the ceiling with a brush attachment on the vacuum cleaner, to remove any steel wool fibers. Then wipe the whole thing down with mineral spirits. Never use water. Brand-new metal ceiling may be ordered in non-rusting copper or brass, or with a factory-applied finish. But an old ceiling will demand a painted finish. If you have exposed any bare metal, seal the whole thing by applying an oil-based, metal-compatible primer coat.
Step 4: Finish Options
Apply two coats of a compatible finish paint, applying the paint thinly to avoid buildup in the recesses. Don’t use water-based paint. Don’t paint in high humidity. A ¾” roller should have sufficient nap for a ceiling with ½” relief.
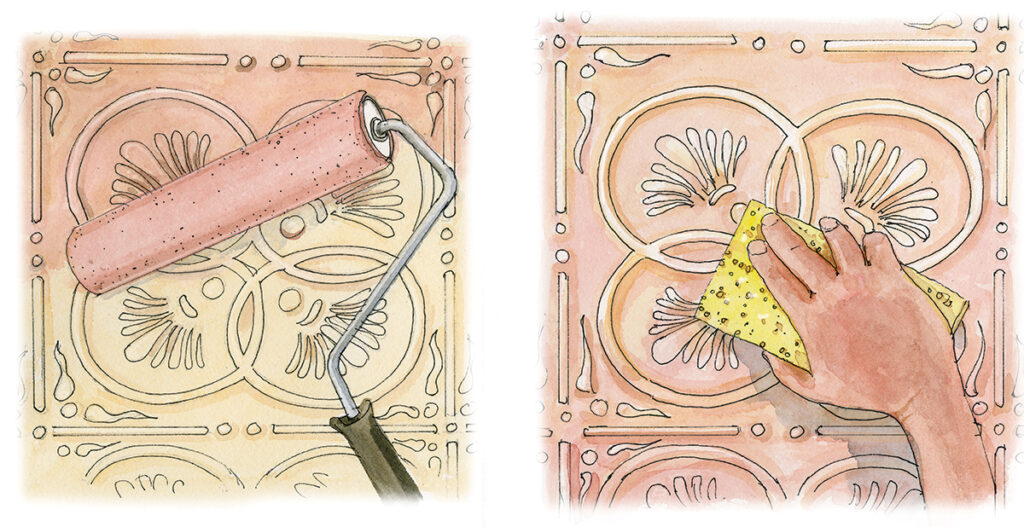
You might consider a decorative treatment. Polychromy uses different hues to bring out the overall design in a ceiling with a field section, borders, enrichment (filler), and the crown or cornice moulding. You can “pick out” certain ornamental bits, change color or tint section to section, or use glazes.
An easy way to show off the embossed relief is simply wiping to expose a color laid underneath, which then becomes highlights. Complementary colors will create a lively scheme. Using a tint and shade of the same or similar hue often works best.
As your first finish coat, apply, over the whole area, what will be the highlight color. Allow it to dry thoroughly. Apply your second color over it, working the paint well into the deeper impressions. Now, using a pliable sponge or soft cloth, quickly wipe the wet paint off the raised areas you want to highlight.
Stripping Old Metal Ceilings
Sometimes the overpainting on an old ceiling is so thick, it has obliterated the details, is failing over large sections, or is covering rust that needs to be removed. In such cases, you might want to consider stripping the paint. This is a terrible job: the surface is overhead, making work dangerous and fatiguing, and the embossed surface is hard to scrape. Assume you won’t get all the paint off; it’s okay, no one inspects the ceiling too closely.
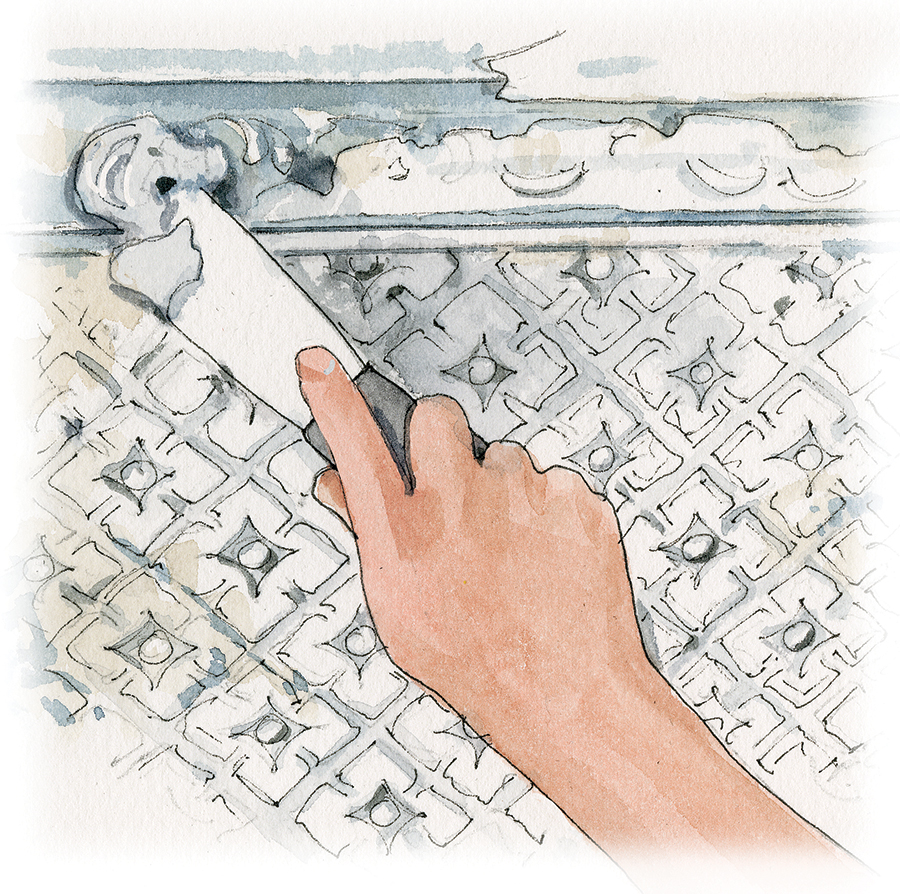
Start by mechanically removing whatever paint you can: with a putty knife, scrapers, wire brushes, and steel wool. Stubborn spots that remain should be attacked with a chemical stripping agent. (A heat gun is not a good choice, as the metal ceiling absorbs heat, keeping the paint from melting.) Buy a semi-paste stripper thickened to stay on an inverted surface; you can thicken it even more by adding a bit of cornstarch.
Be sure to ventilate the room and wear a safety mask. A low scaffold—say, a plank laid over two saw horses,
with a guard rail attached at chest height—will be safer and less tiring than using a ladder.
Rinse with mineral spirits and immediately apply an alkyd or oil primer recommended for use on metal.
Read More:
Resources
Browse Old House Journal’s Directory of Metal & Tin Ceiling Suppliers
Chelsea Decorative Metal Co.
thetinman.com
Pattern sizes up to 24”; tin-plated steel & copper; unusual finishes such as silver, copper, faux
W.F. Norman
wfnorman.com
Since 1898, mfrs. of Hi-Art sheet-metal products; 140 ceiling patterns, in zinc, copper, or brass—Victorian & Colonial Revival to Art Deco; custom
American Tin Ceilings
americantinceilings.com
Many patterns; colors/metallics
Classic Ceilings
classicceilings.com
National distributor of Shanker products, Calif. showroom
M-Boss Inc.
mbossinc.com
Ceilings, backsplashes in tin, aluminum, stainless steel, brass, copper
Metal Ceiling Express
metalceilingexpress.com
Ceilings in 40 patterns, 100 colors
Shanker Industries
shanko.com
Mfr. since 1896 of patterns from original dies, in unfinished steel; brass-, chrome- or copper-plated; lacquered or powder-coated


