

Though the first few coats of oil-based paint sometimes penetrate a calcimine ceiling and hang on for several years, water-based latex paint can begin to bubble and peel away almost immediately.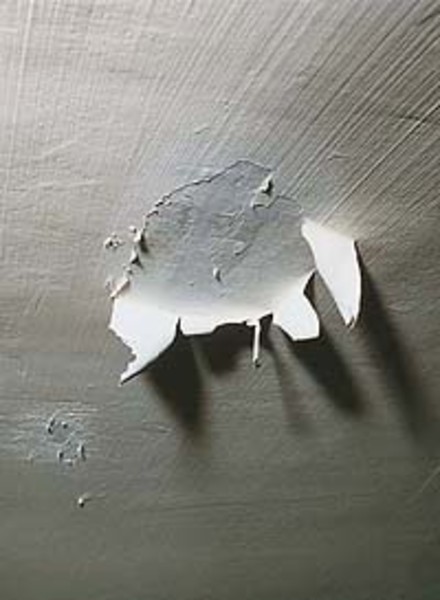
If patches of peeling paint hang from your ceiling, or paint chips litter your floors, your old house’s past probably includes calcimine paint. Since calcimine is essentially a water-based mixture of chalk and glue binder, in time any modern paint applied over a calcimine base will fail. There are no easy or quick-fix solutions to dealing with calcimine coatings.
For any new paint to adhere in a smooth and long-lasting surface, you must remove as much of the calcimine as possible. Simply repainting the surface will not, unfortunately, make your problems go away. Here we’ll describe the three procedures we prefer when dealing with determined-to-peel calcimine surfaces.
Calcimine paint is a problem for old-house owners because it does not offer a durable base for modern paint coverings. Calcimine is a very soft coating and any movement by today’s stronger paint products will cause them to pull away. Environmental and climatic changes (temperature shifts, unheated rooms during winter, moisture and humidity) also significantly accelerate the delamination. The consequences are lots of peeling paint.
Identify What You’ve Got
The first process is to identify for sure that you are dealing with a calcimine problem and assess the kinds of paints that might be coated over it. Because it is predominantly chalk, you can easily detect calcimine by rubbing a damp finger (sure, spit works) or a sponge on the surface and looking for a chalky residue. If you have calcimine, it will feel just as if you wet your finger and rubbed a dirty chalkboard. To identify the subsequent types of paint, first choose a cloth or rag that is a distinctly different color from your surface so you can plainly see the results of your test. Next, dampen the cloth in rubbing alcohol and rub a peeling spot. Oil-based paint will not be affected by the alcohol, but water-based latex paints will dissolve to some degree, getting sticky and rubbery like an eraser. Sometimes there will be coats of oil paint followed by coats of latex. With this scenario you will see chips with a crackled base (the dry oil paint) and a stretchy, more intact top layer of paint. The rubbing alcohol experiment will remove the top layers of latex paint, then stop when it reaches the oil layer.
Consider Complete Removal
If you really want to get rid of the calcimine problem, you need to scrape off all the paint and scrub away as much of the calcimine as possible. This is a time-consuming process that requires significant amounts of elbow grease, lots of water and detergent, and patience. It is also very messy and wet, so be sure to adequately protect floors, woodwork, furniture, and fixtures in the removal area.
Carbide scrapers are handy for removing stubborn paint and even the calcimine itself.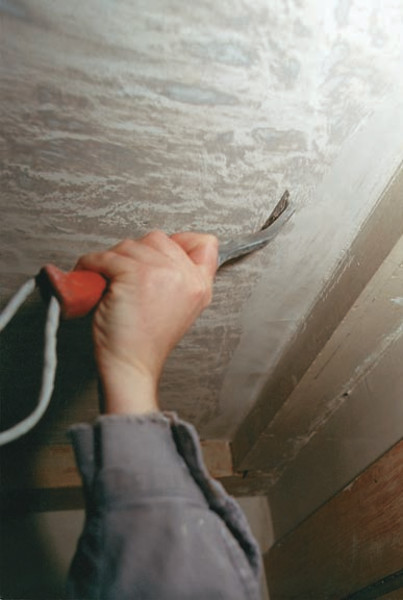
You might want to begin in a test area—perhaps a corner or less visible section of your room. This will help you develop a feel for the difference between paint, calcimine, and plaster and perfect a technique that does minimal damage to the plaster.
Step 1: Begin by scraping all visibly loose paint using a sharp putty knife or razor knife. If the ceiling is really peeling readily, start with a 6 joint compound knife. Once you get down to more stubborn paint and the calcimine, switch to a smaller 2” knife. (We prefer carbide scrapers at this stage.) Maintain control to minimize plaster damage, but remember that some is inevitable. You can repair blemishes once the calcimine is removed. As you scrape down to the calcimine level you will notice the tool generating more dust. This is the chalk coming off. Then you will begin to see the plaster beneath, and the scraper will stop generating the chalky dust. The surface will feel different, and you can see the white lime coat or the sandy look of the plaster.
Step 2: Once you feel you have scraped off as much paint as you can, begin scrubbing and washing. The water will soften the glue and encourage the calcimine to lift from the surface. Wash all surfaces with a detergent or hard surface cleaner (Spic ‘n’ Span, dishwashing liquid, TSP) using a scrubbing pad. Really scrub at the surfaces, and use a cleaner that will generate as many suds as possible. You want to generate a foamy-froth that suspends the water. It keeps the surface wet longer and helps the calcimine to let go.
Step 3: While the surface is still foamy, use a squeegee tool or large sponge to remove the foam and water. Repeat the scrubbing, sudsing, squeegee process several times, using clean water and fresh detergent each time. Usually two to four wash/scrub cycles are necessary.
Step 4: Once you feel you have all the calcimine removed, rinse all surfaces using clean water. Follow up with one final clean-water rinse, then let the surface dry completely for a few days. Test the success of your calcimine removal by firmly rubbing a dark cloth or your finger across the surface in a few different places. If chalk appears, you still have more scrubbing to do! Our goal is to remove all of the old paint and calcimine, and realistically end up somewhere around 80-percent calcimine-free. Then we rely on oil-based calcimine coating paint or oil primer to make up the difference.
Ample suds, and plenty of vigorous scrubbing, are the only secrets for loosening the glue in old calcimine paint.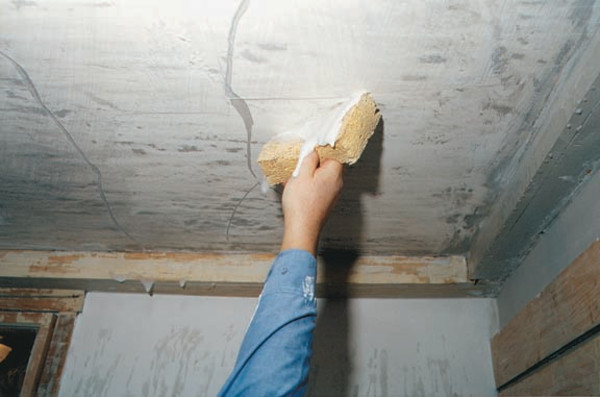
When you are ready to repaint your removal areas, use a calcimine-coater paint if available (see Suppliers). These products can be tricky to locate, but they will penetrate through any remaining calcimine and seal it. Some brands are made to be followed with a topcoat paint, and some are not, so read the labels carefully. If these products are not available, then prime all removal surfaces with an oil-based primer. You can then finish with a latex or oil topcoat of your choice.
Try a Quick Cover-up
If you want only to cover up your calcimine problem, then you can try a spot scrape-wash-seal of only the peeling areas. This approach may work nicely for years (we did a ceiling that’s held for 10 years), or it may not be successful. If you have a very small area that is peeling you might want to start with this approach. Once you have scraped off the loose paint, you can either scrape off the calcimine or gently wash it away in just the scraped areas. The more washing you do, the more the calcimine will lift off and your peeling areas will grow. Finally, go over these areas with a calcimine coater paint or oil-based primer. If you want to fill the shallow craters where the paint chips were. Use vinyl-based paste or filler compound instead of a water-based joint compound, which can activate the calcimine. Lightly sand with a 120-grit sanding block then gently damp-sponge these areas to remove sanding dust and follow up with another coat of calcimine coating paint (or oil-based primer). If you choose, you can now go over your plaster with a flat, latex ceiling paint.
Is your plaster ceiling sagging or cracking? Learn how to perform your own plaster ceiling repair!
Peter and Noelle Lord operate Peter Lord Plaster & Paint, Inc.


