I live in Cordova, Nebraska, a rural community with a population of 140. All the streets in town are named for Greek heroes and philosophers. My house is on the corner of Socrates and Andromache.
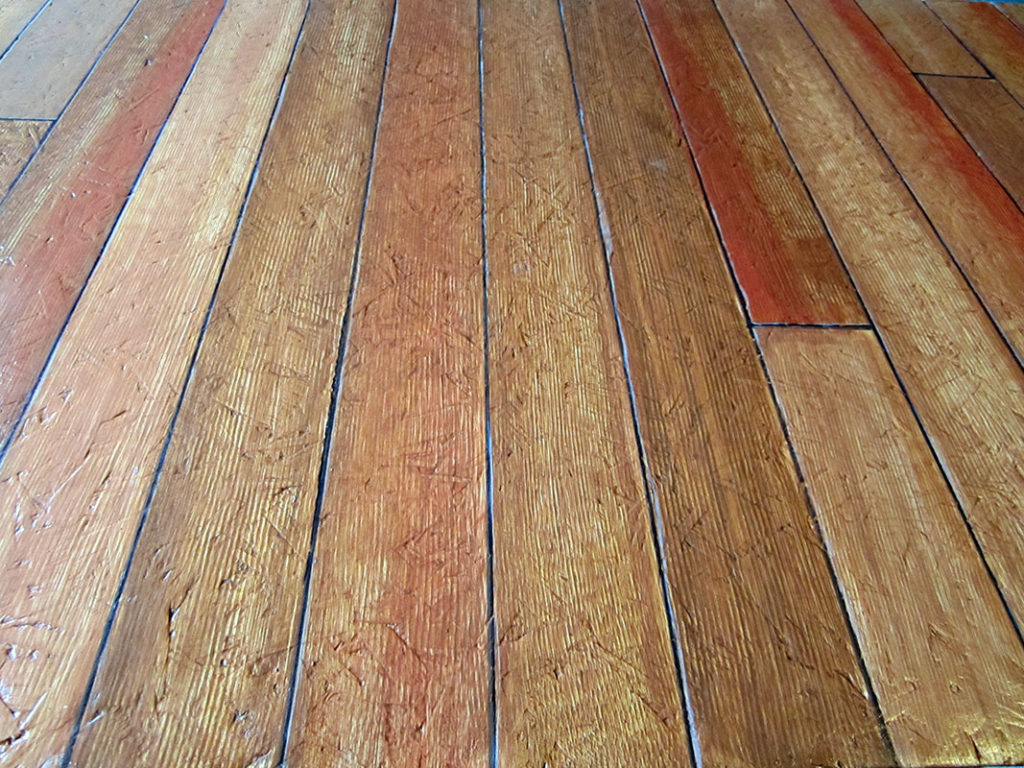
This wood floor might fool you.
Michael Bristol
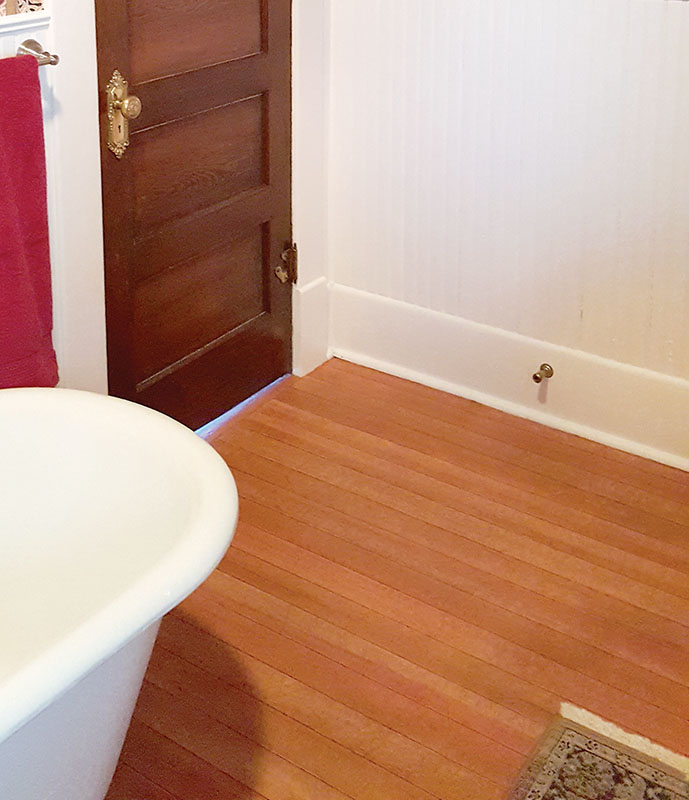
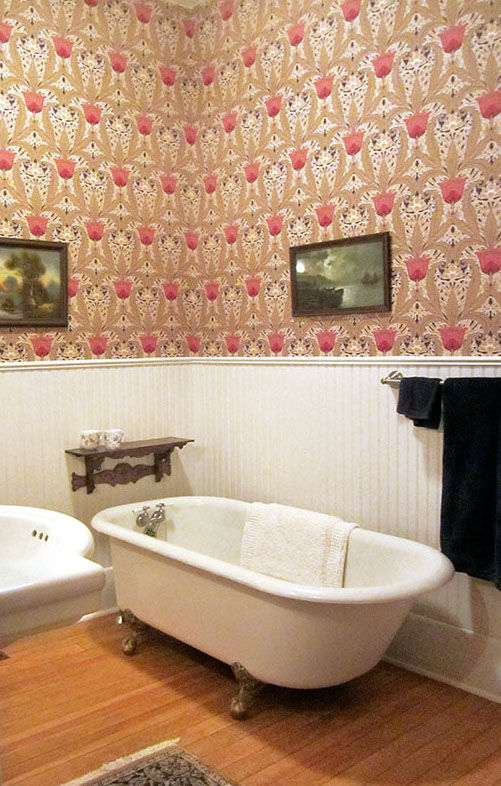
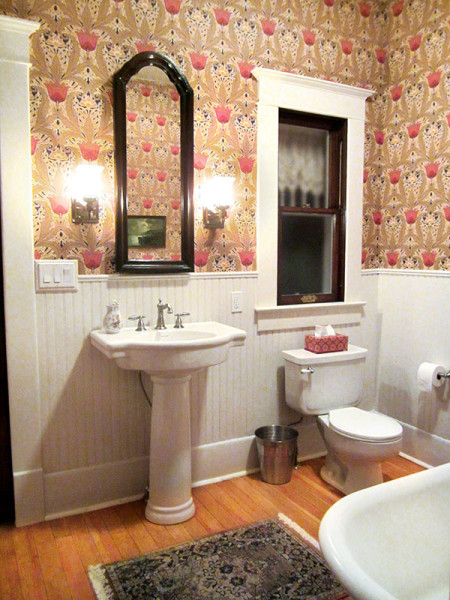
But what I want to show off here is a bathroom renovation. The project was part of my ongoing restoration of a 1908 house with a small addition. The first floor presented some challenges. In the kitchen/bathroom/laundry area, the original pine flooring had been overlaid with OSB and then covered in commercial carpeting. [OSB is oriented strand board, an engineered wood particleboard sheathing product made of compressed wood flakes and adhesive. –ed.] I dreaded pulling everything up, but adding a top layer of tile or wood would raise the floor level at least a half inch.
I started in the bathroom by pulling up the carpet. Then I thought: I’ll just paint the sheathing. After filling holes and a seam with drywall joint compound, sanding, and priming, I used paint, glazes, and antique graining tools to make the floor look like pine floorboards.
I replaced the tired mid-century vanity cabinet with a pedestal sink, and hung reproduction ‘Tulip Garden’ wallpaper from Aesthetic Interiors. Trim painted creamy white is more cohesive and lends a turn-of-the-century look. The traditional “pine floor” warms the room. I plan to use the same treatment for the floors in the kitchen and laundry room.
A recent project has been to create a turn-of-the-century garden in the side yard. The plan and plantings are simple and suitable, to go with the philosophy I’m learning from my rural home.
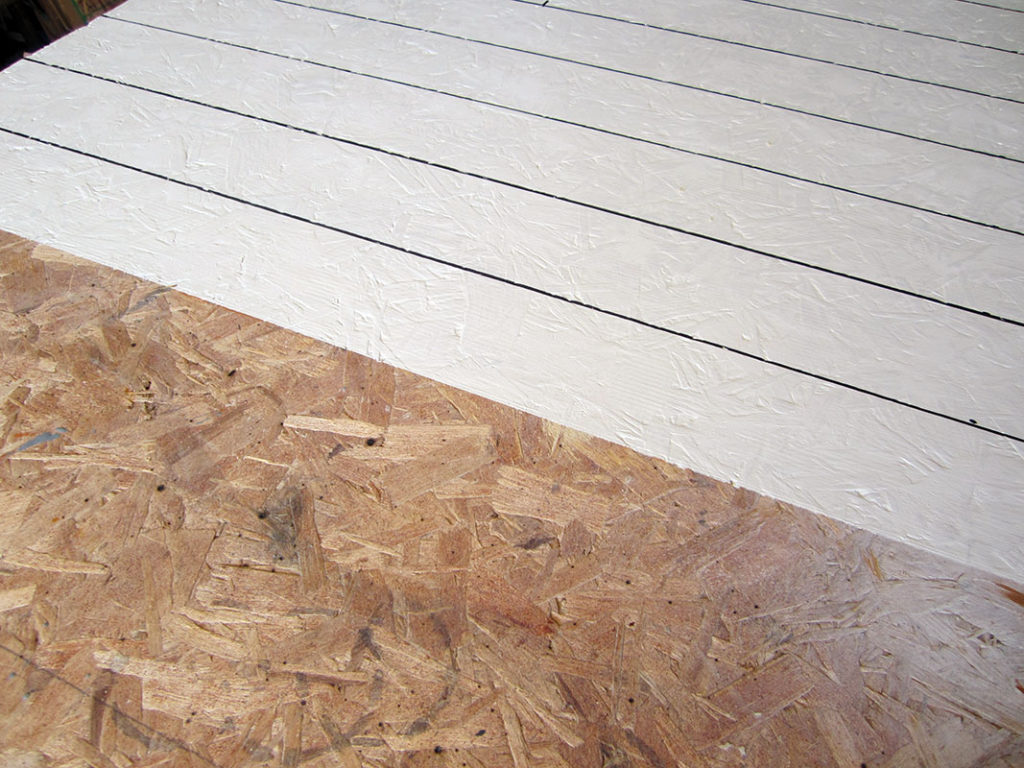
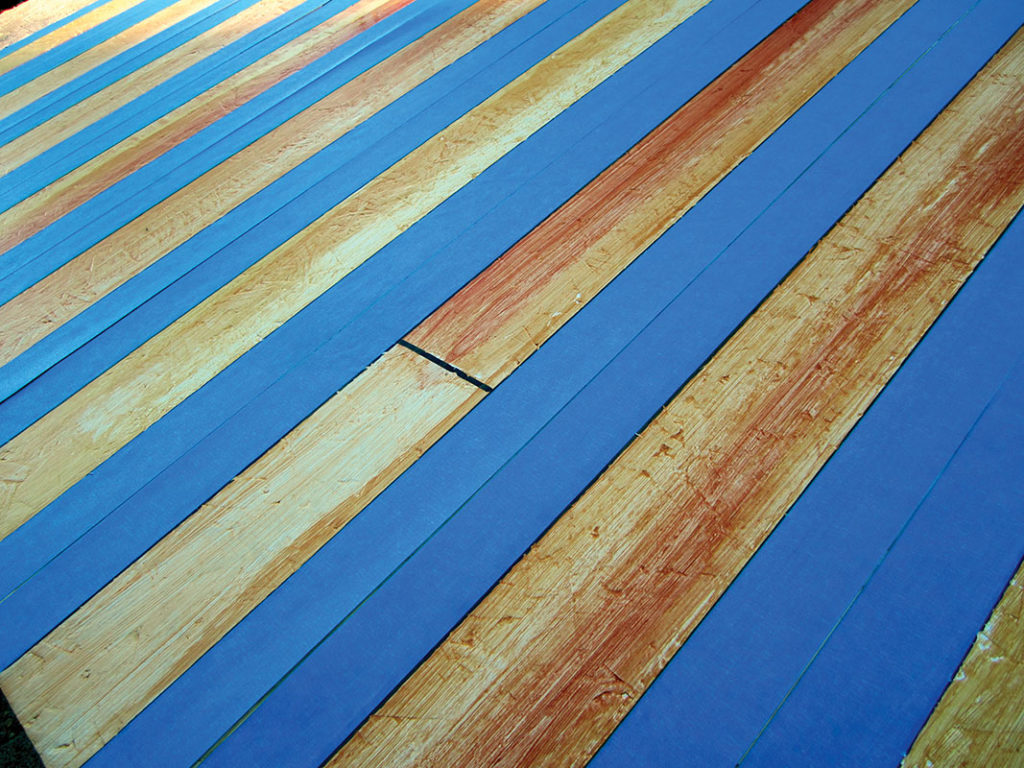
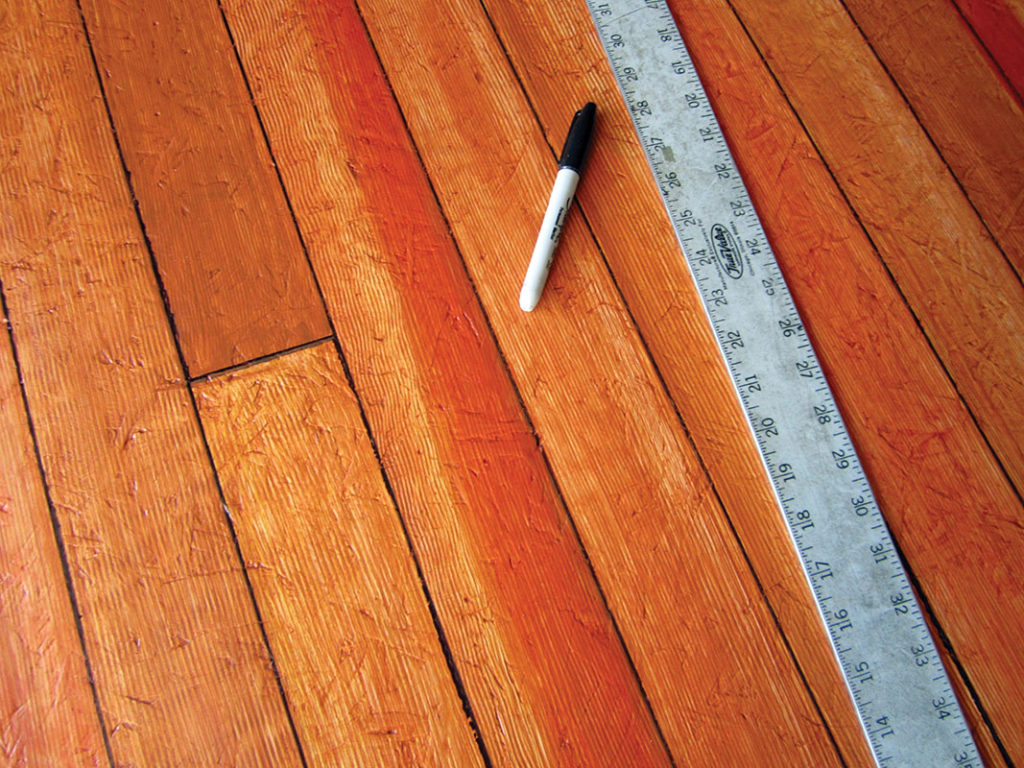
1. Cover prepared OSB or plywood with latex white primer; let dry. Choose “floorboard” width and with tape measure, straightedge, and black marker, draw parallel lines on the primed sheathing.
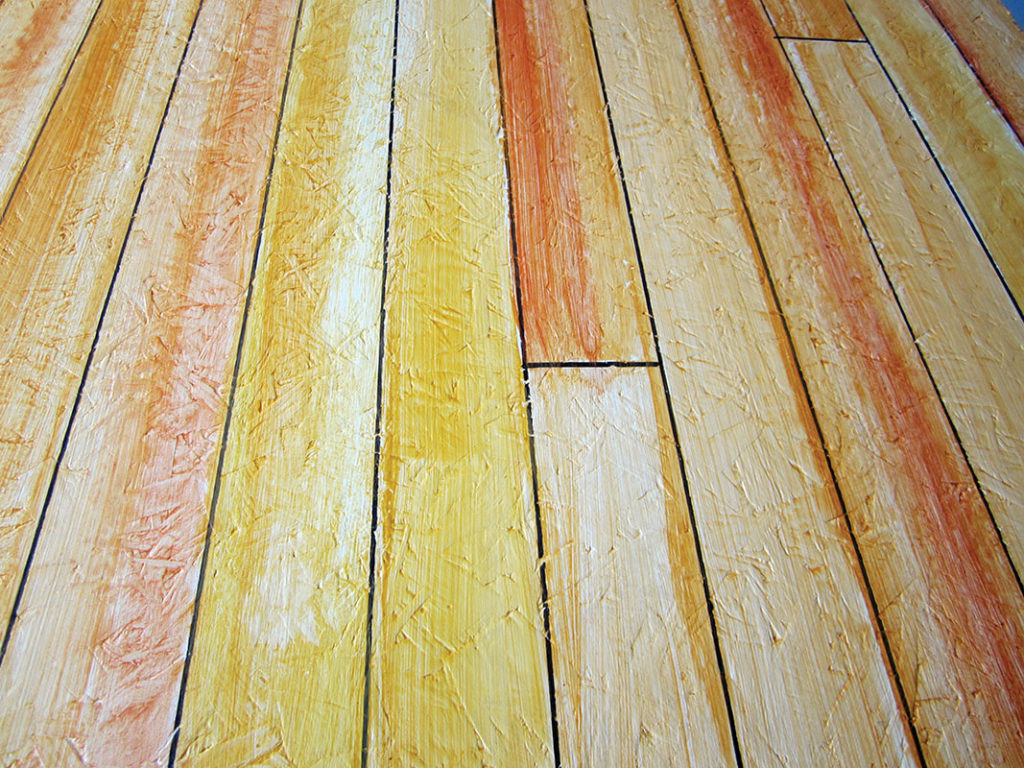
2. Here five colors were used, two light, one medium, two dark: Sherwin-Williams flat latex in Sociable, Tassel, Spicy Hue, Penny
Wise, and Rugged Brown. Take three lighter colors and separately mix each with glaze (Sherwin-Williams Faux Impressions). Apply quickly and at random with bristle brushes, in the direction of the “boards.” Let dry.
3. With painters’ blue tape, mask every other board. Choose a dark tone and mix with glaze.
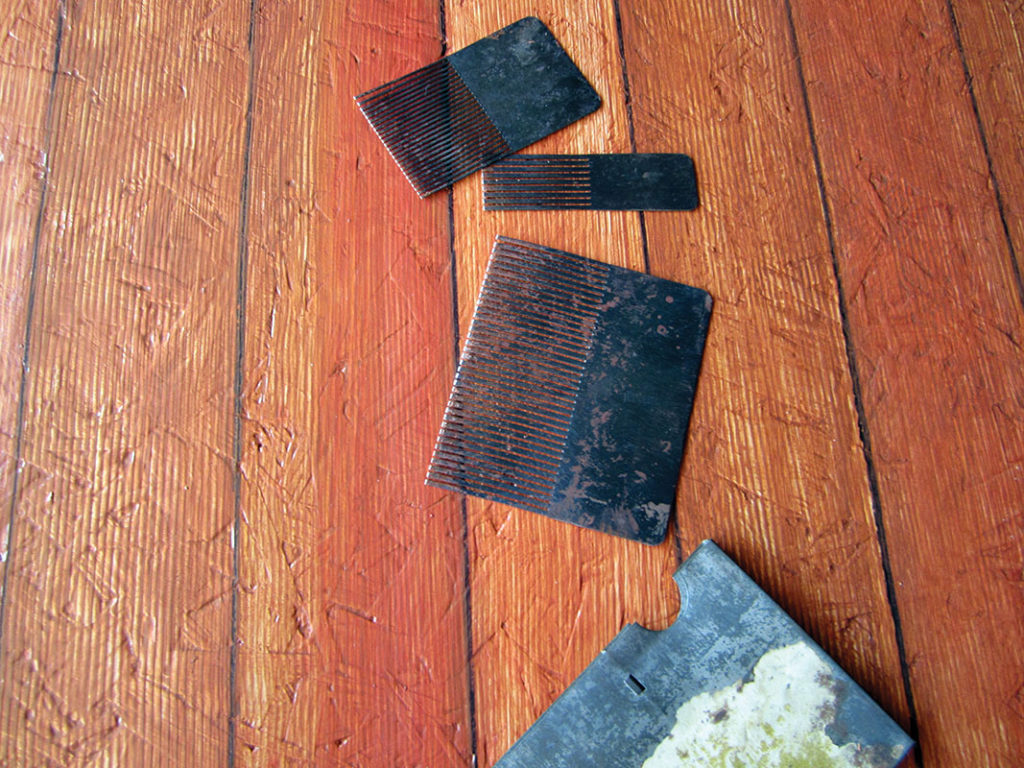
4. Apply entire length of a board, then, with a continuous motion, pull the graining comb or rocker tool to lift some paint and reveal “grain.” Continue for each unmasked board. Always allow the paint/glaze to dry before removing tape. Repeat on the remaining boards.
5. Mix the darkest color with glaze for a wash; spread on three or four boards at a time, and while wet gently drag a soft rag along the “board” to soften. In this project, the surface was then “stained” with a mix of burnt umber liquid acrylic paint in glaze and water; use raw umber for a more aged look. Let dry.
6. Against a straightedge, use a black permanent marker to redraw lines mimicking seams between “boards.”
7. Protect the painted surface with a high-quality satin or semi-gloss urethane or varnish, applied in several thin coats