

Conservator John Leeke mixes a two-part epoxy compound at a work site (HistoricHomeWorks.com). Courtesy John Leeke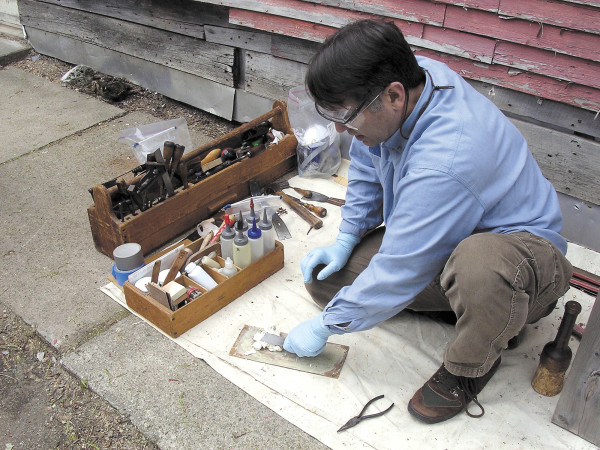
Contrary to popular usage, “epoxy” is not one thing, nor is it a verb that means “to glue.” The word refers to a class of synthetic thermosetting polymers used in adhesives, consolidants, plastics, fillers, molding compounds, and coatings. Different formulations make epoxy compounds compatible with wood, glass, stone, concrete, and more. This article is about those epoxy products used to reinforce and fill wood elements.
Epoxies are two-part systems. The product typically comes in cans or tubes labeled as A and B. These are mixed (thoroughly) immediately before application. As thermosetting compounds, they cure through a heat reaction. The epoxies used in rehabilitating wood are made up of a resin and a hardener. When they are mixed together, a chemical reaction changes the resin into a gel and then a solid.
A historic Palladian-style window is in place after repairs that involved several products and techniques. Ray Tschoepe
Chemists formulate epoxies with a wide range of pre-cure and post-cure characteristics. The product may be watery to penetrate porous materials, or thick and viscous for use on a vertical surface. The cured epoxy can be hard and brittle or soft and rubbery. Chemists can adjust the rate at which the epoxy cures. Additives may make them more flexible or spreadable. It’s important to use epoxy products specifically formulated for your application.
Epoxy technology dates to the 1940s; like plywood and Plexiglas, it was an innovation of the war effort. Epoxy was used as an alternative to metal fasteners in the production of aircraft. By the 1960s, strong epoxy adhesives were on hardware-store shelves.
“Component repairs should be made using traditional joinery instead of non-historic methods like the wholesale epoxy casting of a missing part.”— Robert Adam, founder and senior advisor of the Preservation Carpentry Department, North Bennet Street School, Boston
Epoxy: Yes or No?
Epoxies have grown in versatility and thus popularity, but they are not always the right answer. Traditional repair methods (such as a wood dutchman, scarf, or splice) or replacement of a part may be better options. Some architectural conservators believe that epoxies do more harm than good, both because an epoxy repair can backfire if preparation is poor, and because epoxy repairs are virtually irreversible and permanent. Historic windows, for example, typically need maintenance that requires disassembling one or more joints, so you should use epoxy only on non-jointed window elements. (More upcoming in OHJ’s Sept. 2019 issue.) Reversibility is a key preservation tenet, and thus required for some work on landmarked buildings and antiques.
“And you don’t need $150 worth of epoxy when you can splice in a $10 piece of wood,” says conservator Ray Tschoepe. By volume, epoxy fillers are more expensive than most woods, so consider the value of making repairs with epoxy versus new wood. Sure, a repair project can resort to both epoxy use and traditional patching in kind. But a large epoxy repair is unnecessary for a common building component. Spend the money on an item that is difficult or costly to replace, such as a carved column capital.
Epoxy comes in handy when replacement of a component is difficult due to surrounding structures, or because of the location. Good use of epoxy on damaged wood falls into two categories (not mutually exclusive): consolidation, and filling. In consolidation, the porous, damaged, decayed wood is saturated with a thin, liquid epoxy consolidant, which hardens within the wood. Absolutely all of the decayed wood must be saturated; otherwise moisture and ongoing rot is trapped, which hastens deterioration. Unfortunately, it’s often hard to see where decayed and sound wood meet.
An alternative is to remove all of the decayed wood. After the fresh surface is coated with an epoxy primer, voids are filled with epoxy paste filler. In this method everything is exposed and you can be sure that what’s left is sound. Of course, you have to step back and solve the initial problem. If the decay was caused by a gutter leak overhead, fix the gutter!
Deteriorated wood in muntins was carefully removed and replaced with new wood splices in the fan portion of the sash. An epoxy adhesive was used. Ray Tschoepe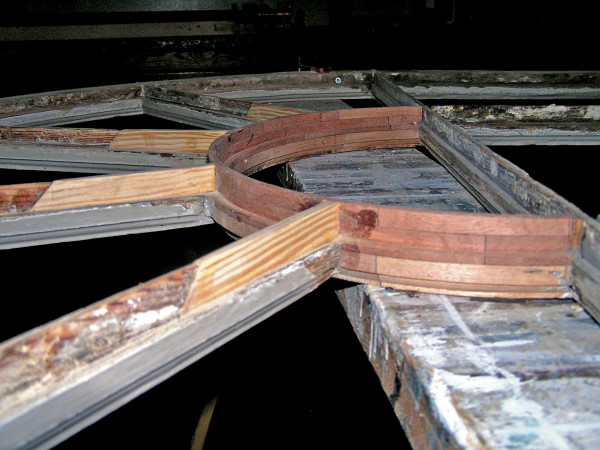
Patching with Wood
Sometimes called a dutchman, a scarf repair is used when only part of a wood element needs to be replaced. The damaged or rotted section of wood is removed to create a clean line for gluing. A patch of wood (with matched grain if the finish is to be clear) is glued in, and after drying the surface is planed or sanded flush with the original wood.
Rules of Thumb
Replace the entire decayed wooden element when . . .
• the damage covers more than 50% of the piece.
• it’s square stock or something readily available and easily replaced.
• this is your third epoxy fill on the same piece of wood.
Use a dutchman patch or splice when . . .
• you need to replace up to 50% of the element.
• the piece must be drilled for screws or milled for joinery.
• the final product will be clear finished.
• it is important to respect original construction and wood species.
Use epoxy filler when . . .
• about 80 to 85% percent of the element is still sound material.
• the element or piece would be difficult to replicate with new wood, such as molded trim that would require sophisticated machining or laborious handwork.
• the piece can’t be easily removed without taking apart other components, such as a pegged windowsill. —Ray Tschoepe
Reusing a Vintage Door
A DIYer offers first-person hints on using an epoxy filler.
As part of the restoration of the front vestibule on our 1880s townhouse, Wendy and I adapted a salvaged maple exterior door for the new entry. When we found the door, the joints were loose and the peeling paint needed sanding and stripping, but it was about the right size for the opening and clearly was from the same era as the house in its style and construction.
After laboriously making the initial repairs, I was ready to patch several nicks and holes too large to address with wood filler. Missing wood in the door frame from old hinge locations needed patching, too. I turned to my favorite wood filler, a two-part epoxy made by Abatron called WoodEpox. (I’ve been using it for years, ever since I saw an advertisement for it in Old-House Journal in 2003.)
A kit comes with two same-size tubs (Part A and Part B). With WoodEpox, one part is a dark tan color and the other is bright white. One of the lids is marked with a red dot so you can easily identify which tub is which without opening the container.
Applying and working with WoodEpox is easy and straightforward. The work time is at most 20 minutes—long enough not to rush, but short enough that everything should be set up and ready to go before you start. Clean the area you plan to fill, removing any dirt or grease, and allow to dry. Wearing latex gloves (epoxy can be disastrously sticky), open both containers. Using only your left or right hand, pull out a ball of material. Using the opposite hand, pull out an equal sized lump from the other container. (Make sure you don’t put the glove used in the first container into the second one, or you could ruin the remainder.) Mash the two lumps together, then knead them to fully combine them. The two distinct colors of A and B will slowly turn to a consistent light tan together.
Once the epoxy is thoroughly blended, apply it to the damaged area. I make sure I add a little extra, because it is better to overfill the void than to under-fill it. (You can always remove excess material after it cures.) Work the epoxy in with your fingers and get it roughly to the desired shape.
Allow a 24- to 48-hour cure time, depending on the application and humidity levels. Don’t try to sand the repair too soon or it will gum up your sanding discs or pull away from the filled area. Once cured, the epoxy can be sanded, planed, cut, carved, drilled, nailed, and painted just like wood. —Alex Santantonio
A deteriorated window sash is saturated with liquid epoxy consolidant, with special attention paid to end grain. Next, an epoxy filler readily bonds to the cured consolidant and wood. (Wearing gloves is recommended.) Epoxy fillers formulated for wood can be tooled once cured. OHJ archive/gordon bock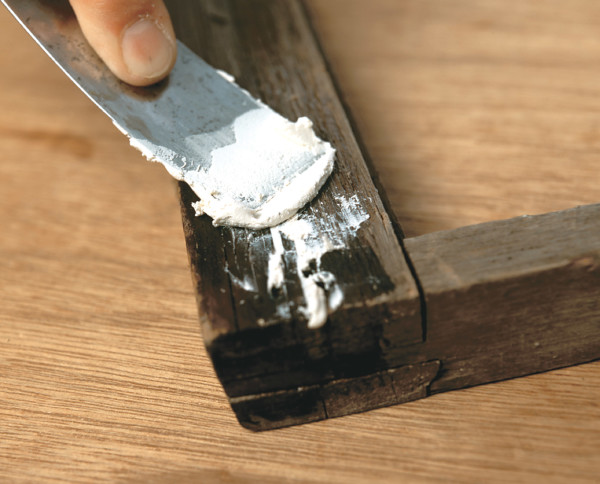
Epoxy Products for Wood Repair
Epoxies designed for wood repairs are formulated to match the strength of wood and to be flexible enough to move with cycles of contraction and expansion. Several manufacturers sell wood-repair epoxy products in kits that may include one or more of the following product types:
Epoxy consolidants Where the wood component still retains its general shape, but has lost integrity due to rot, fungal growth, or insect damage, epoxy consolidants can be used to reinforce the remaining wood fiber.
Generally speaking, the consolidant is resin that has been formulated for low viscosity so that porous wood readily absorbs it like a sponge. Ideally, the consolidant penetrates right to the threshold of sound wood, returning the damaged area to a significant percentage of its former strength and durability when it cures. In small projects, resin and hardener mix is often simply brushed repeatedly onto the component surface as the wood drinks it up. Larger projects often require perforating all of the damaged wood with small holes in strategic spots to enhance saturation, then filling these holes with consolidant mixture from a squeeze bottle. (Consult the manufacturer’s recommendations.) The treated wood can be sanded, sawed, planed, drilled, nailed, routed, and painted.
The typical consolidation candidates in old houses are the rotted parts of window sash, doors, and carved or molded features such as newel posts and column details. Indeed, the beauty of consolidants from a practical (as well as historic preservation) standpoint is that they retain much of the original wood element. Moreover, they can often be used without removing the building part from its installed position. Epoxy consolidants, however, are for the most part not reversible; once they have cured they cannot be undone.
Epoxy primer When a liquid consolidant is used with a paste filler, the consolidant acts as an effective bonding primer. Specific primers to be used on sound, clean, dry surfaces are also sold for use before filling with epoxy.
Epoxy paste filler Consolidants help restore the integrity of wood, but it takes epoxy fillers to replace lost wood fiber. These consist of resins and additives combined (often in proprietary mixtures) to make a gap-filling paste. Unlike simple one-part wood putty, epoxy fillers are, again, mixed from A and B components and often formulated not only to adhere well to consolidated wood (which helps increase their bond in tough, outdoor conditions) but to flex like wood and even tool like wood using planes, chisels, and sandpaper. Epoxy fillers are ideal for filling voids and holes: checks and splits from weathering; holes from old hardware or countersunk screws and nails; lost knots and woodpecker holes.
However, the right filler can also be used to reconstruct totally lost features by building it up in several applications, then sculpting or forming it with woodworking tools. The epoxy curing process actually has three stages, and this can be a great advantage when working with fillers. When the liquid resin or paste filler is first mixed with hardener, it remains in an easily manipulated first stage called the open time or working time. Before the epoxy cures to the third solid stage, it passes through a second stage, often called the gel or kick-off stage. In this short stage, the epoxy has begun its initial cure; while it is no longer a liquid it is not quite yet a hard solid. When fillers reach this soft, rubbery stage, the time is ideal to rough out general shapes and remove large amounts of material by quickly sculpting them with “cheese-grater” tools (such as Stanley Surform planes). With experience, it’s possible to quickly work the filler without breaking its bond to the wood, waiting until the filler has cured hard for final shaping and sanding.
Paste fillers can be colored, either by adding dry pigments to the A/B blend during mixing, or by staining or painting after hardening. —Gordon Bock
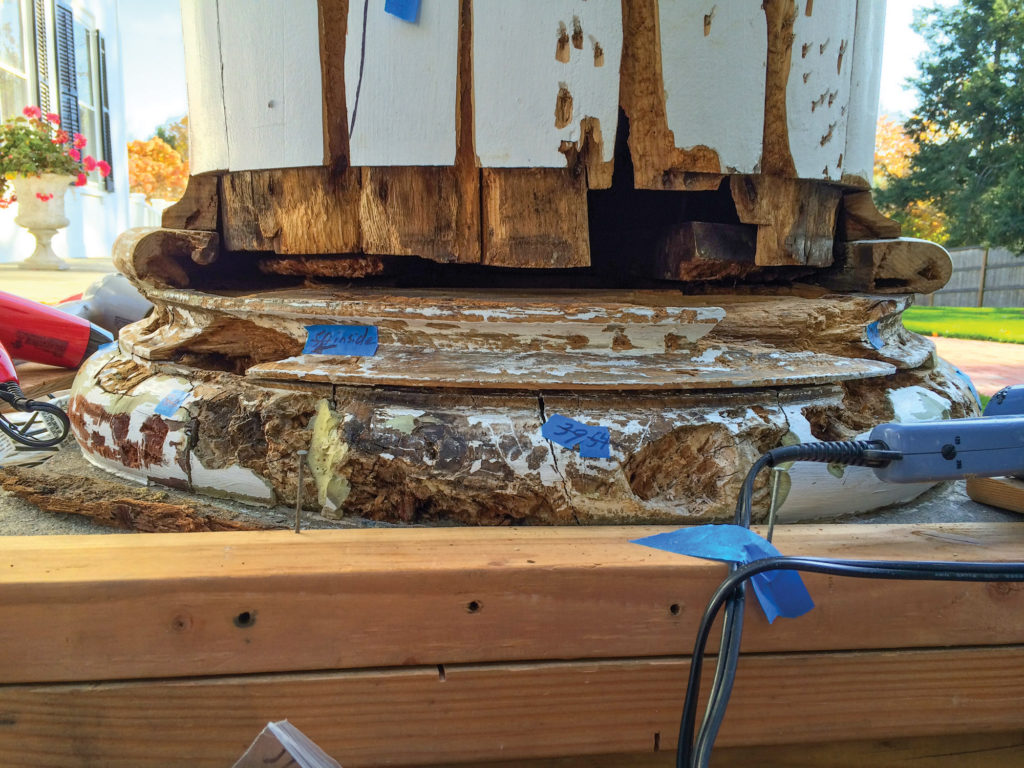
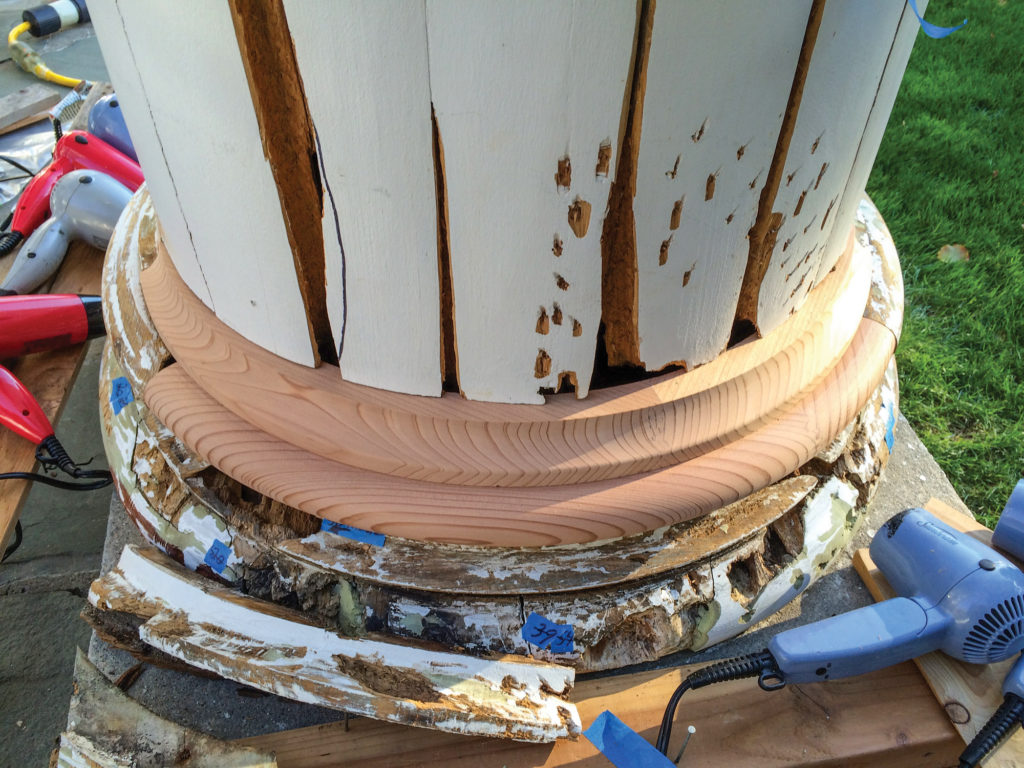
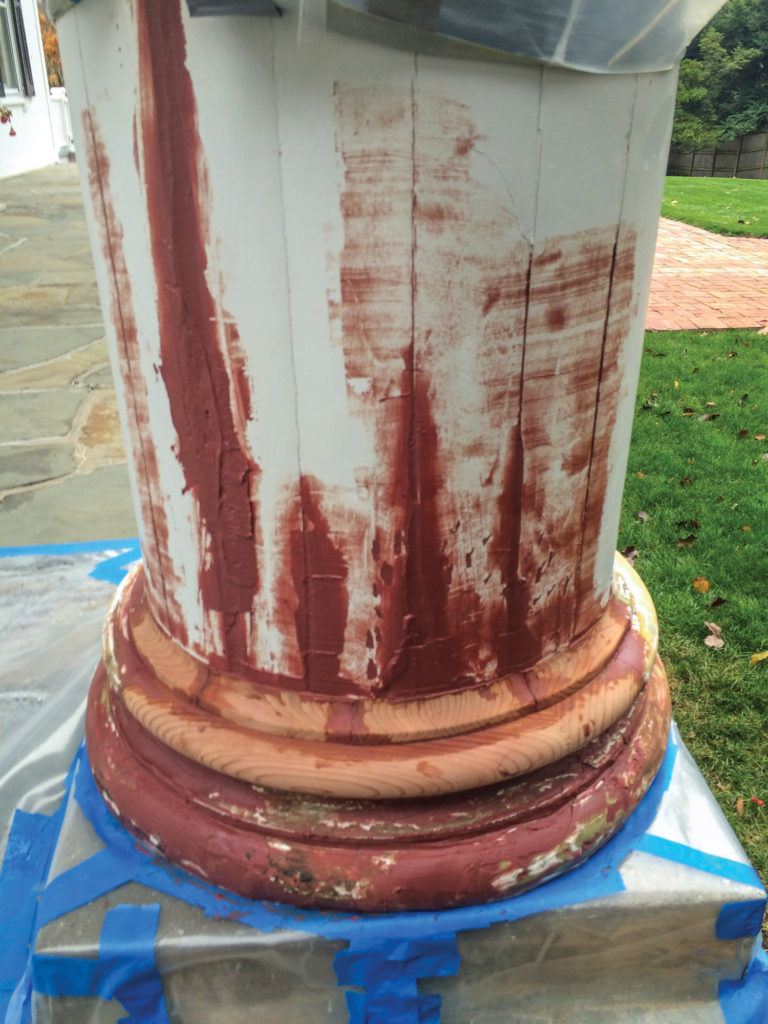
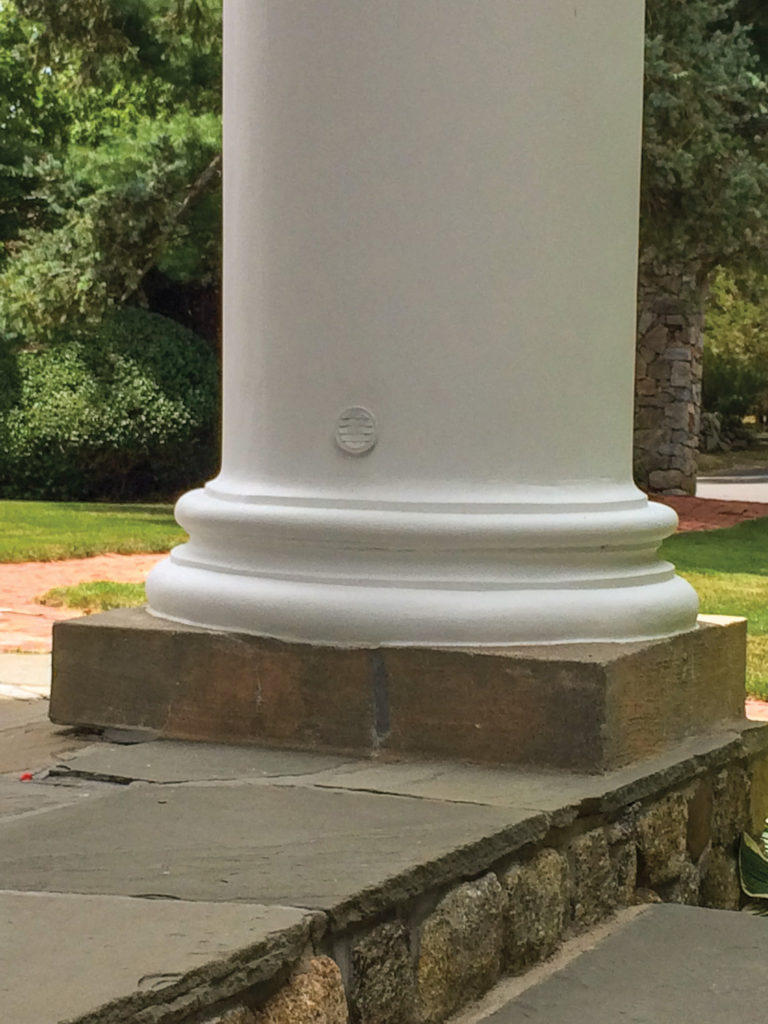
Repair of exterior columns using ConServ Epoxy products involved liquid borate preservative, epoxy consolidation, epoxy filling and shaping, and new wood at the base.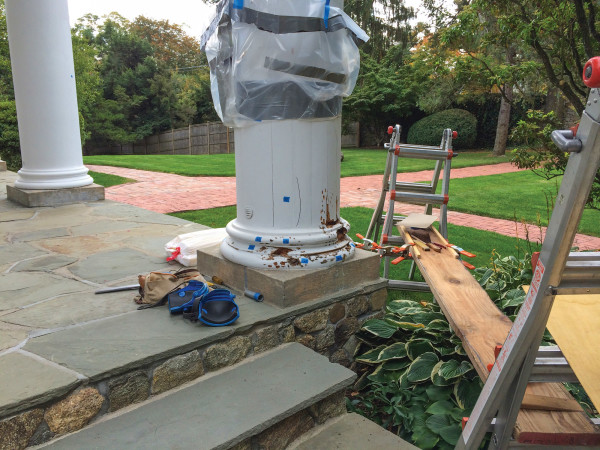
Wood damaged by rot or fungal growth needs to have
1) the source of moisture corrected and
2) the wood thoroughly dried through air circulation or heaters.
Epoxies cannot penetrate wood fiber that already has a high moisture content, as might be found inside a post or column. If the consolidant is applied so that it cures only on the dry outer surface of a member, it will trap remaining moisture inside the wood, where it will continue to promote damage. For this reason, some restoration conservators use consolidants along with wood preservatives, such as borates, when working on large repairs.
GOOD AS NEW
Paul Marlowe of ConServ Epoxy describes a typical exterior repair sequence:
Step 1 The badly deteriorated base moulding is removed, revealing rotted areas to be scraped away.
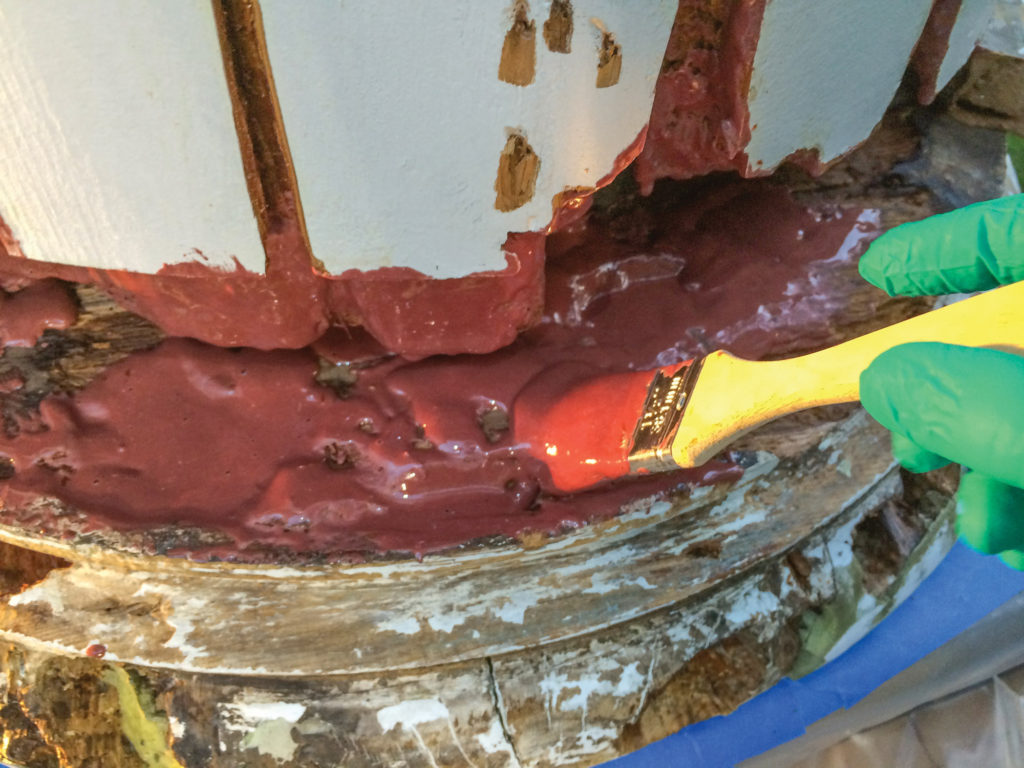
Step 2 After consolidation with a liquid epoxy, a paste slurry and then a paste filler are used.
Step 3 New mouldings were milled in redwood for the base, adhered with the same epoxies.
Step 4 Additional filling and tooling (after cure) restores the original profiles.
Step 5 In the finished, painted column, note the all-important vent that allows air flow into the shaft to exit at the capital.
Stay away from two-part car repair products!
Not Epoxy
Don’t use two-part car repair products on wood.
The word epoxy often is used erroneously to mean any resin applied to repair wood—even when the resin is not epoxy. People confuse many adhesive, bonding, and filling products with epoxies. They include five-minute adhesives, bar-top coatings, and paints. Moreover, don’t assume that a product with two parts is an epoxy. Repair products including common auto-body filler get caught up in the confusion. (Bondo is the familiar product from 3M.) Most are polyester resins that cure with the addition of a catalyst rather than a hardener; they are formulated for sheet metal, not wood.
Preparing decay zones for epoxy repair: My method uses a HEPA vacuum along with a 90° auto mechanic’s pick pulled across the grain. It provides quick, controlled removal of damaged wood, clear visibility of the decay zone, and constant assessment of the substrate. You see when you’ve reached sound wood, and you can creep to a thin edge. More aggressive tools can be used for large decay zones, but a vacuum is always beneficial. —Paul Marlowe of ConServ Epoxy
Damaged wood in the decay zone is scraped with a mechanic’s pick as a HEPA vacuum keeps things clear. Courtesy Conserv Epoxy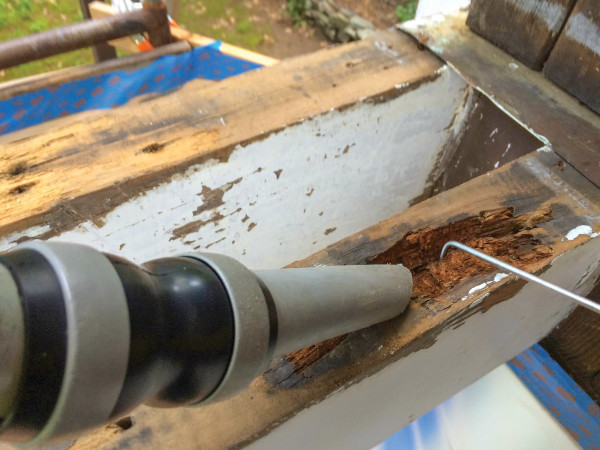
Mixed epoxies give off heat as the resin and hardener polymerize, and since heat accelerates curing, the patch may cure quickly, especially on a hot day. To mitigate in these conditions, keep the epoxy components (before mixing) in a cool place. Put mixed components on ice, if possible. —Ray Tschoepe
With custom epoxy formulations and easy-to-use kits, Abatron is committed to conservators and do-it-yourselfers.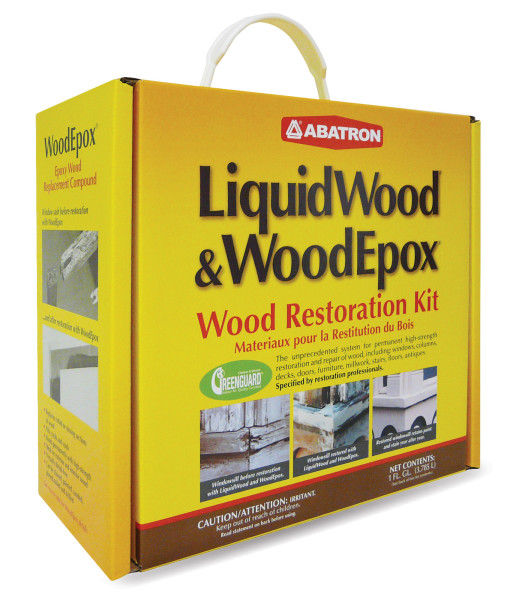
Moisture and water diminish penetration and adhesion. Moisture content should be below 17%. Wood can be dried with heat or ventilation. Another method to accelerate drying is brushing acetone (caution: flammable) on the wet surface. The solvent accelerates evaporation.
A common mistake we see is someone using a consolidant as a protective coating, rather than as a treatment for decayed wood. Epoxy consolidants should be localized at the region where a decay zone exists or where an epoxy filler is going to be used. Coating large areas with consolidant creates a moisture barrier, which can actually trap moisture and speed up the decay process.
Avoid shallow or too-large containers. Use separate measuring tools to scoop from the A and B containers to avoid contamination. Mix only as much as can be used within the “pot life.” WoodEpox (paste filler) can also be mixed by hand in small quantities, like modeling clay. Always wear gloves. —Abatron
Wear a respirator when working with epoxy. bigy9950/adobe stock
SAFE USE Epoxy is nearly colorless and odorless, not noxious, but don’t let that fool you. It’s an active compound that presents certain health hazards if conditions allow. Wear nitrile, vinyl, or rubber (Playtex) gloves, and eye protection. Do not get liquid materials on your skin. (If you do, wash immediately with vinegar, then soap and water). Always work with good ventilation—outdoors is best—or wear a respirator.
To keep epoxy from oozing onto nearby surfaces, use strips of plastic wrap or waxed
paper as a separator. Epoxy won’t stick to either one. To protect the epoxy patch from rain while it cures, loosely cover the repair with plastic sheeting. —Ray Tschoepe
Developed by Gougeon Brothers initially for boatbuilding, West System has a full line of epoxies for outdoor use.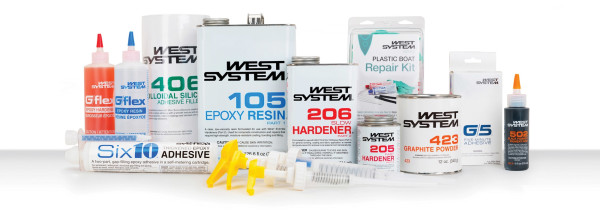
Specialty Epoxies
Abatron | abatron.com
High-performance epoxies for wood, concrete, stone & metal
ConServ Epoxy LLC | conservepoxy.com
Wood-rot repair epoxies & restoration materials
PC Epoxy | pcepoxy.com
Permanent repair products for wood, concrete, etc.
West System | westsystem.com
Epoxies that bond fiberglass, wood, metal, fabrics & other materials


