

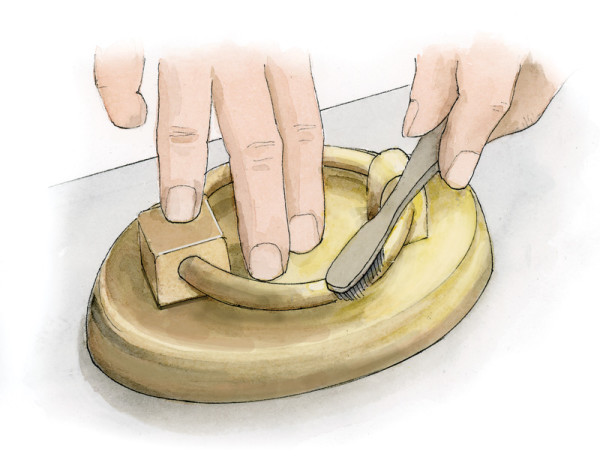
Wear gloves when touching brass hardware; oil from your hands will accelerate tarnishing. (Illustration: Rob Leanna)
Clean and Seal Brass Hardware (Hour)
Brass hardware on front doors weathers and tarnishes from exposure to the elements. Cleaning and sealing the hardware will keep it looking its best. After removing the hardware from the door, wash it with dishsoap and water to remove any dirt buildup. Use an old toothbrush to get in crevices. Dry with a soft cloth. If the piece has a worn lacquer coating, take it off with a paint or varnish remover. Polish off tarnish by soaking the piece in ammonia, and rubbing it with a soft cloth or toothbrush. Rinse and dry with a soft cloth. Leave no fingerprints, and apply brass sealer to the hardware, or spray it with a clear lacquer. Let it dry. Repeat the process and then reattach the hardware.

Repair Damaged Screens (Day)
Torn window screens may be a bane of summer, admitting insects we want to stay outside. Take a day to tackle repairs. Window screens come in rolls of fiberglass or aluminum (or old-fashioned bronze mesh). Fiberglass is more forgiving to work with, but aluminum is stronger. Measure all of the windows before purchasing materials to make sure you get the right width.
STEP 1
Using an awl or a flat-head screwdriver, pry out the old spline and remove the old screen. Clean any debris out of the channels. Lay the frame on a flat work surface and roll out the new screen. Trim the screen with a utility knife, leaving 1″–2″ excess on all sides. Cut a 45-degree angle at each corner from the spline channel outward, to prevent bunching in the corners. Weight the center of the screen with a brick, and secure the screen to the frame with clamps. The brick allows for the right amount of tension when the screen is installed: not too tight or too slack.
STEP 2
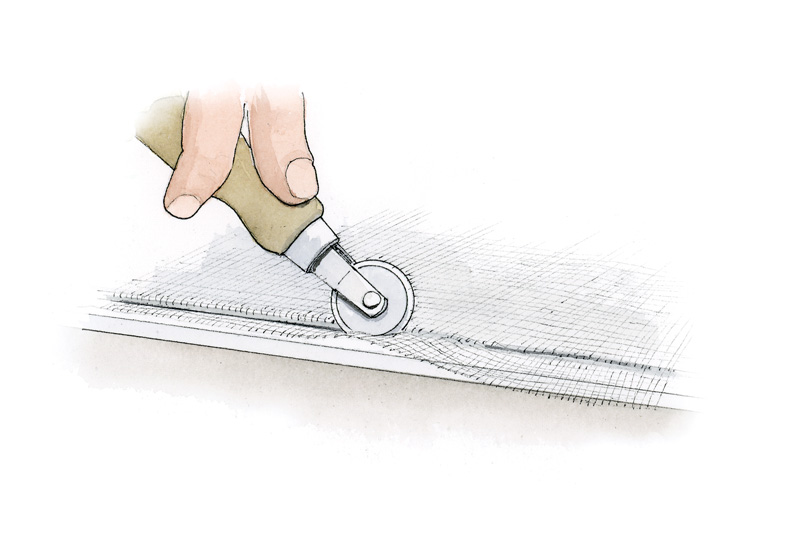
With a screen roller, run the convex wheel over the screen, pushing it into the frame’s channel. Work in one direction only. Small bulges should roll out as you go along; stop and redo the screen for any folds. Use a flat-head screwdriver to press into the corners. Now, using the concave wheel on the screen roller, push the spline into the channel over the screen. Make sure the spline is all the way in and won’t come out. Trim the excess screen.
Hang Shutters (Weekend)
Functional shutters are not only a charming detail on a home, but also provide protection from strong winds and help keep the interior cooler. Custom wood shutters come in paneled, louvered, and board-and-batten styles, which may be varnished or finished in any paint color. When ordering, follow measuring instructions carefully—shutters should have a ¼” gap around the window casing when installed. Also do any prep work before hanging them. An assistant is helpful with this project.
STEP 1
Position the shutters in the window with wide horizontal rail at the bottom and the plain side of the shutters facing out. Louvers face down when in the closed position. Shim the shutters into place, leaving a ¼” space around all sides. The shutters should not overlap any of the window trim.
STEP 2
Slide the strap of the hinge onto the pintle. Hold the strap against the top rail of a shutter and the pintle against the window casing. Center the strap and, with a level, check that the pintle is plumb. Mark the screw holes with a pencil. Remove the hinge. Drill pilot holes into the window casings and then fasten the pintle to the casing. Repeat with the other upper hinge. For the two lower ones, do the same process, but also mark a vertical plumb line so that the upper and lower pintles align.
STEP 3
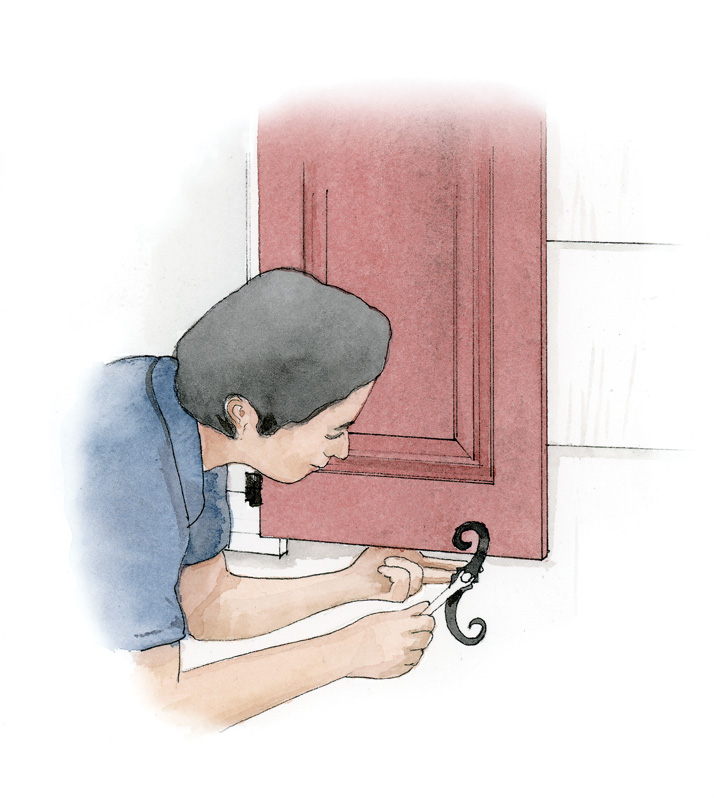
Remove the shutters and place them on a work surface. Drill the pilot holes for straps and screw them on. Turn the shutters over and position the latch, placing it so that it is slightly below the center of the shutter, within easy reach. Hang the shutters, and check how they swing and adjust as needed. Open the shutters and position an assembled shutter dog against the siding. A shutter dog should be placed 4″ away from the shutter and 1″ from the bottom edge of the shutter. Check that it will hold the shutter. Mark the location and drill a pilot hole into the siding. Using a wrench, fasten the shutter dog’s bolt. Repeat on the other side.


