

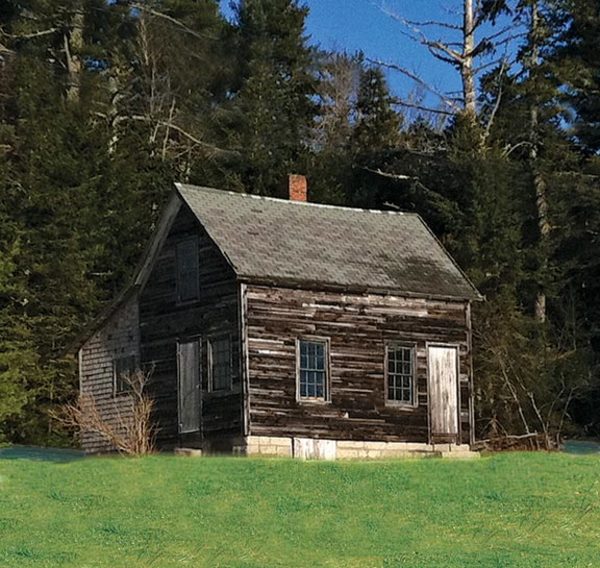
Thanks to good design, old, weathered buildings can sometimes be as sound as newly built ones.
When I drive along rural roads, I sometimes come upon old farm buildings that have been abandoned long ago. I’m often surprised to find that although the wood is weathered and gray, the siding, trim, window sash, and sills are still remarkably sound. Why is this, when I’ve seen just as many 10- to 15-year-old buildings already in need of replacement sash and jambs?
The survival of traditional materials in an outdoor environment usually depends upon four interdependent factors: design, material, craftsmanship, and maintenance. In the case of these old buildings, I can’t speak for the craftsmanship, and I know that maintenance has been absent for quite some time, so I attribute their stubborn survival to quality, old-growth wood and the attention paid to design details. These details were often second nature to builders until the early part of the 20th century, when man-made materials (aluminum, composites, synthetics) freed the builder from the mundane and time-consuming chores of detailing every joint and attending to the pitch of every surface.
However, for the restorer who still works in the everyday realm of old houses, and does not have the advantage offered by old-growth timbers or the choice to install synthetics, then attention to detail can mean the difference between a project that lasts 5 years and one that lasts 10 times that. Modern plantation-grown lumber is notoriously poor at resisting decay, so protection through thoughtful design should be the number-one concern.
The simple key to all good design is the ability to shed water. The study of older structures reveals this on many levels. Sometimes the aesthetic style of a building is even shaped by this basic requirement. Craftsmen who are not familiar with traditional building practices are inclined to reproduce the overall appearance of an element without a full appreciation of the original construction detailing that incorporated this simple rule of thumb.
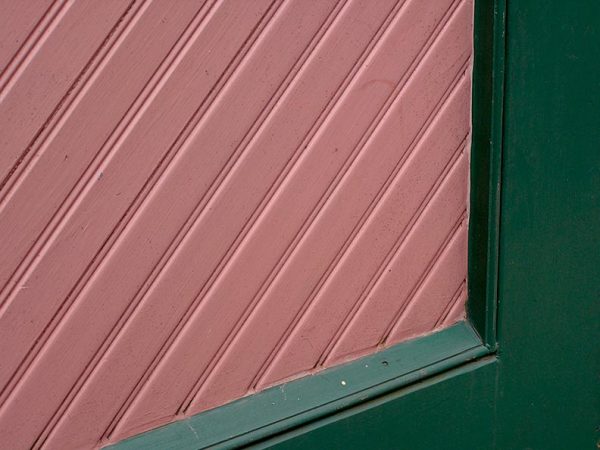
Even small surfaces such as panel molding need a slight slope to keep them from trapping water.
If we mentally follow water that flows across the roof, we can trace its path all the way to the ground as it encounters many surface textures and pitches, various joint orientations and path changes before it soaks into the soil. New, old, or treated lumber, as well as stone and metal, can benefit by employing three basic principles of design that will keep water away from the portions of the structure that are most vulnerable to fungal decay, freeze/thaw cycles, and ponding.
Design Principle #1: Avoid Flat, Horizontal Surfaces Where Possible
Everything from porch floors to windowsills and head casings should be constructed to promote the flow of water away from the building. Slopes of 5, 10, or even 20 degrees are reasonable. Although this seems intuitively obvious, it’s remarkable how often I see new porch railings installed with a flat handrail and bottom rail.
Many times, small pieces of molding, such as the lower panel molding on a door or shutter, are often discounted as having an insignificant amount of flat surface to make any difference. Yet, these are places where water can pond for prolonged periods of time, so make sure that every horizontal surface, no matter how small, is inclined away from the building.
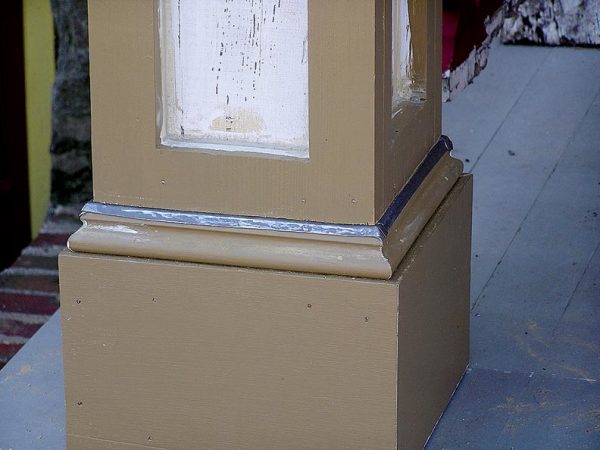
When joints at the base of square columns point downward and are protected by flashing, rainwater naturally slides off the wooden element, preventing infiltration that can lead to rot.
Design Principle #2: Avoid Joints That Face Skyward
This may well be the chief source of water infiltration and subsequent deterioration in modern construction. This joint orientation tends to show up where broad handrails meet columns or when square column bases are wrapped in wood.
No matter how carefully the joints of newly restored wooden elements are caulked, the caulk will eventually fail and admit water. If you do need to caulk existing vertical seams, avoid caulking the earth-facing lower edge of an element. When water enters, it’s much better to let it flow through unimpeded, rather than to trap it by blocking its path with a bead of caulk.
In practice, this may be the most time-consuming joint to make watertight, but the dividends are worth the effort. To get the design right, think like a roofer, and install pieces from the ground up. For example, install the lower panel molding first and cope the side moldings to it. Use flashing on seams that can’t be easily eliminated or redesigned. Where horizontal and vertical members meet (such as handrails and columns), mortise the vertical member to accept the horizontal.
Design Principle #3: Avoid Unvented Spaces
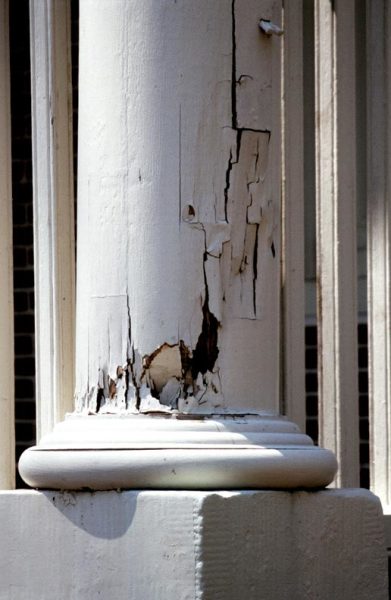
Water seeping into hollow, unvented columns can create a breeding ground for mold; simple vents at the top and bottom of the column will allow water to evaporate.
Box beams, hollow columns, soffits, and even weight pockets on sash windows can trap water or water vapor. Moisture typically enters through open seams in the upper portion of an element and puddles in a watertight lower space—for example, water entering a column through a leaky porch roof. Unvented shafts will then fill with water until it ever so slowly seeps under the edge of the shaft. In the darkness of an enclosed space, moist air laden with fungal spores spells peril for wooden surfaces.
Although I’ve seen unvented, old-growth hollow columns that have survived for more than 100 years, it’s unlikely that unvented columns constructed from modern lumber will survive that long. Columns can be vented through the plinth or through vents directly installed in the column shaft. Make sure that any vents installed in this way are screened to limit the potential for the open space to become living quarters for insects or other pests. The top can be vented into the roof space or simply at the perimeter joist. Venting both extremities of an enclosed space will promote airflow and the consequent movement of water vapor.
Although it’s tempting to give in to the immediate pleasure brought on by fresh caulk and paint, as old-house stewards, we must take a longer-term view of repair projects. The first step in doing so is to hold fast to the principles of good design.
Ray Tschoepe, one of OHJ’s contributing editors, is the director of conservation at the Fairmount Park Historic Preservation Trust in Philadelphia.
Online exclusive: Get more tips for keeping water away from your house from restoration pro Duffy Hoffman, who will be teaching a class on the subject at this spring’s Historic Home Show.


