

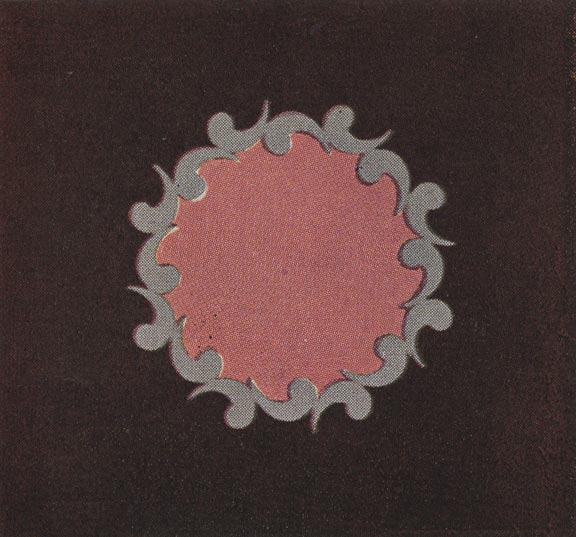
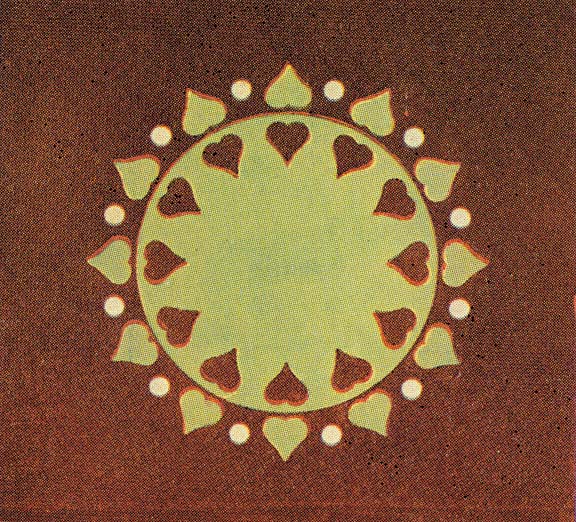
This tea-set medallion from Sealex had a Delft blue background. (Photo: Warshaw Collection of Business Americana, Archives Center, National Museum of American History Behring Center, Smithsonian Institution)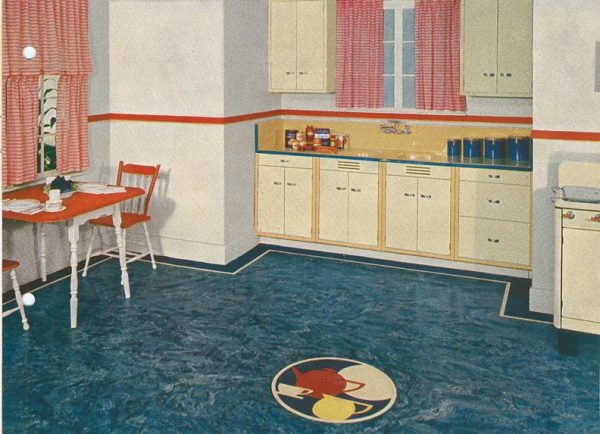
Back in the good old days, linoleum used to come in really amazing patterns. Thousands of them. But now, although linoleum is more available than it has been since the 1960s, it no longer comes in the remarkable patterns that were once common, only in variations on marble and in solid colors. The marketing campaigns of the three companies currently producing linoleum could be summed up as, “It’s hip, it’s contemporary, it’s not your grandmother’s linoleum.” That’s all well and good, but some of us want our grandmother’s linoleum—what are we supposed to do? Actually, there are quite a few options.
Vintage linoleum is available at Second Hand Rose in New York City, sometimes on eBay, occasionally at your local salvage yard, and, if you’re lucky, as a room-size rug left in a house that is now on the market. If none of those avenues pan out, there are still alternatives. For instance, a talented installer can do a custom inlay using new linoleum, and all the linoleum flooring companies offer prefabricated borders to jazz up an installation—and will even do custom borders.


Even if none of those options are appealing, there is still hope. With a few simple tools, and a certain amount of skill, you can have an inlaid linoleum floor in a fabulous pattern just like the old days. You may not be able to have a linoleum oriental rug, but a lovely geometric pattern or an inlaid medallion is within the realm of possibility. Bear in mind that this is not a comprehensive guide to laying linoleum. There are reasonably good instructions for that on the linoleum companies’ websites. And I wouldn’t recommend it for anyone who has never laid a floor before.
The basic theory of inlay is that if you put two pieces one on top of the other and cut out a shape in both, both shapes will be identical and interchangeable. The process is similar to marquetry. As an example, let’s say you are doing the teacup inlay shown above. (I don’t suggest trying anything this complex on your first try—this is merely to illustrate the theory.) It uses three colors: cream, yellow, and blue, with cream being the dominant color, and requires three pieces of linoleum, one of each color, all slightly larger than the finished size of the design.
In 1940 you could “write fun all over your nursery,” according to Congoleum-Nairn, with inserts such as these athletes. (Photo: James C. Massey Archives)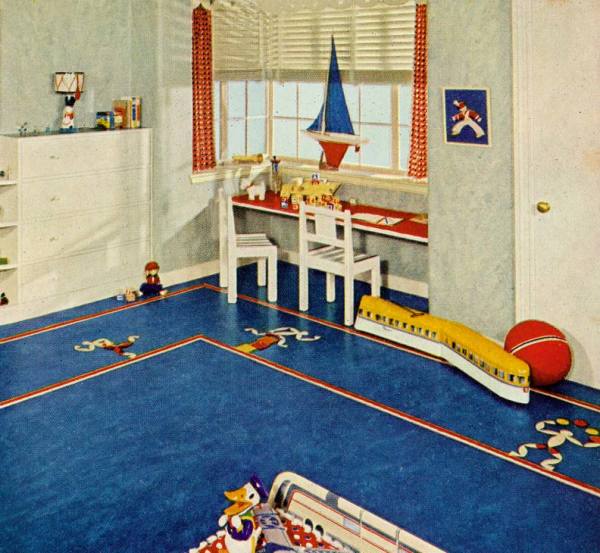
First, lightly pencil lines down the center of the cream linoleum (horizontally and vertically) to help in positioning it on the floor later. Then trace the whole design onto the cream linoleum. (It can either be drawn in pencil or traced with dressmaker’s carbon, which comes in different colors.) Using a linoleum knife or an X-Acto knife with a curved blade, score all the lines of the design on the cream linoleum, without cutting all the way through. Obviously, this has to be done carefully.
Next, slide a piece of blue linoleum under the cream, taping the two pieces together to prevent them from moving. (Blue painters’ tape works well for this.) Once the two sections are taped, cut through all the lines on the cream portion, but only deep enough to score the blue piece underneath. Remove the tape and slide (don’t lift) the cream piece to one side. Place the yellow piece under the blue and tape as above. Cut through all the lines on the blue piece, just enough to score the yellow portion below. Slide the blue piece to one side and finish cutting through the scored lines on the yellow section. The end result is all the pieces of the design in three different colors. If there were more colors in the design, the same steps would be followed, progressing from the most prominent color to the smaller pieces.

Insert the blue sections of the design into the proper places on the large cream piece, removing the matching cream pieces to do so. Then insert the yellow portions of the design into the combined cream/blue piece, removing the corresponding blue shapes. (Note that you can do this with the remaining pieces, getting three decorations for the price of one!) After taping all the pieces together so they won’t come apart in handling, tape the inlay to the floor, matching the centering lines with the ones you have previously drawn on the floor. Score the field linoleum (which has been fitted but not glued down) around the design, slide the design to one side, and cut through the lines on the field linoleum. Remove that piece, slide the design in and check for fit. If it fits, go ahead and glue the floor, saving the design for last.
It’s also possible to inlay a floor that has already been glued—it’s just a little harder to get the piece of field linoleum out, and you’ll probably have to scrape off the glue underneath and put on more adhesive before inserting the inlay. Does this sound like a lot of trouble? Well, that’s because it is. Of course, you could send your design to the local laser and/or water-jet cutting facility and have it cut for you, though you’d still have to insert it in the floor (or pay someone to do so).
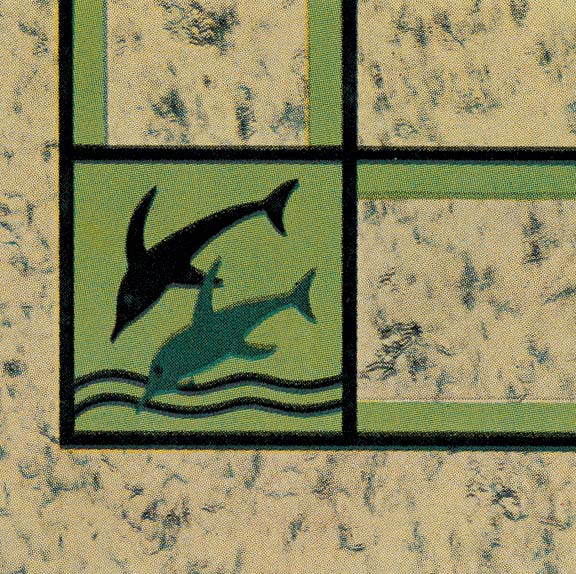
This bathroom, huge by ’40s standards, had not only a floor with linoleum feature strips and insets, but also linoleum walls. (Photo: James C. Massey Archives)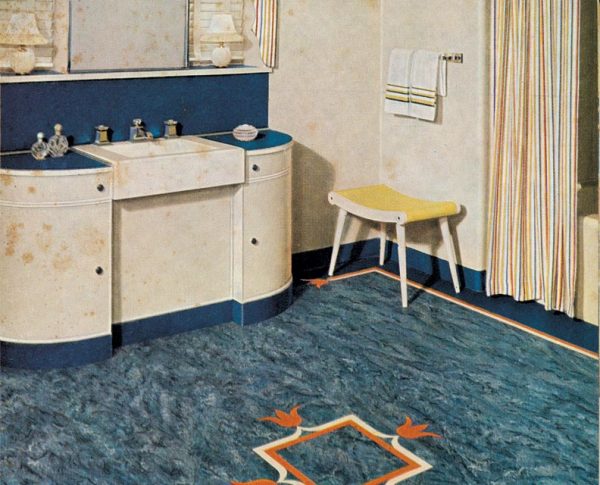
Perhaps an all-over pattern is what you seek. Using the method above, you could inlay motifs at regular intervals all over the floor, though it would be a great deal of work. A simpler method uses 13˝ x 13˝ linoleum tiles, which are much easier to lay than sheet flooring. Rather like designing a patchwork quilt, geometric pieces can be combined to make a complex pattern. In fact, that is the way inlaid linoleum was originally made: The linoleum pieces were cut, laid out by hand in a design, then pressed between heated metal plates to fuse the pieces onto the burlap backing.
The simplest all-over design alternates colors or pattern direction in a checkerboard. By simply cutting a square out of one corner on every other tile and replacing it with a solid color, you can achieve a pleasing pattern. Butting four cut corners together and replacing each corner with different colors result in a retro design as well. The cutting method is the same as for the more complex teacup inlay: lay one piece on top of another, cut through the top piece enough to score the section underneath, remove the top piece, and finish by cutting through the scored piece.

Geometric patterns are easier to cut because the lines are straight. Turning a pattern on the diagonal results in a completely different look. It will be a lot easier to install if the diagonal pattern is set into a square or rectangular border, and the remaining area is filled in with tiles parallel to the room edges, because it’s easier to fit the tiles to the walls that way. It would probably be wise to use a very simple design for your first inlay project.
There are many possible sources for designs, including books, magazines, fabric, clip art, and, of course, your own imagination. Books of quilt patterns can be also useful. Books of copyright-free clip art are available in most bookstores, and stencils can be found in craft stores. The Internet offers thousands of sources: A web search for “clip art” turned up 68,000 sites. Once you find a design, it is easy to enlarge or reduce it at your local copy center. It’s a good idea to work out the design on graph paper first, and then try it on a scale drawing of the room, especially if the room has an irregular shape. It might also be a good idea to practice cutting a design with some scraps first, until you get the hang of it. You might even want to try the inlay process on something that won’t show much, like a closet floor or a shelf liner (linoleum makes great shelf and drawer lining).
Does it still seem like too much work? Then write to the linoleum companies and beg them to reissue some of their old patterns. Otherwise, get out that linoleum knife and start cutting.


