

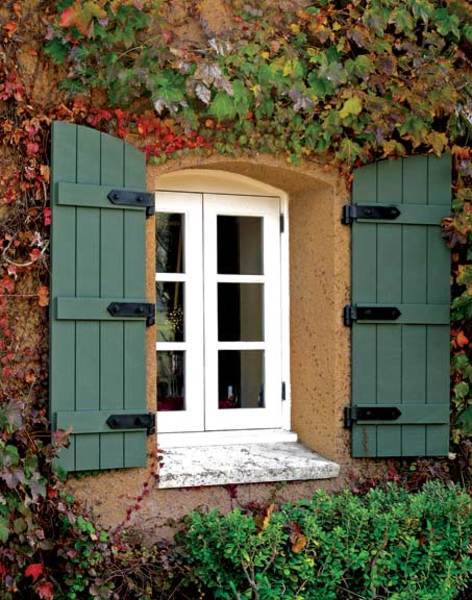
Using rivets to secure strap hinges on shutters can ramp up period authenticity.
Shutters can be a great accessory on many old houses. Not only do they look good, but they’re practical, too, helping modulate light and breezes. They also hearken back to the days when the earliest houses donned them out of necessity, for protection against attacks and intruders. And strap hinges—like those visible on shutters from the 18th and 19th centuries—are a perfect accessory to the shutters themselves, providing period detail as well as an engineering boost.
By design, strap hinges add strength to standard stile-and-rail construction because the strap overlays mortise-and-tenon joints with a layer of iron or steel. Today’s reproduction strap hinges get attached with factory-manufactured screws. The originals, however, were secured into place using rivets—visible as a large, hammered head on the outside of the shutter, and a lump of metal on the interior. After many decades of use, original rivets can wear out. But re-creating rivets is a fairly straightforward job, well within reach of a handy homeowner aiming to restore the appearance of an original, rivet-fastened strap hinge, or secure a reproduction strap with a period detail.
History First
Rivets are a simple technology—bars of soft iron with a convex head formed onto one end. Their straight shaft is driven through the metal object being fastened and “peened” over it (hit with the ball portion of a ball peen hammer). This hammering action mushrooms the head, making it wider than the shaft and hole, and locking the rivet into place. There is no screw to loosen or nut to work free, creating a simple, effective, and lasting fastener. Today we usually associate rivets with enormous steel constructions like skyscrapers, highway bridges, and ocean liners. But in the 18th and 19th centuries, rivets were a common means of fastening strap hinges to shutters and doors. Because they were inexpensive and quick to install, rivets were a favorite among era builders and tradesmen.
Creating Rivets
A
Today, a number of blacksmiths will supply rivets. But if you have a source of high heat like a torch, you can make your own. Most people can produce visually convincing and fully functional rivets after a simple trip to the hardware store. Start by purchasing carriage bolts the same size as the hole diameter on your strap hinge, and long enough that the unthreaded portion is at least ¾” longer than the thickness of the shutter. You’ll also need a canister of MAPP gas (methylacetylene-propadiene, a high-temperature fuel) and the appropriate gas nozzle. (Propane isn’t quite hot enough for this job.)
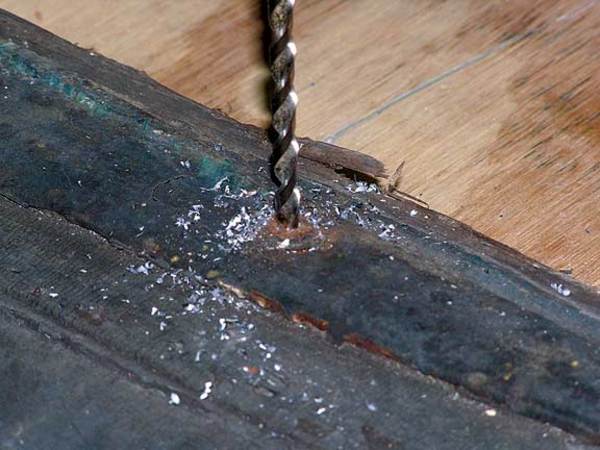
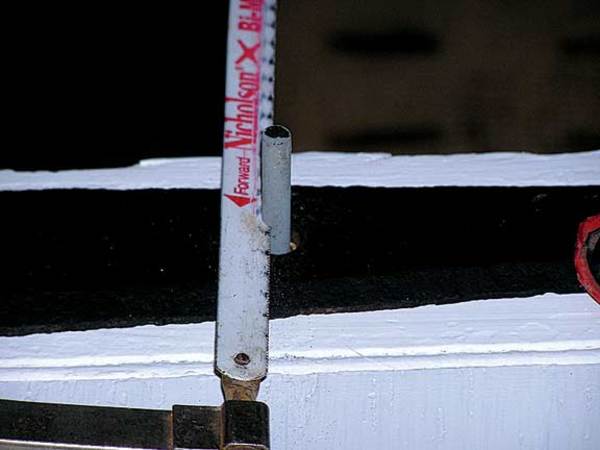
Before you begin, you’ll need to remove any existing rivets [A]. Strike the center of the rivet on the hinge side with a center punch or nail. Drill into the center with a 1⁄8″ drill bit, about 3⁄8″ deep. Successively increase the size of your drill bit until the rivet’s peened end is cut free. Then, use a nail set or pin punch to remove the remainder of the rivet.
B
C
D
E
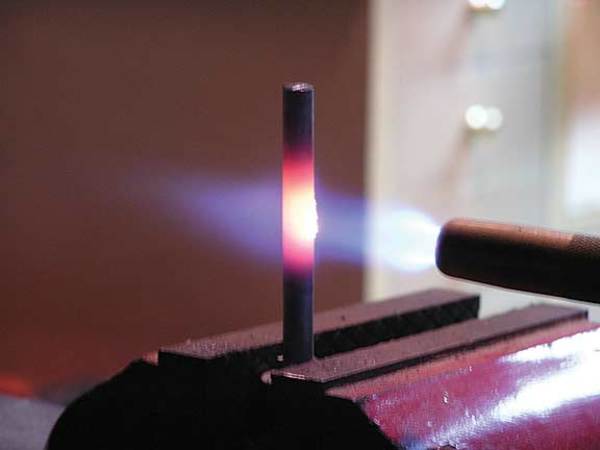
Prepare the carriage bolts by cutting away excess length; they should be ¾” longer than the shutter/hinge assembly. Then, stand them head-up in a vise and file or grind away the square head to match the round shaft [B]. Next, flip the bolt around and heat the last inch or so with the MAPP gas torch until it glows bright orange [C]; this process anneals, or softens, the metal, making it easier to peen. (Note: Always don appropriate safety gloves and goggles when filing and working with the torch.) Let it cool overnight (do not quench it in water; it will harden the metal). Once the bolt has cooled, lightly sand it and spray it with a rust-inhibiting primer.
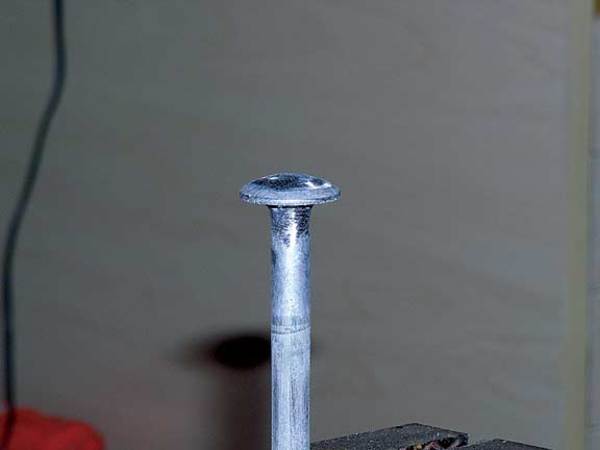
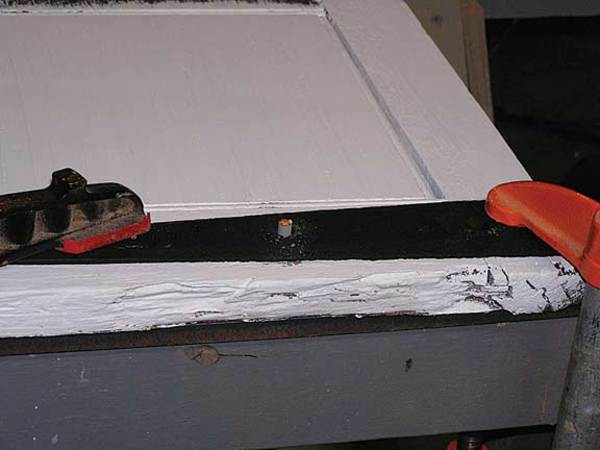
Insert the bolt through the shutter hinge. Next, use a hacksaw or angle grinder to cut off all but ¼” to 5⁄16″ of the area protruding above the hinge [D]. Clamp the shutter and hinge securely over a strong, flat surface to prepare for peening [E].
F
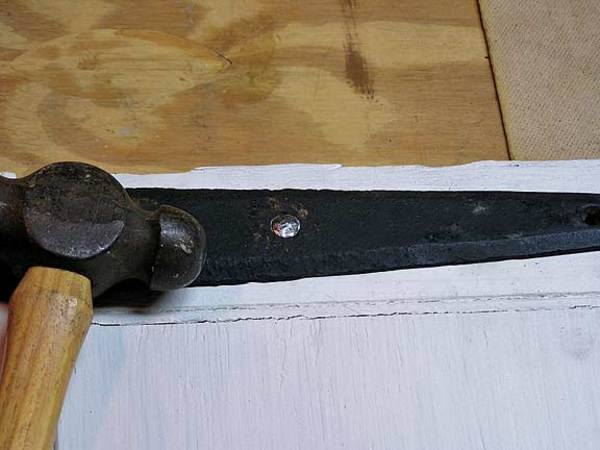
Wearing ear and eye protection, strike the center of the protruding shaft with the ball portion of a ball peen hammer [F]. With a little practice, you will be able to mushroom the metal evenly around the shaft until it forms a shallow mound covering the hole.
If the metal was sufficiently softened, peening will take no more than five minutes per rivet. When you have finished peening all the rivets, the hinge should sit tight. Finally, coat the hammered ends with a clean metal primer and paint with two finish coats of paint. Your finished shutter—accented by era hardware—should function for another century.


