Wood Dutchman Patch
Before you can rehang an old door in a new space, you inevitably have to prepare it. Prep work often includes carpentry like repairing a rotten or broken mortise-and-tenon joint, cutting down or building up the door to fit the frame, and patching old latch holes and hinge gains (the notches that hold the leaves) with wood Dutchmen. To make a Dutchman repair, you cut and fit a piece of new wood to replace the damaged or missing wood using the following basic steps:
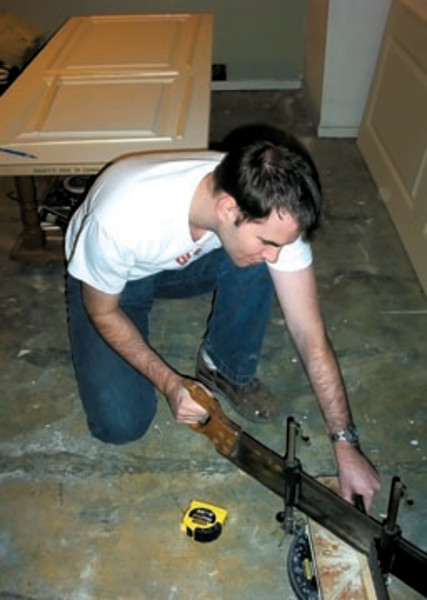
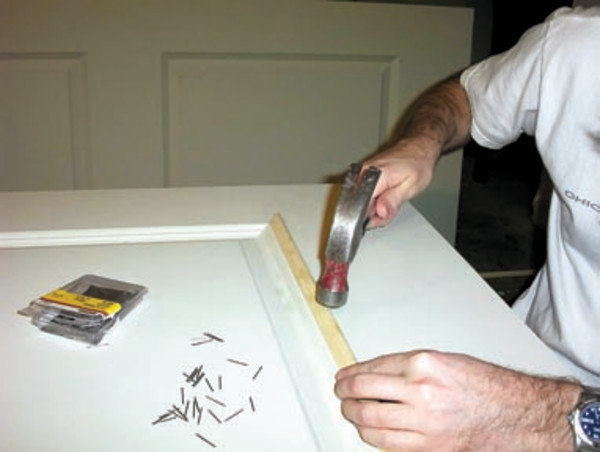
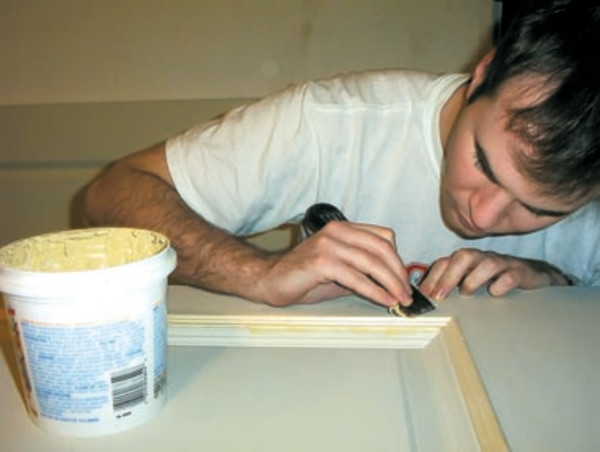
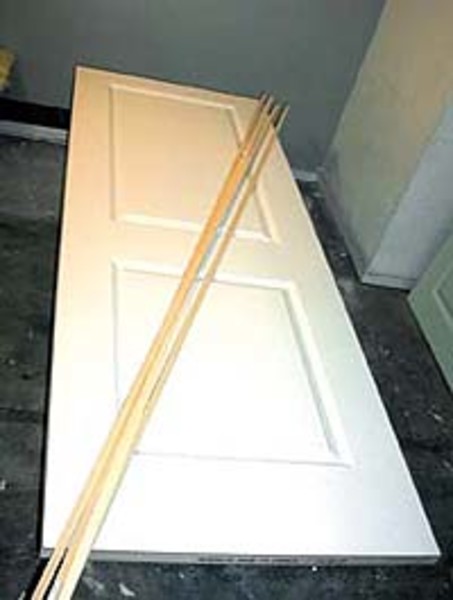
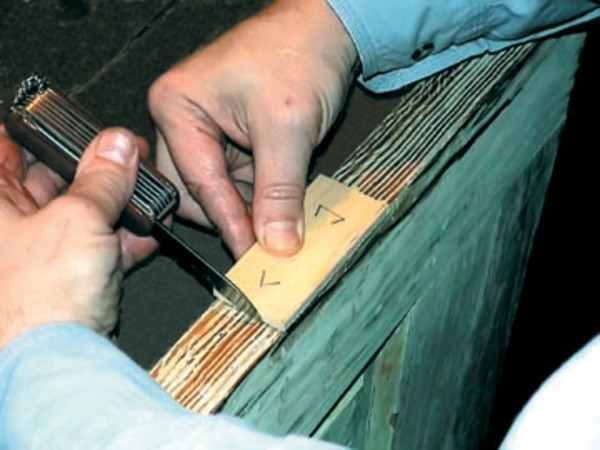
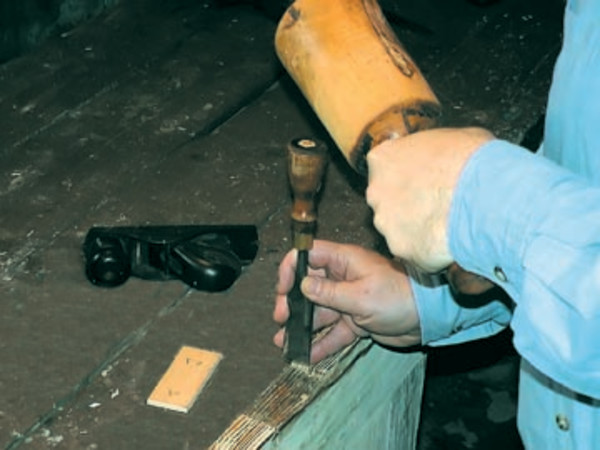
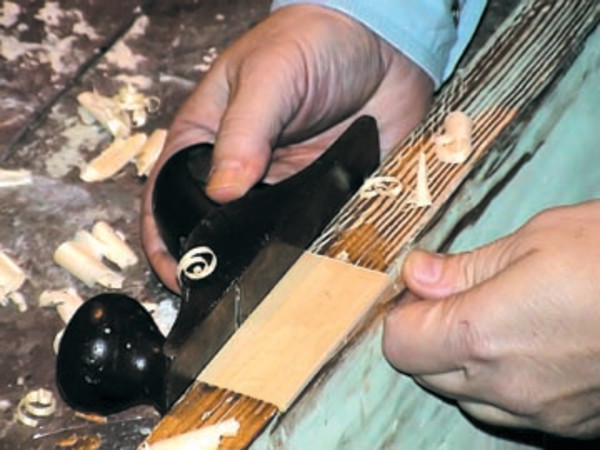
A B C D 1) Scrape paint buildup from the repair area, exposing bare wood. 2) Cut a slip or block of wood a bit larger in all dimensions than the repair area [A]. 3) Hold the wood firmly over the repair area and scribe a mark that outlines the wood block on the surrounding surface [B]. 4) Chisel out the surrounding wood accurately to the scribe marks to form a pocket so the block of wood will press-fit tightly into the pocket [C]. 5) Glue the block of wood into the pocket. Usually the press-fit will hold the block in place well enough, but you may need to tack or clamp it. 6) With a sharp plane or chisel, plane down the proud surfaces of the block until they are flush with the surrounding surfaces [D]. Here, Chris Pehlke of Ontario, Canada, shows us how he dresses up a Medium Density Fiberboard (MDF) door with wood moldings. These modern door products are manufactured as a single unit by forming wood particles and binder in giant presses. Though some come in designs that try to imitate traditional door and molding patterns, they may look “stamped out” next to the authentic early millwork in your house. (Some even have textured surfaces that imitate wood grain, but stand out clearly as fake when compared to early doors that were almost always planed smooth.) To improve vintage appearance of an MDF utility door for a better fit with his early house, Chris adds moldings around the panels, similar to the traditional practice. 1) Select a door product that is similar to other doors in the room or floor—that is, with the panel pattern and style (raised or flat panels). If you are planning on using antique-style hardware, order the door unmilled (without holes for the door knob and hinges), and smooth (if you don’t want the fake surface texture). Allow advance time because you may need to special order. Moldings can be wood or plastic. Select a profile similar to others in your house, one with bold features that casts nice shadows. Skip over the washed-out designs that look like they are from an animated cartoon. A 2) Trim the moldings to length at a 45-degree angle with a miter saw [A], creating miter joints. Sand off any burs or splinters to ensure a tight fit on the corners. Back off the bevel along the bottom edge slightly with a sanding block so the top of the joint that shows fits nice and snug. Lay out each piece as you go around the panel to test the length and fit. Finally, test-fit all your parts at once to ensure a tight fit and to make any adjustments. B 3) Glue and nail each piece as you go around [B]. Use a flexible, water-based glue and thin brads. The glue is what actually holds the moldings to the MDF door. The brads only hold the moldings in place while the glue sets, so two or three per side are enough. First, lightly tack each piece to the door, so the points of the brads just barely penetrate the door’s surface. Then take it up and spread on the glue. Place the piece back on the door, locating the brad points in their holes, and drive in the brads with a hammer. With a damp rag, wipe off any excess glue that squeezes out from under the moldings. 4) Set the brad heads with a nail set so they are about 1/16″ below the surrounding surface. Let the glue set before the next step. C 5) Fill in the nail heads and fill any gaps between the moldings and the door and at the joints [C]. A water-based spackle may dry quicker than some others, but any wood filler with a thin consistency will work. Allow the filler to dry. 6) Sand around the moldings, and the door is ready for hanging. Clean, prime, and paint the door after hanging to prevent damaging the paint during all the drilling, mortising, and handling of hanging. John Leeke is a preservation consultant who helps homeowners, contractors, and architects understand and maintain their historic buildings. Learn about pocket door repair.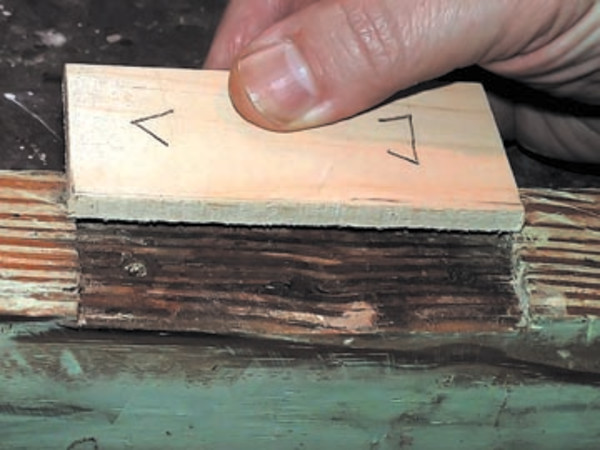
Faking It