

Wall-lining textiles apply with adhesive like wallpaper and are ideal for covering multiple cracks and surface imperfections.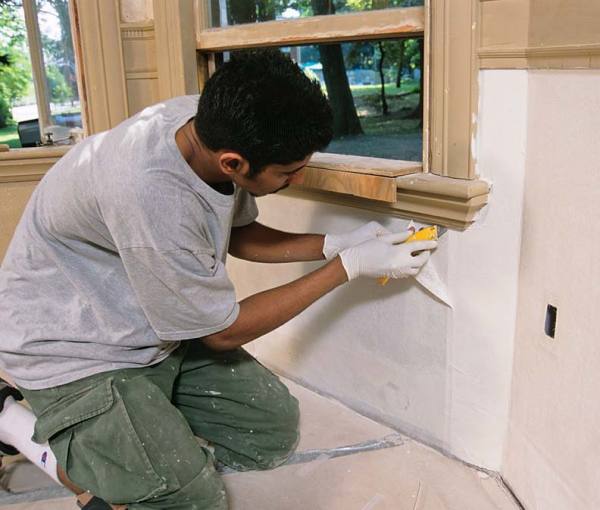
Need to tackle some plaster repair? Flat plastering is a time-honored, magical craft, the process of mixing dry powders and water into wet, plastic mortar, then spreading it over entire walls so that it creates a surface that is die-straight and alabaster smooth. Skill and handed-down trade practices are the secret ingredients in traditional plaster, and they help make it a durable, original, and beautiful finish that old-house owners go to great lengths to keep. In contrast, flat plaster repairs are usually much smaller and more variable, with techniques adapted to the many kinds of damage and decay, from tiny cracks to large holes, and through hard-won experience. Though being handy comes into play here, too, repairs often gain as much from clever products specifically made to improve the results and assist the ad hoc plasterer. What we’ll explore here is an overview of these methods and materials to explain what’s possible with plaster repairs and how they can help you retain the solidity and beauty of three-coat plaster walls and ceilings.
Historic plaster walls that have stood up well for decades can start to fail for a number of reasons. Pre-industrial plaster from the 1850s or earlier may be affected by shortcomings in the materials themselves, such as lime of uneven quality or sand that contains impurities. A more likely cause, though, is dicey installation conditions, such as plastering in weather that is too hot or humid (which can keep the plaster from setting) or too cold (which causes the plaster to freeze before it can cure). Then there’s just the toll of time—movement of balloon framing, for instance, or roof leaks that saturate a ceiling or wall, stressing the plaster and lath with the added weight of water while leaching out binding materials.
Cracks and Surface Problems
Cyclical cracks are the bane of antique walls and must be repaired with care to avoid reoccurence. First, dig out the crack in an inverted V (top) that undercuts the plaster, vacuuming out all debris. Next, thoroughly wet the crack with water, then apply bonding agent with a brush at the undercut edges (middle) to help new plaster bond to the old. Then fill with patching plaster (bottom) to slightly proud of the surface and sand flush when dry.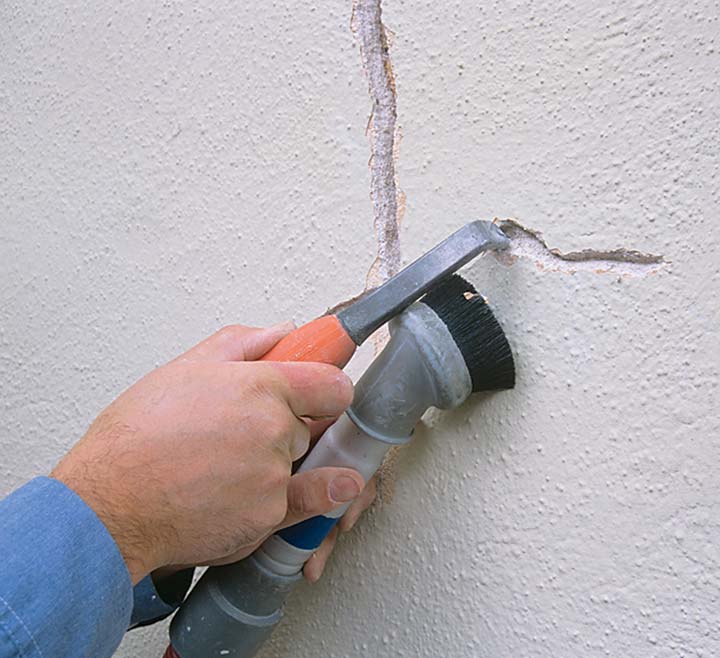
Small, hairline cracks traveling in random directions are generally not evidence of plaster failure, but they can be unsightly and something you’ll want to address before repainting. In these cases, first open the cracks with the point of a can opener or a tool made for this purpose, then fill with spackling compound. Many cracks, however, are cyclical, and these you can’t just cover with a quick swipe of a putty knife and spackle because they’ll only return with the next seasonal expansion or contraction of the building. Here, the better approach is to bridge them with drywall tape or fiberglass tape made for this purpose, then cover with drywall joint compound, which is more flexible than rigid plaster products. Even better, if the cracks are large or known to be reoccurring, dig them out in an inverted V that undercuts the plaster to provide added anchoring. Then vacuum out all the debris, wet the new surfaces with a bonding agent to aid adhesion, and fill with patching plaster.
When you have plaster that is fundamentally sound, but riddled with too many hairline cracks to cover one-by-one, a good option to consider is canvassing the wall. In this traditional technique, you first prep the wall, removing any loose paint and filling plaster defects. Then, after applying adhesive, you cover the entire surface with sheets of fabric—originally canvas, but now usually a modern, manmade fiber product made for this purpose. Canvassing has been used for generations on new walls to create a high-quality surface for decorative painting or expensive wallpaper. In old houses, though, it’s a very effective upgrade for covering problem cracks or smoothing walls that have grown uneven through years of minor repairs, repaintings, and wallpaper removal.
Get step by step instructions for your plaster repair.
For finish coats, patching compound is OK for small areas, but finish plaster is preferred for large holes. Do your best to match the overall character, as a patch that’s too rough—or too smooth—may be obvious under paint.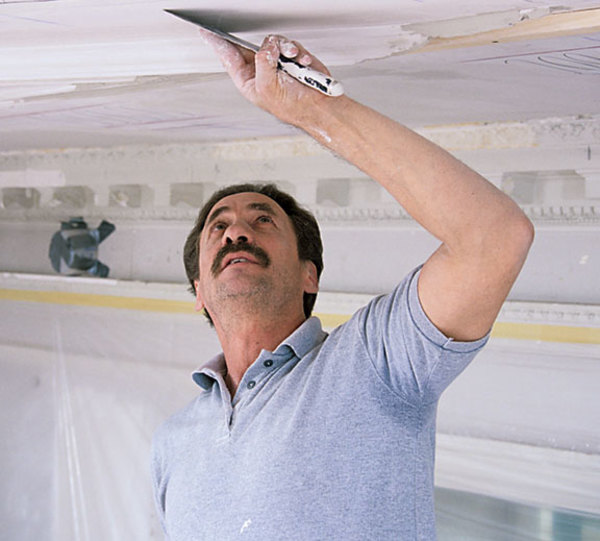
Holes and Cavities
Shallow surface gouges and small holes left by the likes of picture hooks can be effectively filled in one application with a good cosmetic patching product or spackle—even drywall joint compound works. However, when the hole is so deep it’s down to the scratch and brown coats, the repair requires two applications because a one-step patch will tend to shrink, leaving a concave surface. For small holes less than 5″ or so across, first clean the hole of any loose materials and wet down the exposed plaster with a water from a spray bottle to improve adhesion on the next steps. Next, open a bag of perlite-and-gypsum plaster (such as Structo-lite from USG ) and mix up a small batch with water to a wet, mortar-like consistency. Then trowel it into the hole to just below the surface, filling the void and leaving the surface of the mortar rough. When the perlite-and-gypsum has set up (in about 24 hours) return and fill the hole flush with finish plaster or patching compound.
For holes larger than 5″ across that are open right down to the lath, you need to take more involved measures. First, begin by wetting down any wood lath to keep it from twisting as well as sucking the moisture out of the new work. At this point many repair plasterers like to beef up the patch by cutting a piece of wire lath to fit the hole, then nailing or wiring it right over the wood lath. Afterwards they brush bonding agent on the old plaster edges as well as the lath. Whatever lath path you choose, the next step is to trowel in a scratch coat of perlite-and-gypsum the same thickness as the old coat. When the scratch coat has just set, to aid adhesion of the next coat, score it with a nail and let cure. Then follow up with a brown coat and thereafter a finish coat. To reduce chances of cracks between old and new work, lap each new layer of plaster over the old plaster so they are evenly joined and stepped for maximum strength. If the old plaster is slightly wavy or has other obvious characteristics, do your best to emulate these irregularities in the finish coat so the patch will be as inconspicuous as possible.
Loose Plaster and Broken Keys
Expanded metal mesh is the modern lath common since the 1920s and widely used for large repairs. Here, a piece is cut to the patch shape and screwed right over the old wood lath to improve anchoring for the plaster scratch coat.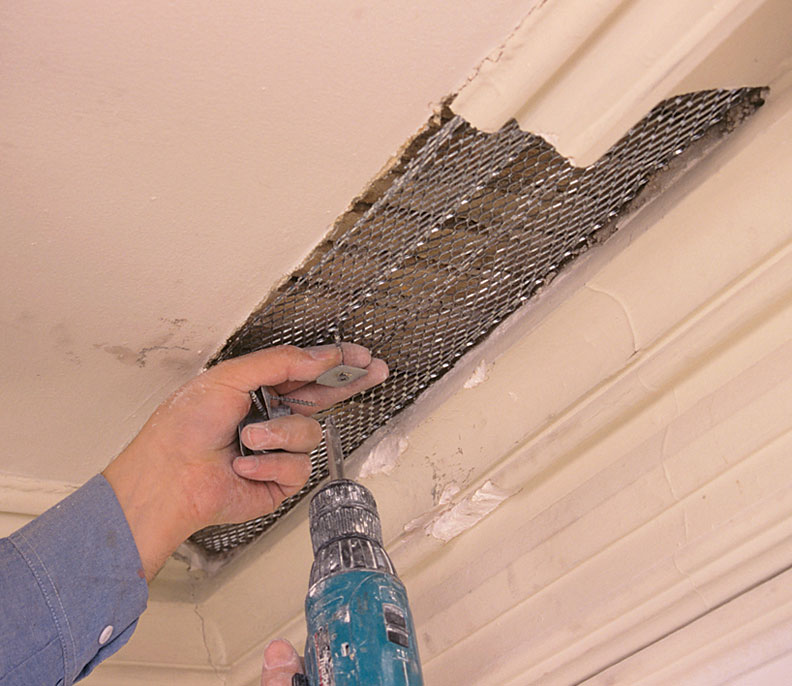
Sometimes the flat plaster in an old house is basically intact but showing signs of bowing—even moving. This is evidence that something has broken the keys and allowed the three coats to migrate away from the wall, a condition that, if left alone, will lead to collapse of the plaster. While this may sound like a lost cause, if the plaster otherwise retains its integrity, there are two techniques worth trying before resorting to a total replastering. The first is to try re-anchoring the plaster from the finish side with plaster washers—small, thin, countersunk metal discs attached with flathead screws, available from plaster suppliers or by mail order (such as Charles St. Supply). In this scenario, assess where the plaster is coming away from the lath and determine if it can be moved back into position with gentle pressure. (If the results are promising, but not complete, try making a hole or two at the bottom of the bulge to vacuum out debris that has fallen between the lath and the back of the plaster.) Next, locate and mark the position of the wall studs on the plaster. Then, have an assistant hold the plaster back in position while you secure it with plaster washers at strategic places. When the plaster is anchored again, skim-coat over the washers to hide them and finish the surface (see Sept/Oct 2006 OHJ for more on skim-coating).
Plaster washers may be practical for re-anchoring plaster where the only access is from the finish side.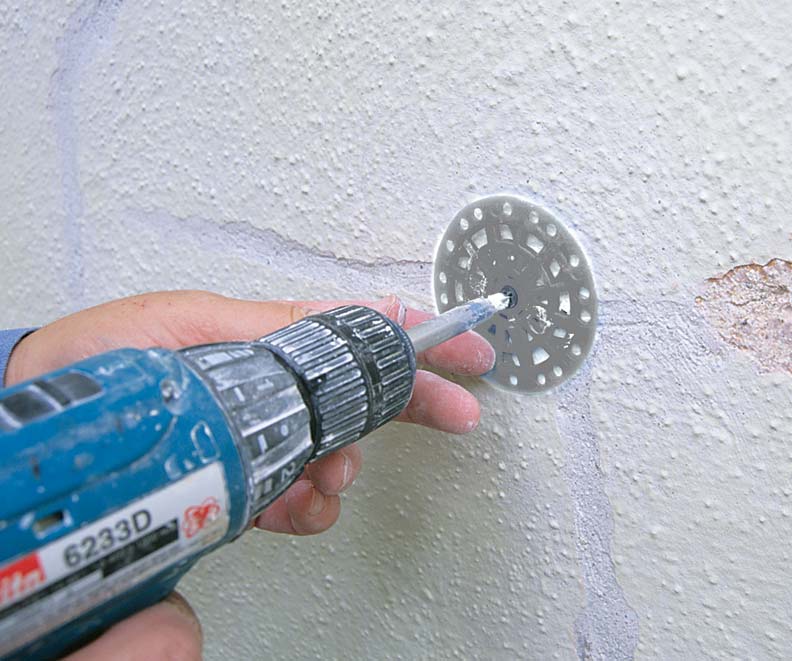
If you are fortunate enough to have access to the backside of the plaster—say, from an attic or by removing floorboards in the case of a ceiling—you can try re-securing the plaster from this hidden side. Begin by assessing the bowed part as before, and removing any debris that prevents the plaster from returning to its original position. Next, bore a series of holes 1/4″ to 5/8″ in diameter along where you need to reattach the plaster, inject construction adhesive into each hole, and gently press the plaster back into position, holding it there with braces until the adhesive has cured.
While this approach may not be appropriate for historically significant plaster or museum-level conservation, it can be an effective alternative for retaining the original plaster and avoiding the expense of wholesale replacement with drywall.


