


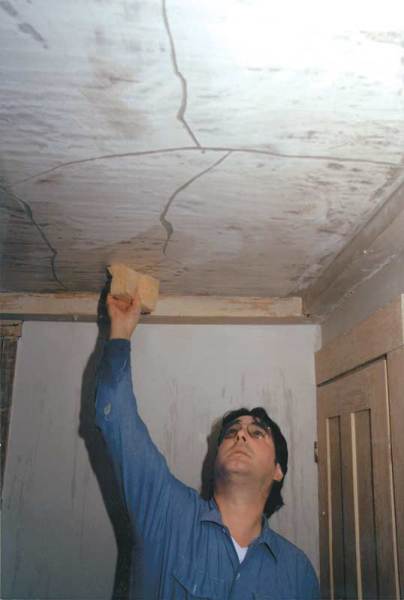
Because this plaster was becoming detached from the lath (delaminated), it has been marked for reattachment. The crack is notched and ready to be vacuumed out. (Photo: The Lords)
It’s rare to see older plaster without any cracks, and there are those of us who find cracks part of plaster’s aesthetic character and charm. Make no mistake, though: Cracking can be serious and lead to further plaster damage if not taken care of.
Cracks occur for a variety of reasons, many of which are simply the natural reactions of plaster compounds and building materials. Climate and temperature changes, buildings settling and moving over time, weight loads, chimney movement, and environmental stresses (heavy traffic, nearby trains, construction blasting) all contribute to plaster cracking. Cracking is further exacerbated by any structural disturbances or building repairs (foundation or sill work), leaving a building unheated during the winter, or deteriorating framing and timber (rotting sills, weak floors and joists, insufficient framing).
One or more of these conditions affect most older buildings, so it’s a good idea for their caretakers to learn some basics of plaster repair. Crack repair is a good place to start and will provide a foundation for other damage control, such as patching and skimming. If you do it correctly, you’ll have long-lasting or even permanent results. If you use a quick fix such as spackling, taping, and/or repainting, the crack is likely to come back. We sometimes use fiberglass tape for hairline cracks, but it requires multiple layers of patching material to cover and camouflage it. So unless we’ll be skimming the entire surface we prefer a dig-out and infill method.
For a sound repair to any crack, you must stop the plaster on each side from moving or shifting, and the substrate material (wood or rock lath) must be solid and secure with no bouncing. Push gently on the plaster on each side of a crack to test for movement. If it gives, or has delaminated 1/8″ or more from its substrate, you’ll need to make additional repairs such as reattachment. If the substrate is weak, some sort of stabilization is necessary. Assuming that you have a crack in stable plaster, we find this method very successful.
First remove the plaster from the crack by digging it out down to the wood or other substrate material with a sharp utility knife. Have lots of extra blades on hand for this. Following the crack, create a V-notch by removing the plaster along both sides of the crack, cutting at an angle until you see the substrate. You want to open up the V-notch so that it is approximately 1/4″ to 1/2″ wide at the opening and as narrow as possible next to the substrate material. This angle will give your infill material maximum bonding surface without sacrificing too much plaster around the crack. You will also be minimizing the amount of debris that you might push into the lath and behind the plaster, causing more damage. If the plaster around this area is delaminated, you can complete any reattachment at this point.
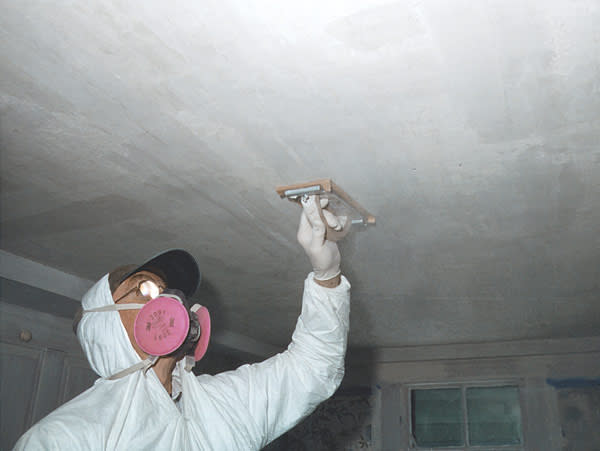
Next, vacuum out the crack, then carefully remove additional debris and dust with a small hand broom or paintbrush. Use a spray bottle and damp sponge to clean the dust off the plaster and prepare the surfaces for infilling with 1) a setting-type compound such as Durabond or 2) plaster such as gauging or plaster-of-Paris.
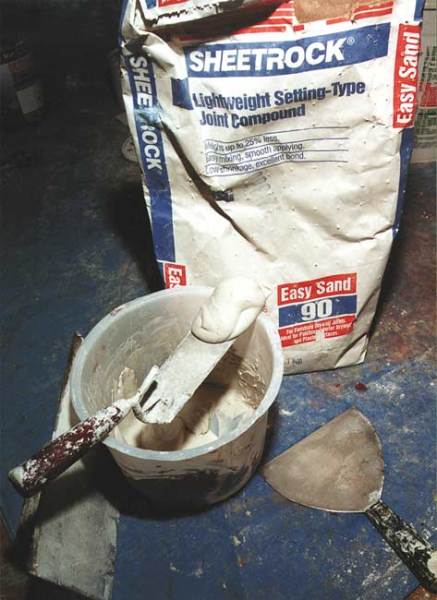
Durabond is a setting joint compound with plasterlike qualities, a built-in bonding agent, and a range of available setting rates—45 or 90 minutes are most common. Durabond also comes in sandable or nonsandable versions. Nonsandable dries harder and slightly stronger, and we usually use it for the first coat. If you’re less experienced you may want to use sandable Durabond throughout so you can sand away any excess. When you’re ready to infill the crack, get your spray bottle again and thoroughly wet the V-notch, both inside and 3″ on each side. This damp surface will let you remove buildup from your infill products.
You should mix Durabond to peanut-butter consistency. Push it into the crack perpendicularly from each side so that you are “smooshing” it under the plaster, achieving a little reattachment in the process. We use a 6″ joint-compound knife for this. After each infill application, hold your knife almost perpendicular to the plaster surface and pull it along the notch to scrape off excess filler and leave the filler flush with the surface. The filler will shrink as it sets up, requiring two or three coats. We normally use sandable Durabond for the final coat so we can provide a final touch-up with a 150-grit sandpaper block.
If you’re more of a purist and prefer to use “real” plaster to fix your cracks, you should follow the same digging, vacuuming, and washing process to prepare for filling. Be aware that plaster sets up much more quickly than Durabond, is very difficult to sand, and requires a little more skill in application. Also, when the crack is ready for infill, you will need to brush on a bonding agent because plaster won’t stick on its own. We prefer acrylic bonding agents, available from plaster supply houses and many concrete-product suppliers (USGS, Weld-O-Bond from Silpro, Plaster- and Concrete-Weld from Larson’s). Many are colored, letting you clearly see where you have painted them on.
A bonding agent works by providing a consistent surface for a new compound to adhere to. When wet, it bonds with the plaster and holds it onto the adjoining surface. It does not need to be fully dry before you apply the plaster. If it does dry, it will remain active for up to a week, but don’t push your luck—it can get wet only once.
You want to mix plaster to a thick-yogurt consistency. You’ll get the proper ratio if you put cold, clean water in a small container and add plaster to it until the water disappears. (A container roughly one-third of water will mix up to a container full of plaster.) Once you’re done stirring, you have about 15 minutes to work with plaster-of-Paris, up to 30 minutes for gauging plaster. As with Durabond, fill the crack by coming at it perpendicularly from each side to push the plaster into and under the crack. Scrape the excess off the surrounding area but leave it proud, or slightly bulged, on the surface. Use a damp sponge to wipe any excess plaster off the surface surrounding the crack. As the plaster turns rubbery, spray it down slightly and begin to work it again, scraping off excess fill (it will have a creamy consistency) and pushing it further into the crack, or into other areas where the infill is dipping slightly. It’s important to keep it damp enough to prevent drying out before it sets up. If plaster doesn’t have enough moisture to fully set up, it will lack strength and integrity. You can tell when the plaster is drying because it will change from grey to white.
If you finish filling the crack and it dents in slightly, you can go back and perfect the repair with a coat of sandable Durabond. To properly prepare repaired surfaces for repainting, we use a one-to-three vinegar and water rinse to restore the surface pH. At this point your plaster is ready for priming and painting.
Peter and Noelle operate Peter Lord Plaster & Paint, Inc. specializing in the preservation and restoration of historic surfaces, and all plaster systems. www.plasterlord.com


