

The key to textured finishes is experimentation. Plaster has a way of pointing you in the right direction, as long as you are open to making adjustments according to its needs.
Real plaster walls are so rare in modern construction its easy to assume they can never be more than flat, neutral surfaces. However, once you see plasterwork of the past, you can appreciate what’s possible with the free play of this timeless material. After studying an exhibition of Roman frescoes rescued from the volcanic ash of Mt. Vesuvius, I was impressed with how ancient artisans manipulated simple lime-and-sand mixtures to create vibrant textures and colors—fitting backdrops for their fine breads and rich cheeses. American artisans brought out the personality of plaster again in the early 20th century, creating beautiful forms and decorative effects with names like Italian Plaster, Roman Tile Finish, and Spanish Palm Finish for houses built in revival styles.
Learning how to reproduce plaster textures of the 1920s and ’30s for repairs or additions to old houses can be a rewarding experience when you employ the appropriate materials. Though many of the original, handed-down trade formulas and practices are lost, the key—simplicity—is right at hand, especially if you’re attempting to duplicate traditional work with modern materials. Take the confusion out of common repairs, and begin your plaster project with lime and sand. Not only are the plaster recipes for these materials essentially unchanged over the decades, they are compatible with historic construction practices without relying on additives such as acrylics, accelerators, retarders, and binders. Once you learn how to control moisture loss to the base that’s receiving the plaster, you can use your creativity and enjoy the effects that spring from the action of a trowel and a few common tools.
Mixing Plaster
To prepare the plaster mix, place a trowel-full of lime putty on a board or slab of marble, form it into a caldera or doughnut, and fill it with clean water.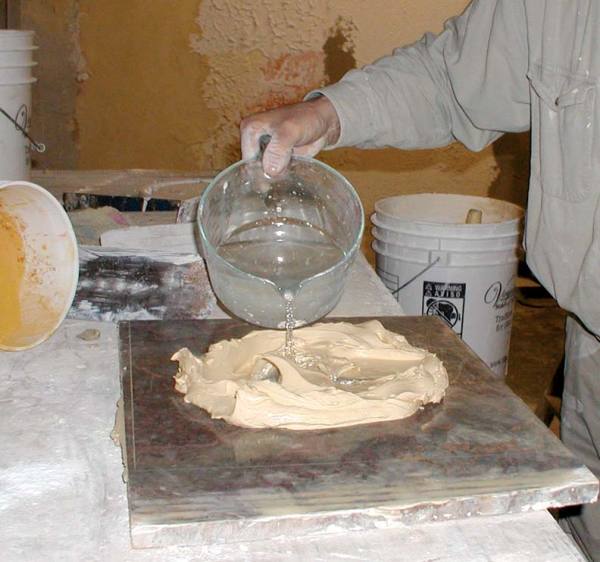
To the salespeople at a masonry supply house, a textured finish coat may mean a splattered application of drywall compound (or a mixture of acrylics made for a franchise ethnic restaurant), but this is definitely not what you seek for historic restoration or even new additions. So for the moment ignore the plethora of plaster products out there and note that the raw materials for textured plaster can be boiled down to a mixture of water, sand and natural hydraulic lime. The recipe I like to use is natural hydraulic lime mixed with sand in a ratio of 2½ to 1—that is, 2½ buckets of sand to 1 bucket of lime powder, or whatever volume you can use comfortably in a few hours.
Begin with a flat surface, such as a sheet of plywood laid across sawhorses, and start with a small batch—say 7½ cups of sand to 3 cups of natural hydraulic lime mixed together dry. Next, shape this mixture into a volcano cone, scoop a hole in the middle of the dry batch, and fill it with water, being careful to add just enough water to obtain the consistency of thick pancake batter. After slowly pulling the dry material up into the water and letting it soak for a few minutes, mix it together with a trowel and let it set for about fifteen minutes or so to fatten up and become thicker and fuller.
Add gauging plaster or gypsum, and mix well. This lime putty mix will set up in about 15 minutes, so only prepare small amounts at a time.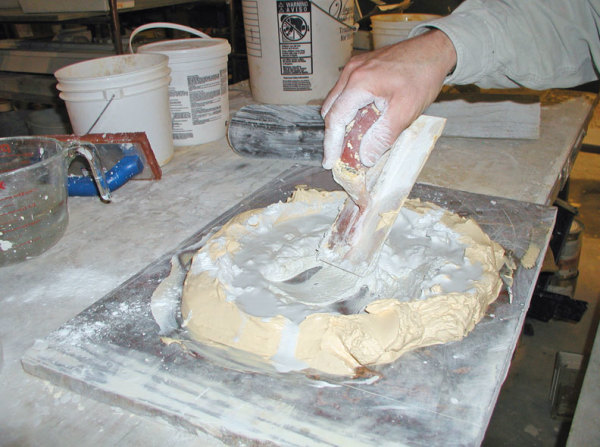
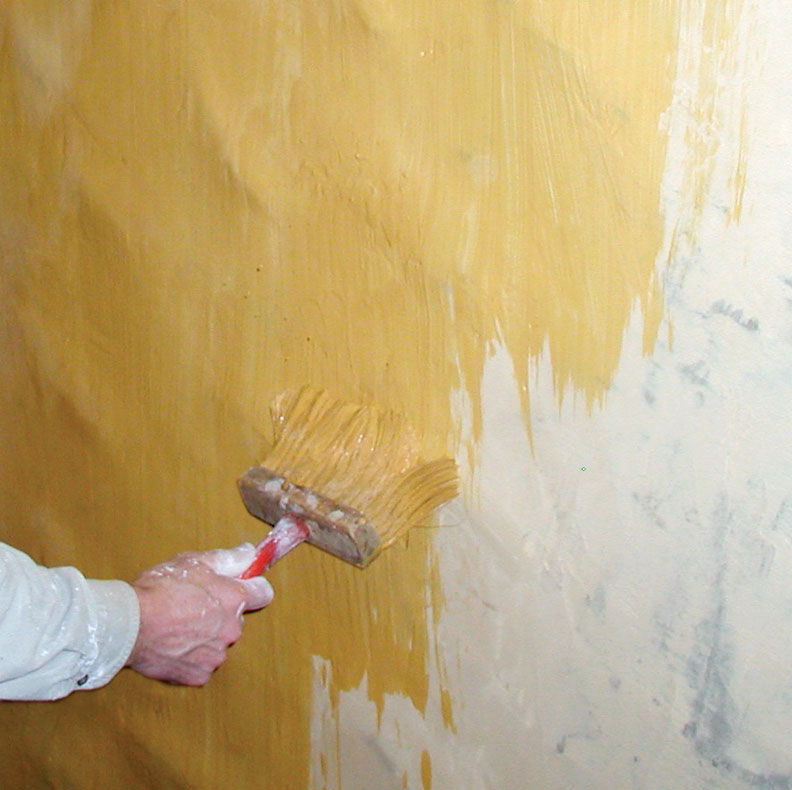
Meanwhile, turn to the portion of the wall that you are going to plaster, making sure it is clean of any grease or smooth paint, and wet it down thoroughly with a mason’s brush or spray bottle. Notice how the wall absorbs the moisture. Wetting down is critical for adhesion because the water will transport the plaster into the base material so it becomes an integral part of it. (Old plaster walls, concrete block, soft brick, metal lath, and wood lath are all good bases for new lime plaster.) If the surface is painted, glazed tile or brick, or has insufficient suction, you cannot expect the plaster to bond. In this case, either chip the surface enough to produce a porous substrate or apply a plaster bonding agent. (Bonding agents are acrylic liquids sold in convenient quart cans or gallon jugs that you brush or roll onto the wall prior to applying plaster.)
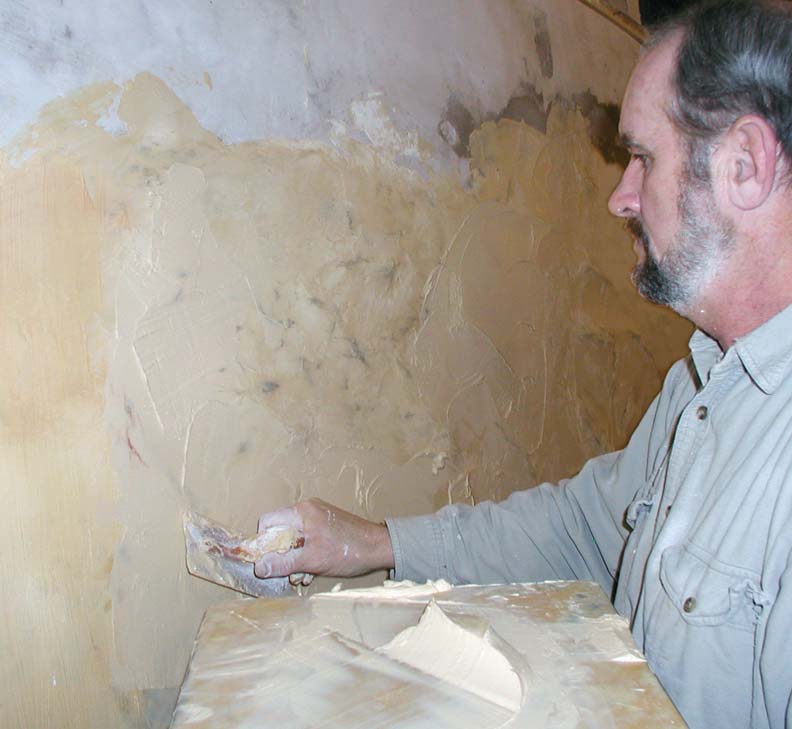
For thick coats of plaster over masonry substrates or lath (the situation for most repairs), begin by troweling the lime-and-sand mix onto the wood lath, metal lath, or moistened wall. Lay the plaster on about 3/8″ thick, then notice how it behaves when you apply a wooden trowel to it. You will be able to rub the surface to flatten it without bringing water out, so you can form the plaster for rounded corners or around obstructions in the wall.
Always use a wood float to smooth and flatten the surface—not the steel trowel, which you should reserve for initial application and finishing operations. This is because if you over-trowel with a steel trowel while leveling or otherwise shaping the surface, excess water may migrate to the surface. This robs the plaster of the suction needed at the wall, and the new plaster will fall to the floor. If this happens, simply wait for the wall to dry somewhat and reapply the lime-and-sand mix.
Finish Experiments
As you apply putty, pace your work so the margins of the last batch are damp enough to bond with the next batch. Feather the batches into each other for a smooth transition.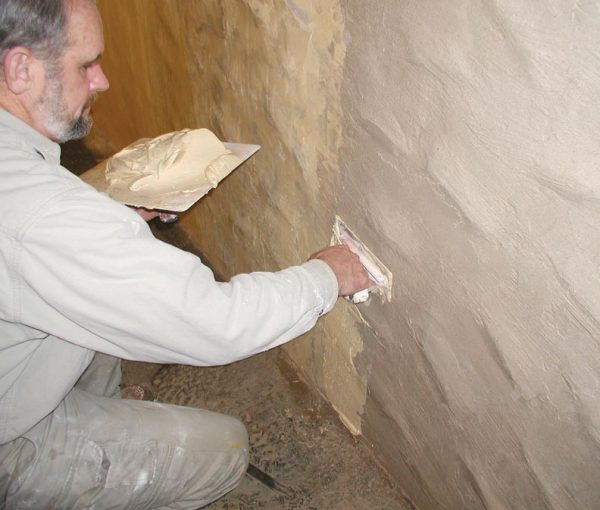
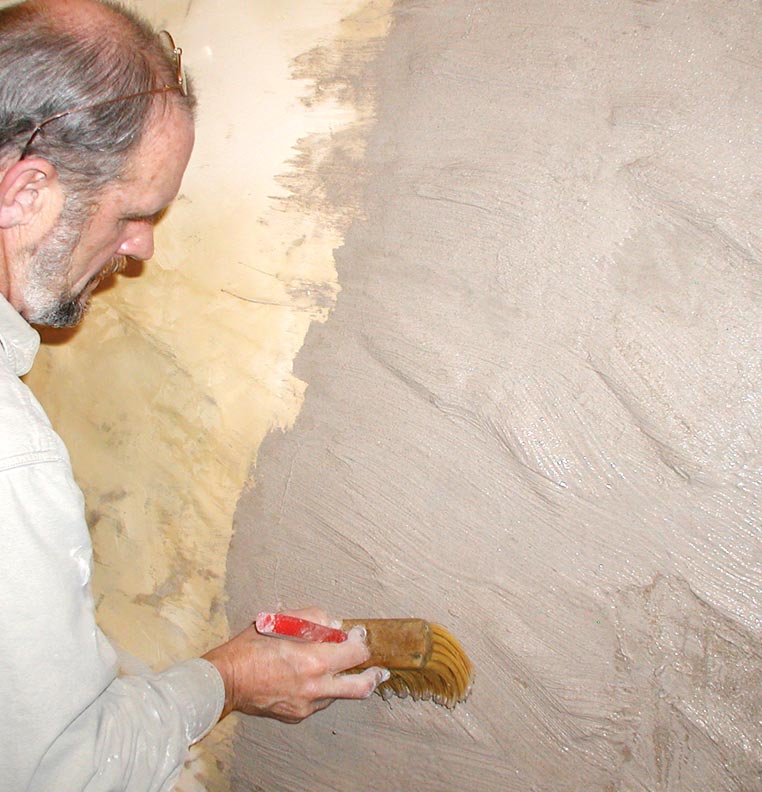
At this point, you’re ready to start experimenting with textures. First, try broadcasting the plaster onto the wall with a brush, covering it with an even splatter of fine or rough surface. Next, grab the steel trowel and compress the raised surfaces somewhat, while noticing how the time you wait until troweling affects the final texture.
Alternatively, take up a brush and stipple the surface of the wet plaster wall to obtain a rough, natural look. Aside from color, texture is the most interesting way to vary flat, plain walls unbroken by pattern or light and shadow. Visit old movie theaters to see how the bold play of a plaster surface becomes more dramatic with light, changing character with the different times of day and lighting sources. Mix up a rich batch of lime and sand—perhaps 1½ sand to 1 lime—and apply a thin, fresh coat, then pull the steel trowel directly back away from the surface, achieving a rough texture. Mixing a thicker batter will produce a larger texture, while thinning the batter produces a relief that naturally gets smaller. Wait perhaps 30 minutes before you experiment with trowel and brush over the relief surface to achieve the desired pattern or texture.
Another way to achieve an interesting texture is to compress the plaster with the steel trowel while it’s still relatively wet to make fins on the surface. Use a sweeping motion, holding the trowel slightly on edge over soft plaster. Then repeat the motion in regular arcs, either in short, choppy strokes or in long, arching ones.
The Base Coat
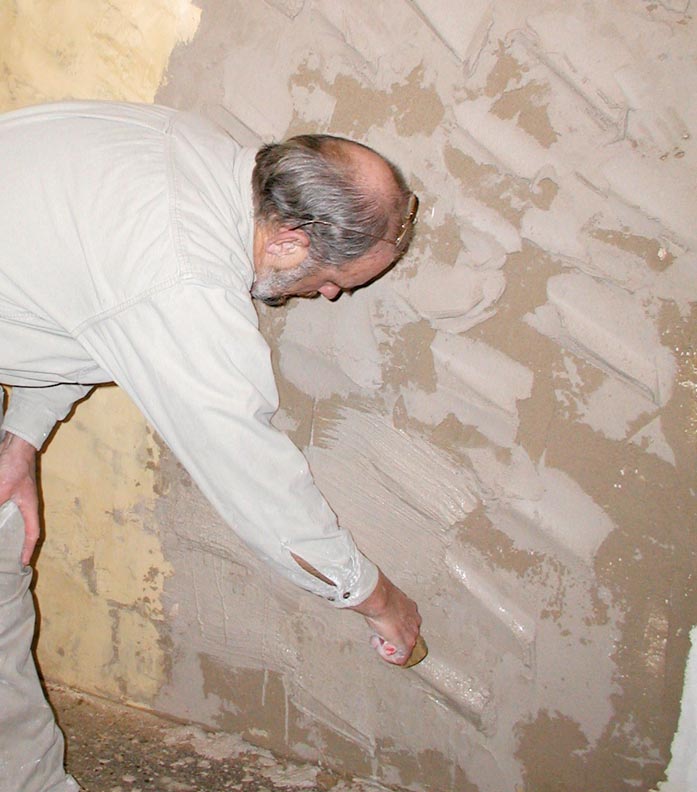
You can obtain a very pleasing, soft surface texture by applying a dampened brush to fresh plaster. For this texture, begin by laying the lime-and-sand mortar thick and moist, then note how the brush creates different surface effects where the wall is wetter or dryer. Applied in the extreme, this kind of texture was used in old theaters after first pulling a thick batter, then playing over the resulting relief with a dampened brush. In my research, the only way to obtain those fat, mastic projections seems to be with traditional plaster.
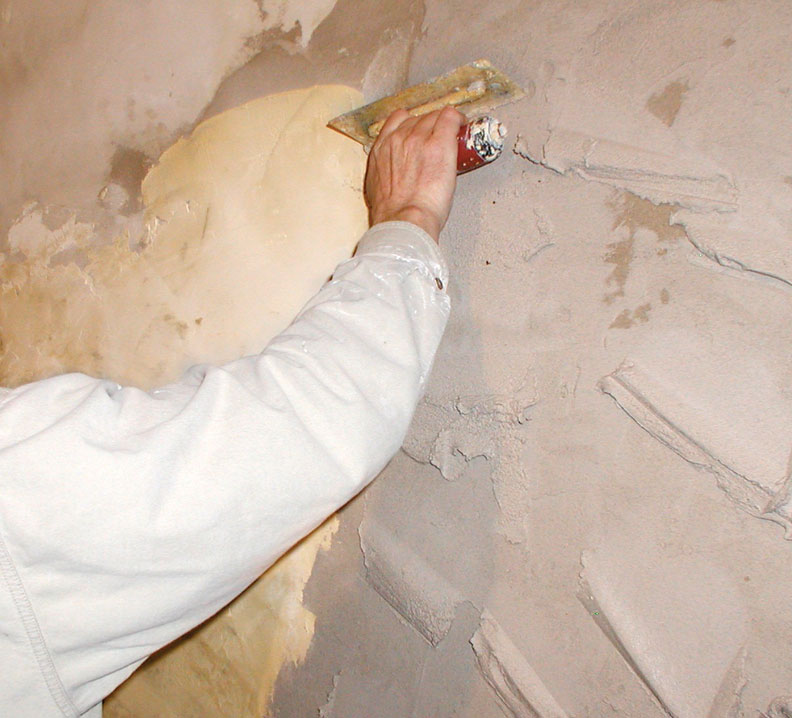
A knocked-down finish resembling a pock-marked stone wall was popular in historic buildings, and has the advantage of being a surface that matures with age as the recessed parts darken. You can achieve this kind of finish by first pulling your trowel from the wet surface to create the peaks. Then double back with the wood or steel trowel to lightly flatten out the peaks fairly tightly, yet leaving voids more or less according to your preference.
The Finish Coat
For a texture that resembles stone pulled up from a bedding joint freshly out of a sedimentary quarry, first take a relatively wet mixture of finish lime and apply it thin over the wall. Next, pull the steel trowel out until you have a fairly regular field of projections that are sharper and much shallower than the heavier ones described above. As a general rule when pulling the trowel for texture, the thinner the coat or layer applied, the smaller and more numerous the projections will be.
It is a good idea to soften the sharp peaks somewhat with a wet paintbrush because the hardened surface, if left sharp, can actually be a hazard to anyone falling against these points. These textures give a pleasing play of shadow, even when the projections are very short and somewhat rounded and softened.
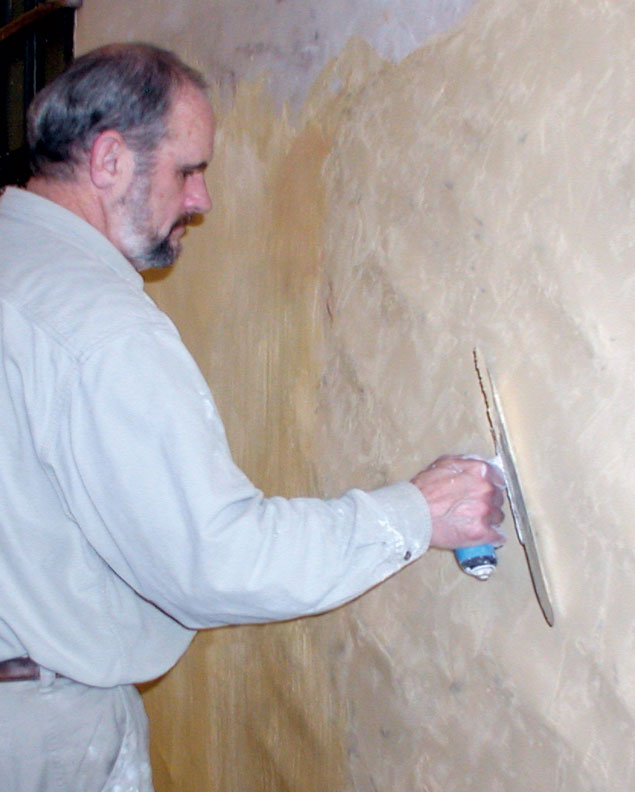
Use a wood or magnesium float to work a newly plastered surface flat and true. These tools won’t bring water to the surface like a steel trowel, which can rob it from the interface of base and new plaster.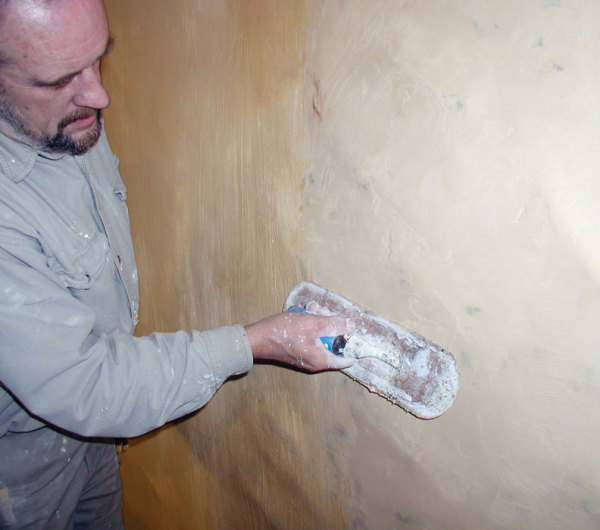
Next, experiment with a dampened tampico brush—the large yellowish clean-up brush used by masons and plasterers. For a stippled finish resembling bush-hammered stone, dip the brush in a thick batter of lime and silica sand and play it onto the wall. Work as though you are painting into hard-to-reach areas, slapping it on the surface a little while attempting to be fairly uniform in coverage. This stippled texture produces only soft, fine surface projections and is especially pleasing when used with a yellow ochre pigment. As always, when you are done with your texture and it has begun to set, cure your work by keeping it moist for some days after application. Then enjoy the ever-changing beauty of the walls you have created with some fine bread, rich cheese, and perhaps a fermented grape or two.
Longtime OHJ contributor Jacob Arndt is the principal of Northwestern Masonry & Stone.


