

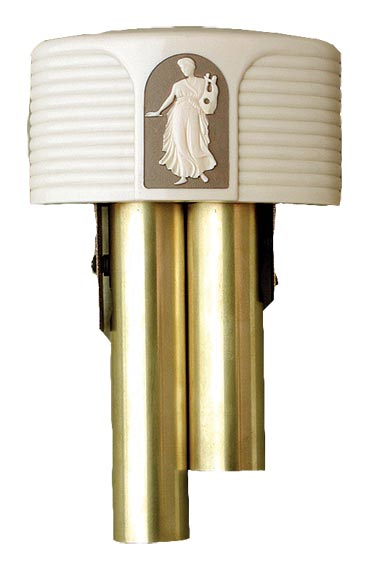
An original Rittenhouse longbell chime graces the entrance of a 1939 house. (Photo: Lora Shinn)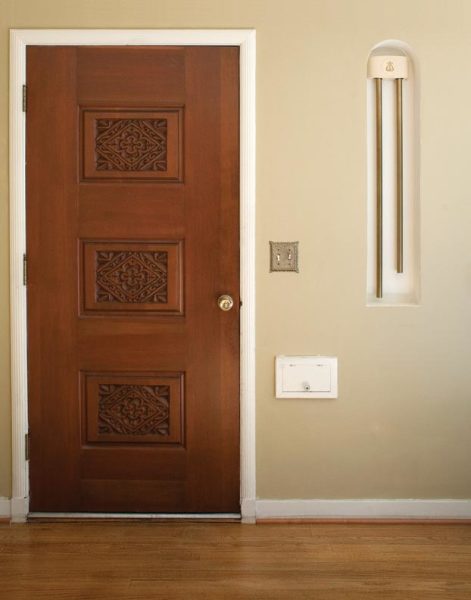
The electric doorbell isn’t as modern an invention as we might think—the first doorbell was invented back in 1831. In the Victorian era, the doorbell rang a simple electric bell. In the 1930s, door chime invention and refinement eliminated the harsh bzzzzt of electric doorbells or clang of the more gong-like bells, and the signature ding-dong of longbell chimes rang clear.
Longbell chimes filled U.S. homes—from bungalows to Tudors to ranches—until about the late 1960s, when the commonplace two-, three-, or four-note devices fell out of favor. Today, most doorbells ring a purely electronic device from a big-box store. But if a plaster niche shaped like a simple rectangle or ornate cathedral window graces your house’s entry, that’s a clue that it once hosted one of biggest home booms of the 20th century.
Chime Types
Restoring a set of vintage longbell chimes is anything but simple, says Tim Wetzel, owner of Knock Doorbells, whose restored chimes have gone on the sets of films and into homes throughout the U.S. “Most chimes were guaranteed by the manufacturer for one year,” he says. “A half century later, it should be surprising that many still work. In the interest of functionality and safety, even the ones that more or less work are ready for some TLC.”
If your home’s chimes aren’t sounding, the problem could stem from a malfunctioning transformer, incorrect voltage, nonfunctioning doorbell buttons, or faulty chime connections, among other problems. If you have the electrical or mechanical skills, you may be able to resolve the issue yourself; if not, call in a pro experienced in chime restoration to troubleshoot electrical or chime problems. Here’s a quick guide to getting those bells ringing once more.
Fix #1: Cleaning the Plunger and Cylinder
A Harmony-brand chime interior before and after restoration. (Photo: Tim Wetzel)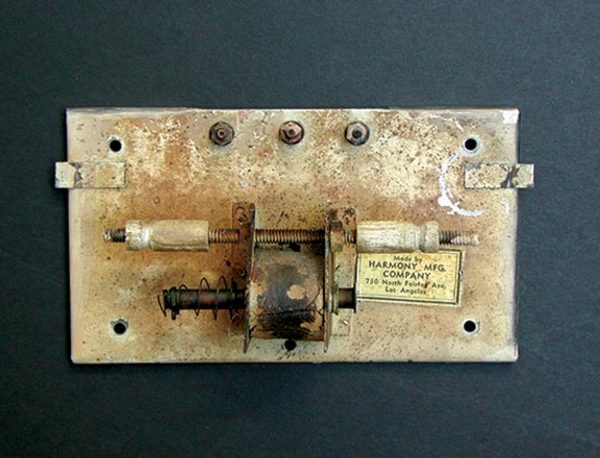
A chime’s plunger can easily become sticky from corrosion, dust, and oil. The result? A lack of any sound, or only half of the intended ring (a “ding” but not a “dong”). Here’s how to remedy the problem:
1. Take note of your chime’s inner workings (they all can be slightly different). Drawing a simple diagram is a good idea.
2. Slide the plunger out of the cylinder, carefully placing aside the spring. Use extreme care, says Wetzel, as the wires that power solenoids are fragile like butterfly wings.
3. Use a metal polish like Semichrome, Wenol, or Autosol, which offer a protective wax finish; apply inside the solenoid coil tube with a Q-tip. Polishing the cylinder may require elbow grease and a rag. (Note: Chimes should never be oiled, as oil’s viscosity causes the plunger to gel up, collect dust, and eventually prevent movement.)
4. Reassemble the cylinder, plunger, and spring exactly as they looked in your diagram.
Fix #2: Replacing Bell Hanger Loops
Positioning the new bell hanger loop. (Photo: Lora Shinn)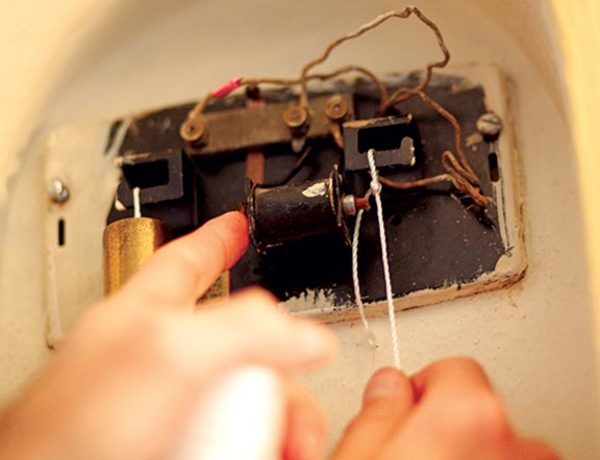
A bell’s fabric loops can break or degrade, and cause the bell to fall or offer a poor sound. Here’s how to replace your loops:
1. Remove the old, frayed, damaged loop. You can cut off any exposed old loop cord on the existing chime, and push the remaining cord down into the tube.
2.Tie a bowline knot out of nylon cord, making a loop about 1″ in diameter. Make sure the knot is positioned correctly so that the plunger’s strike face will hit the longbell beneath the knot (above). Once the knot is in the right spot, use a match to lightly fuse the knot and prevent fraying (you also can use a drop of super glue). The knot will secure the longbell into position.
Pulling the new loop through the bell. (Photo: Lora Shinn)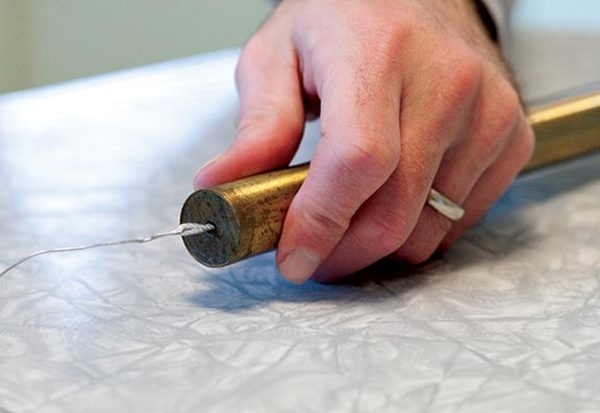
3. Insert thin crafting wire through the chime’s end plug, and push the wire until it comes out the bottom.
4. Twist the new loop onto the wire, then pull the wire up through the tube. Use needle-nose pliers to gently pull the wire loop and knot through the top of the bell.
5. The bell is now ready to hang (and ring) again.
Fix #3: Replacing a Bell
If one or more of the bells is broken, missing, or damaged, you may want to replace those metal tubes—but doing so isn’t easy. You can’t substitute a new bell for a nonworking bell unless it’s from the exact same model of chime. “Bell tuning is a result of alloy, diameter, length, and wall thickness, and there is no standard for vintage bells,” Wetzel explains. Different chime sets feature various brass alloys with differing coloration, volume, and resonance, so it’s unlikely to find a bell that can be easily swapped in for the missing or damaged bell. Your choices, according to Wetzel:
1. Hang a piece of brass pipe just to fill the gap, for aesthetic reasons only. Cost: About $20.
2. Find a stray vintage bell to hang; search reuse stores or eBay. The chime may not sound the same (or even work), but the bell’s look may more closely resemble an authentic style. Cost: Price dependent upon seller, but generally $20+.
3. Buy an inexpensive new set of bells from NuTone, modify hangers, and replace all bells. Cost: $130+.
4. Scavenge a set of bells from a nonworking chime set. Replace all bells. Cost: Around $20 for a badly damaged or abused chime set, but can easily run into the hundreds.
Online bonus: See Tim Wetzel’s list of the worst vintage chimes ever.


