At some point, every historic clapboard house will experience exterior damage due to weather, insects, and general wear and tear. When old claps split, rot, or warp, they can’t perform their crucial job of shedding the elements. Such was the case with the quarter-sawn, old-growth white pine clapboards on this 1840s-era Greek Revival house, which had enough splits and rot to require replacement.
Damaged clapboards and new ones.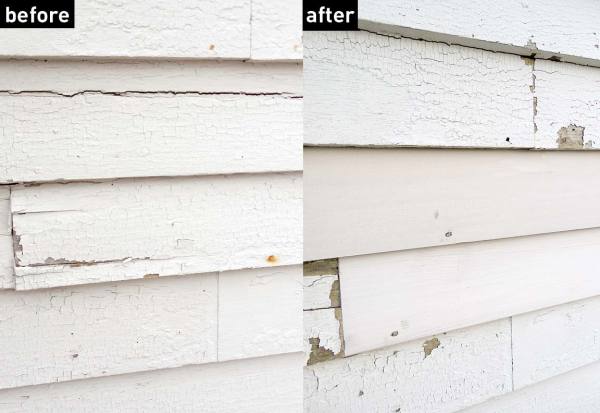
Before You Start
Selecting the right modern materials is an important step that, when done correctly, will add years to the life of your repairs. Spruce and other Eastern pine boards are available, but their density growth rings will not afford you many years of protection. High-quality, tight-grain red cedar clapboard is the best replacement for original quarter-sawn, old-growth Eastern pine claps. Give your new boards one coat of primer before installing—this will increase the wood-to-paint bond after installation.
Supplies
- Heavy plastic groundcover tarp
- Dust mask (lead paint certified)
- Goggles
- 2 or 3 pry bars
- Hammer
- Staple gun
- T-square
- Crosscut handsaw or chop saw
- Ruler/measuring tape
- Galvanized 5d cut nails
- Tin or tar paper flashing
- Red cedar clapboards
Step 1
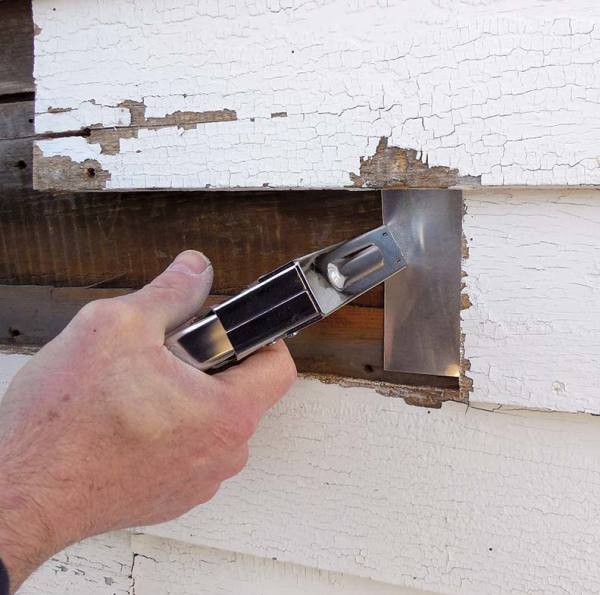
Start by identifying the damaged clapboards. To remove, pry them from the house with thin pry bars and a hammer, starting with the easiest one to pop off (likely the one with the most damage). Start at one end of the butt joint, and work your way across horizontally until it comes free. Sometimes tapping nail shanks under the clap (to the left and right) will free a nail reluctant to come loose.
Remove the damaged clapboard with a hammer and pry bar.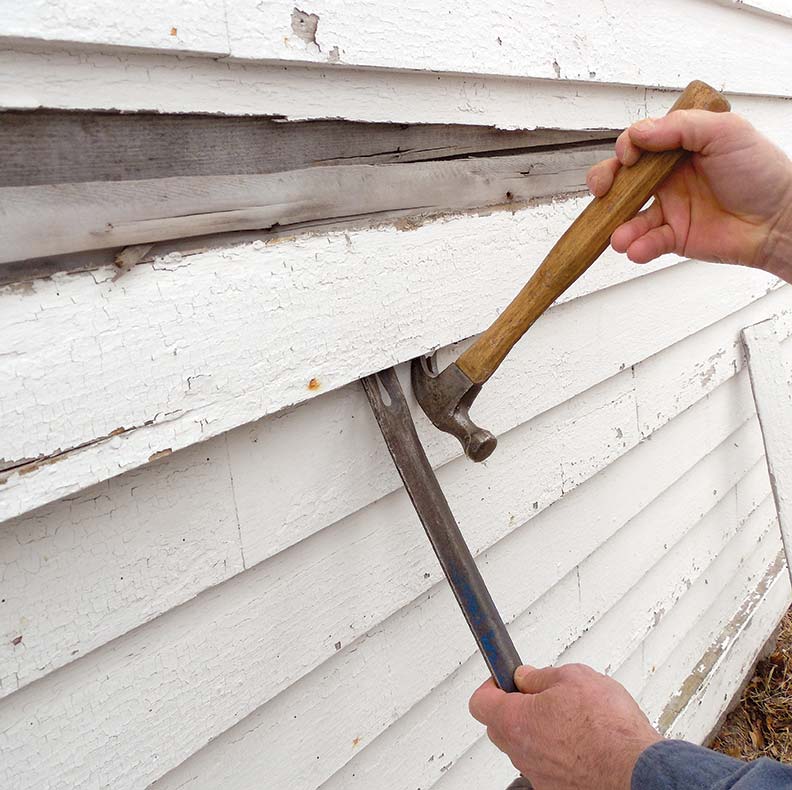
Step 2
To make the replacement clapboard, measure the location of the old one—not the board you just removed. Measure out the first clapboard (always measure twice) and add 1/32″ extra, then cut it—the additional length helps secure the board for a watertight seal. When cross-cutting the new clapboards, always cut from the finished side, starting from the thin top edge and cutting toward the thicker end to prevent breakage. Repeat this process as necessary for each replacement clap needed.
Cut the replacement clapboard.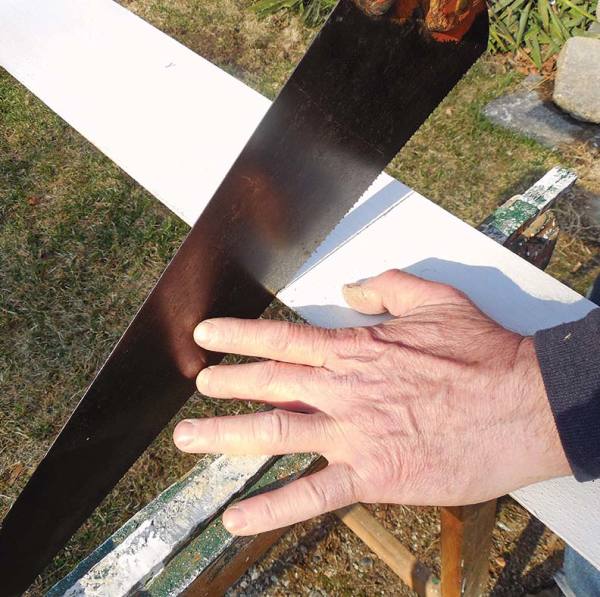
Step 3
Before installing the new clapboards, place tin flashing or tar paper between joints to provide additional weather protection. Slide the tin flashing underneath the neighboring clapboard’s end and staple it in place. Start your installation with the bottom clapboard and work your way up.
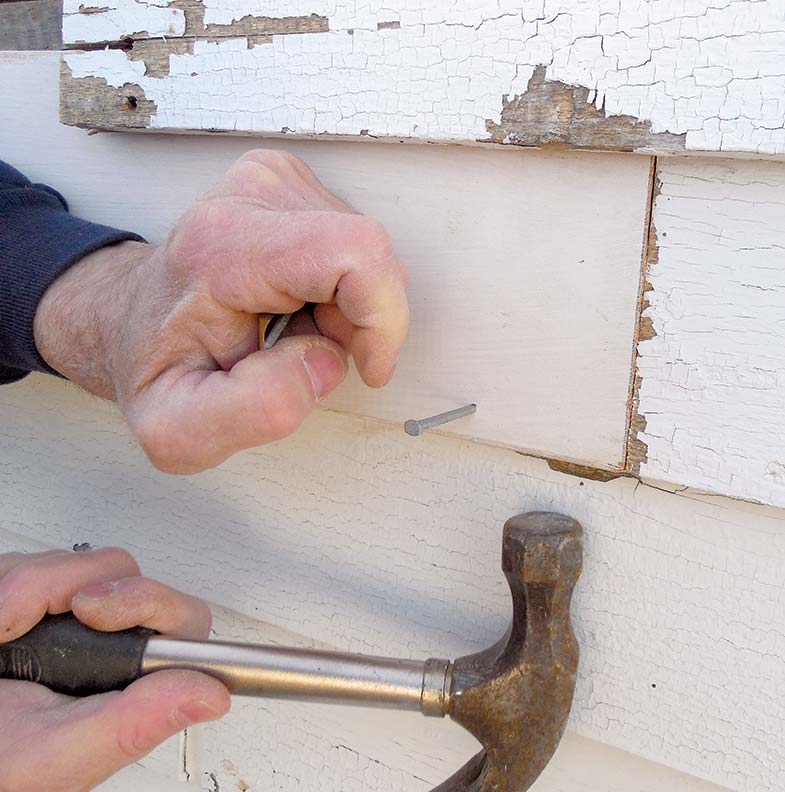
Slide the new clapboard into place. Add flashing between the joints. Gently tap the board into position, then hammer it into place, matching the nail placement of the new clap to the existing ones. Next, insert the upper clap and hammer into place. Go easy on the hammering to prevent damage to new claps. Once all the new boards are installed, apply a second coat of primer and then a topcoat of finish paint, which will cover most dings. Tap the board into place, then nail it securely.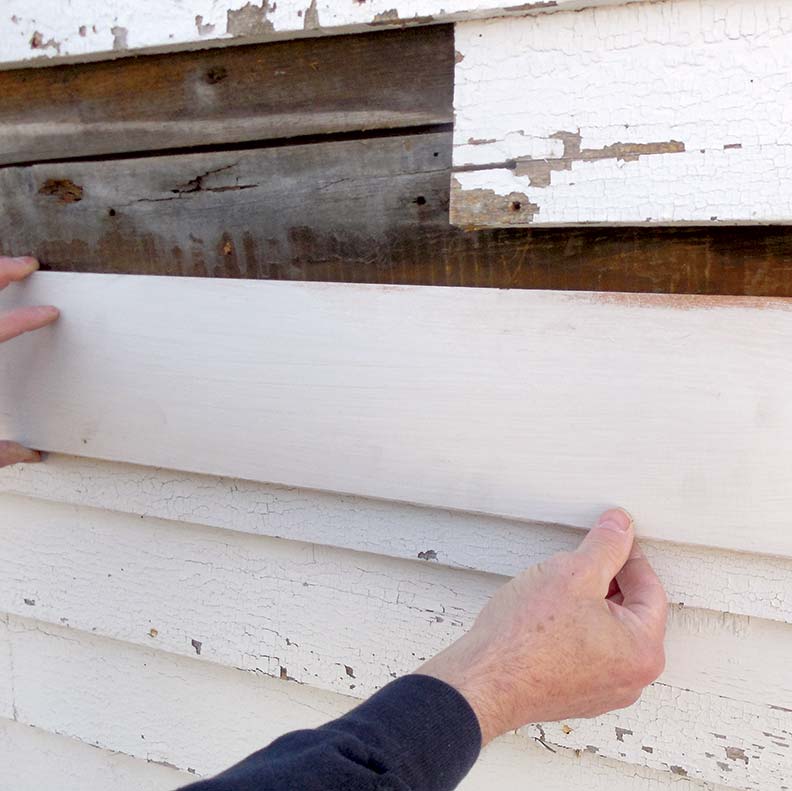
Step 4