

A box full of blooming flowers is a lovely way to welcome spring, and also adds colorful blossoms to indoor views. Wooden window boxes come in ready-to-install kits in many styles; find one that suits your architecture. It should be 6″ to 12″ wider than your window for proper balance.

Install a window box.
Step 1
Measure for the bracket location. On sash windows, the top of the bracket should be 1″ below the bottom of the windowsill and aligned with the window’s edge or frame. (On casements or awning windows, mount brackets 6″ to 8″ lower to allow the window to open unimpeded by plants.)
Place the top screw hole toward the bottom of a shingle or clapboard. (If brackets are not pre-drilled, you’ll first need to drill a pilot hole and countersink for the screw.) Measure down for the second bracket, then use a 4′ level across the top to ensure that its placement is level, and hold it beside the bracket to ensure plumb before placing the bottom screw.
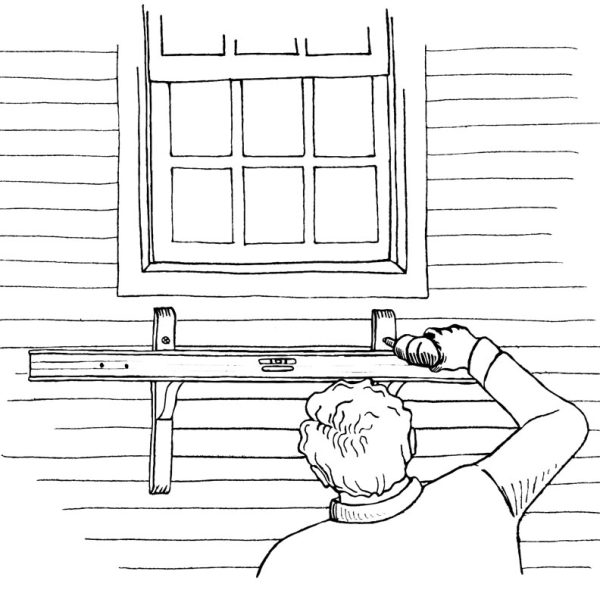
Hanging the bracket for a window box.
Step 2
After both brackets are installed, you’re ready to place the box. If it didn’t come with drainage holes, drill two holes about 10″ apart through the bottom, then place the empty box atop the brackets with the angled side facing forward. Next, center the box on the brackets—use a tape measure to ensure that the box overhang is the same on both sides. Then drill pilot holes on the box’s back side, positioning them directly in front of the brackets. Attach the box to the bracket and wall using 2½” galvanized decking screws. You’re now ready to plant some cheery flowers.

Placing the window box on the brackets.


