

Illustrations by: Rob Lenna
A mould knife is a metal template cut with the reverse profile of the moulding to be created or restored. Making a knife involves finding a way to trace the existing or desired cornice profile, then transferring it to a piece of galvanized sheet metal. Lighter weight metal (22-gauge, for instance) can be cut with shears, but isn’t as stiff and durable as 16-gauge, which requires cutting with a saber saw.
Master craftsman Frank Mangione guides the mould knife through a recessed cove moulding. The tools of the ornamental plasterer’s trade are in the foreground.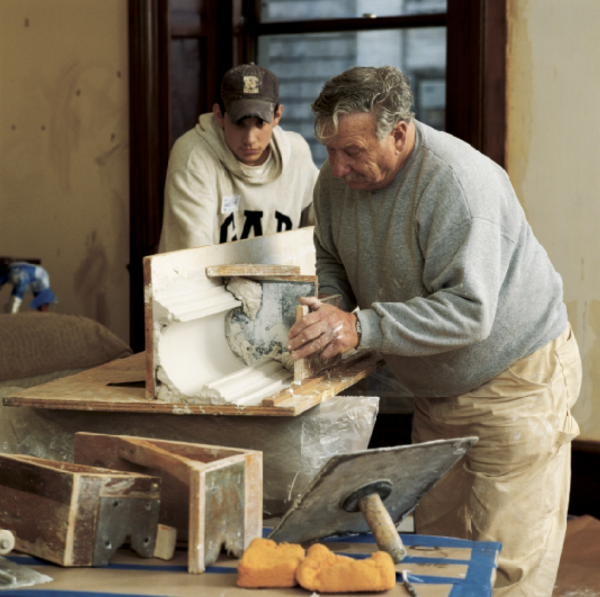
To repair an existing moulding, you’ll need to obtain a cross-section through the plasterwork from wall to ceiling. An easy way to do this is to saw through a sound part of the existing cornice with a cope saw, then insert a sheet metal blank in the slot. Once in place, trace the profile directly onto the template. (The slot can later be refilled with fresh plaster.) If you’ve already removed the damaged section from the wall, you may be able to get a tracing from one of the cornice ends if the profile is perfect and undamaged.
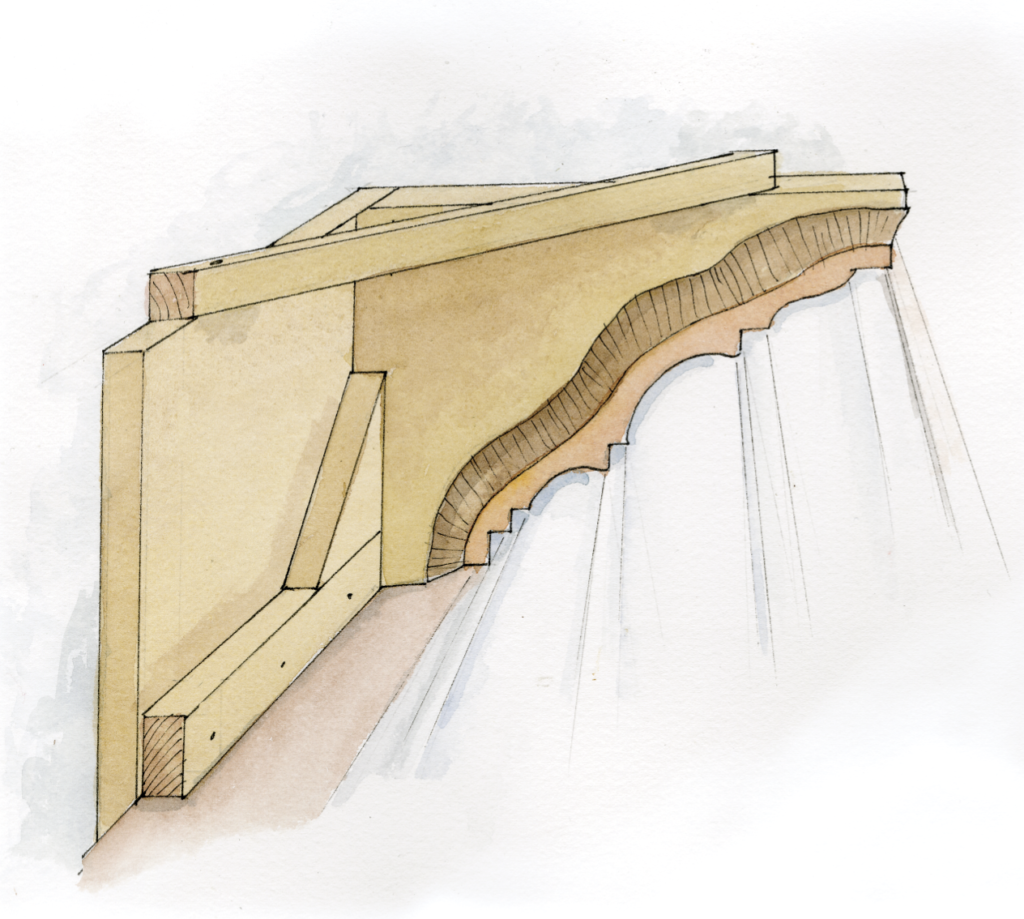
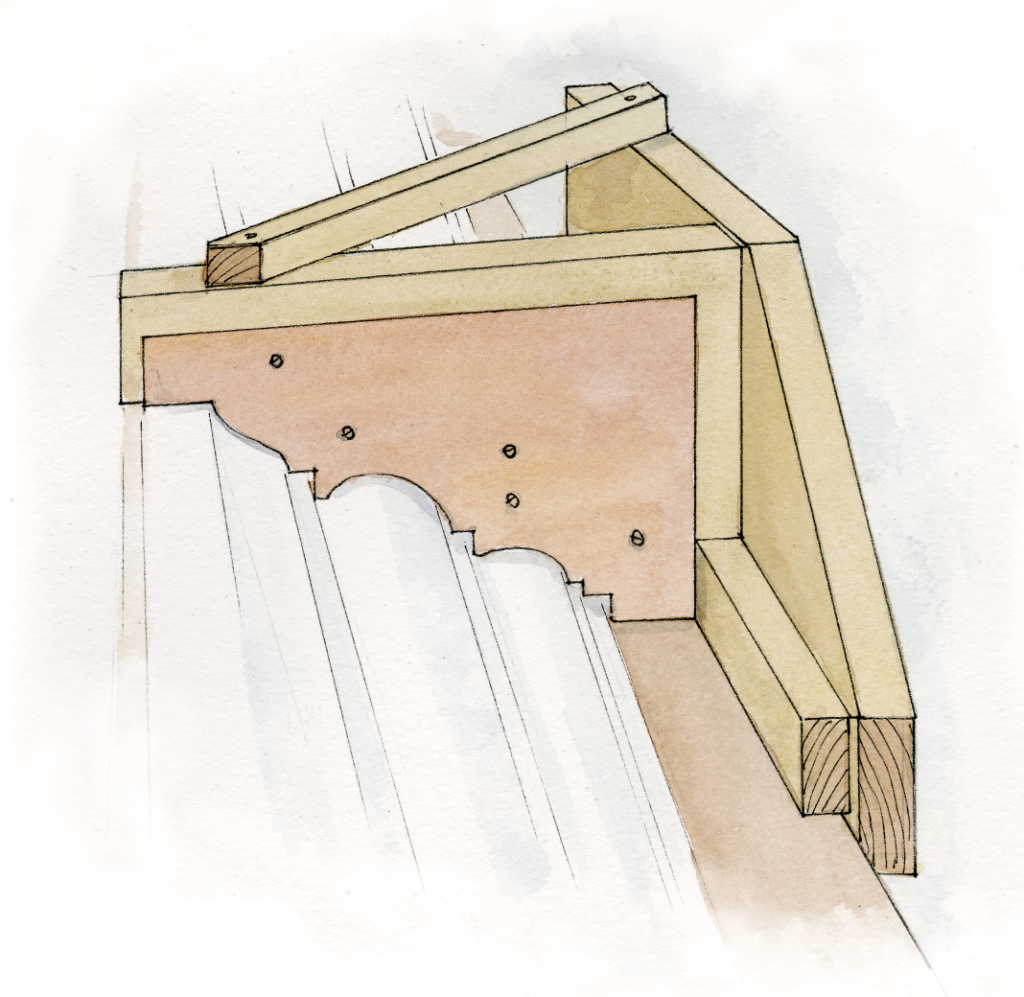
Professionals often use the template to cut out the horse with a saber saw, taking care to cut away at least ¼” of the wood on the back side so that it won’t obstruct the movement of plaster. Once the horse is ready, cut the knife profile out with the shears or saber saw, taking care to replicate the profile perfectly, without bending the metal or forming jagged edges or awkward curves. Use files or rasps to get to any places the shears or saw can’t reach. Any flaws in the template will be faithfully reproduced in the plaster.
Check the knife against the moulding or original outline to make sure it still has the correct contour. Burnish the edge with a smoothing tool like a round file to remove any last bumps or burrs.
Mixing Plaster
Mix the plaster on a square piece of smooth plywood that measures about 3′ x 3′. Dump the prepared lime putty onto the board first, forming it into a ring about 3″ high. (A margin trowel is an ideal tool for this.) Leave a blob of putty in the center.
Pour enough water into the ring to dissolve a similar amount of plaster equal to the putty. Add the retarder to the water and stir carefully until fully dissolved. Adding 1 to 2 teaspoons of retarder to a batch of plaster will typically allow a working time of 20 to 30 minutes.
Slowly sprinkle in the gypsum. Let it stand in the water for a few minutes, soaking it up, before mixing it with the lime putty.
Spread the blob of putty through the plaster using the margin trowel. Then work in the lime from the outer ring, folding it into the center. As you continue to mix, the plaster should gradually change from soupy to a mixture thick enough to trowel on (the mix should just cling to the face of the trowel without sliding off). Transfer small batches to a plaster hod and then work quickly. Once the plaster starts to set, it’s useless: adding water won’t stop the setting process and it will weaken the plaster.
Running the moulding
To begin, layer plaster in a line that’s as long as the intended moulding on the bench. Then pass the mould over the plaster, refreshing with new material as needed. Clean the knife thoroughly after each pass.
Finishing the moulding
Finish work moves quickly. Have an assistant check for voids; add a watery mix as the moulding begins to set, and once it’s ready, cut it away carefully and allow to fully dry.


