

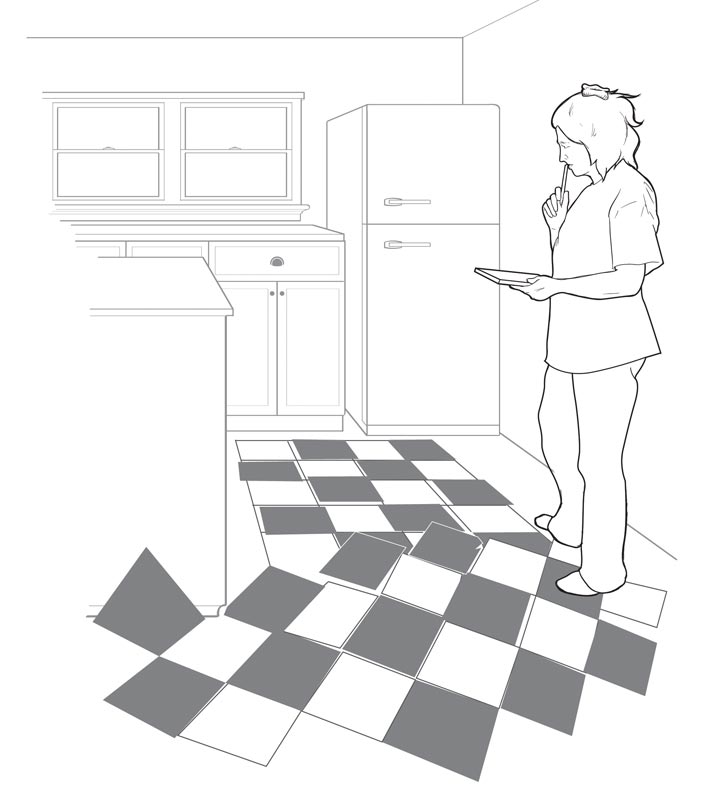
Nothing makes a kitchen feel homier than the right flooring. Linoleum, especially when laid in a checkerboard pattern, is a time-honored choice that’s not only natural and renewable, but also has anti-microbial qualities thanks to one of its main components, linseed oil. Black and white is a classic color combination that will spruce up just about any kitchen, but you also can select color combinations based on the age or architectural style of your house.
Step 1
Make sure you’ve got the right subflooring (find out more), then start by determining your pattern (above). Do you want the checkerboard to run square or on the diagonal? Test both on the floor to determine which works best; you can do this using tiles or colored paper cut to size. (If you’re waffling on color choices, this is a good way to test them as well.) Diagonals often can help make small rooms feel bigger. Be sure to eye the patterns from all adjoining spaces to find the most prominent natural sight line. What looks best from inside the door of the next room?
Step 2
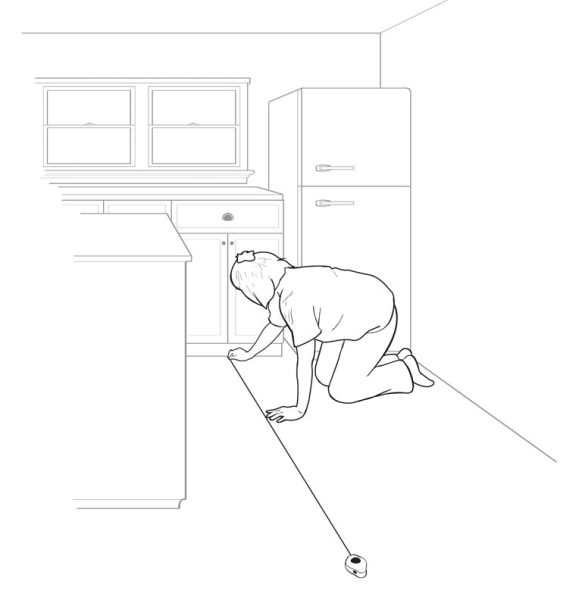
Once you’ve selected your design approach, it’s time to mark your starting point. Measure to find the center of the room, then use a level and a carpenter’s chalk line to mark it (right); you’ll follow this mark to align your pattern. Double-check that your tiles will fit across the room from this start line with only small pieces remaining at the walls; if the walls bisect large pieces of tile on just one side of the room, adjust the starting point until the edging pieces are about even on both sides.
Step 3
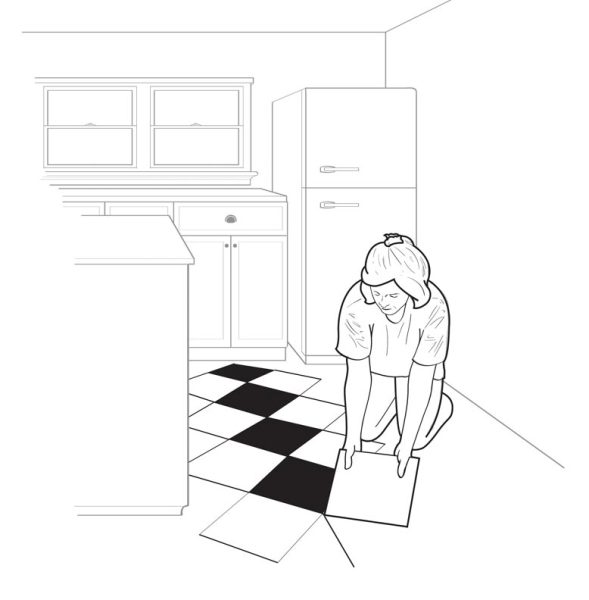
For a diagonal pattern, align the tiles’ corners with the start line. Apply linoleum adhesive, per the manufacturer’s instructions, over a small area—aim to cover an area of at least two, but no more than four, tiles. Start near the wall, being careful to align the corners of the first tile with your mark, and slowly and methodically work your way out to the sides, and then across the room. Once you’ve fitted in all of the full-size tiles, cut the edge and corner pieces using a sharp utility knife.
Online exclusive: See a gallery of checkerboard floors in old-house kitchens.


