

Bliss used reclaimed wood for her cabinet frame to match the patina of the antique window. (Photo: Bliss Ranch)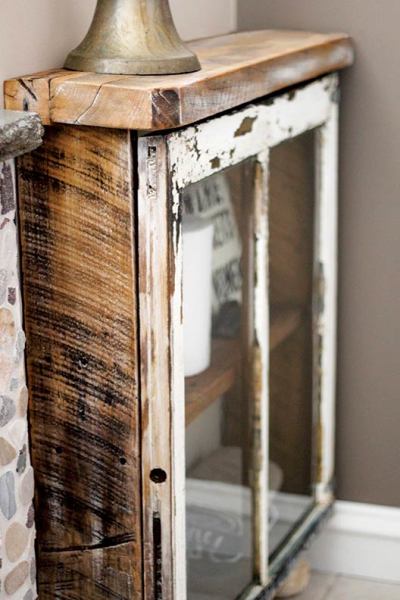
As much as we wish they would, old windows don’t always stay on old houses. But they don’t have to end up in landfills, either—architectural salvage stores are chock full of charming old windows just waiting to be given new life. For this project, blogger Bliss of Bliss Ranch used a vintage window as the door for a small bathroom cabinet. Here’s how she did it.
How To Make It
1. Make the cabinet frame
Bliss created her cabinet from rough-sawn 2×6 timbers salvaged from an old shed, cut to the same size as her window. (The top board is about an inch wider for overhang.) Use three of the timbers to create a U shape, fastening them together at the corners with four 3½” wood screws spaced evenly along the width of the board, about ½” in from the edge. Then create four pocket holes (one in each corner) on the inside of the cabinet frame and use 3½” drywall screws to attach the top.
2. Attach the door
To turn the window into a door, add surface-mounted hinges to the top and bottom of one long side. Place each hinge on the window, mark the location for the screw hole, and then drill a pilot hole before screwing the hinge in place. Lay the window on top of the cabinet and repeat this process to attach the other side of the hinge to the cabinet frame. On the opposite edge of the door, measure to the center and mount a magnetic catch on the interior of the door and frame.
3. Add accessories
Finish the cabinet by adding a shelf, feet, and a knob or handle. Measure and cut a piece of wood for the shelf, mounting it with four L brackets. Add bun feet to the bottom by inserting 3½” screws down through the inside of the cabinet frame, then tightly screwing on the feet. If you’d like, you also can add a knob or handle on the outside of the door—mount it in approximately the same location as the magnetic catch.
4. Mount the cabinet to the wall
This cabinet rests on the floor, but Bliss further secured hers by screwing 3½” drywall screws at an angle through the inside of the top board directly into the studs. If you’d rather have a freestanding cabinet, you can use wood screws to attach a backing material to the cabinet frame at the end of Step 1. (Bliss suggests beadboard, painted a contrasting color and distressed.)


