

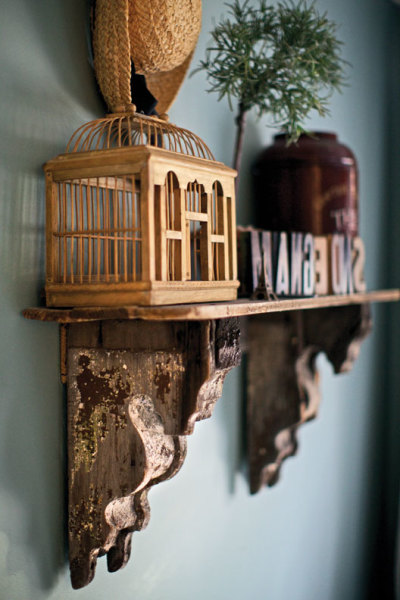
Paired with salvaged fence boards, a pair of antique corbels becomes a display shelf. (Photo: Kyle Dickson)
In traditional architecture, corbels were used to support exterior projections like door and window hoods. Victorian-era ones often boast elaborate scrollwork; topped with a piece of wood, they can become a display shelf that adds instant interest to a blank wall. For this project, designer Camille Dickson combined a pair of antique corbels with salvaged fence boards to create a focal point for her dining room.
How To Make It
1. Gather your materials
First, you’ll need to find a pair of antique corbels. Some things to consider: To support the weight of a shelf, corbels should be spaced no farther than 30″ apart, and should extend at least two-thirds of the depth of the shelving material. To keep proportions in check, look for corbels that are around a foot tall—anything much larger will look better supporting a wall-mounted table. For shelving, consider salvaged wood to mimic the age of the corbels.
2. Create the shelf
To turn her salvaged fencing into a shelf, Camille used a radial-arm saw to cut three fence boards to the desired length (36″), then lightly sanded the cut ends. Because she liked the rough appearance of the boards and the corbels, she didn’t stain or paint them, but if you want to change the appearance of your materials, this is the time to do it.
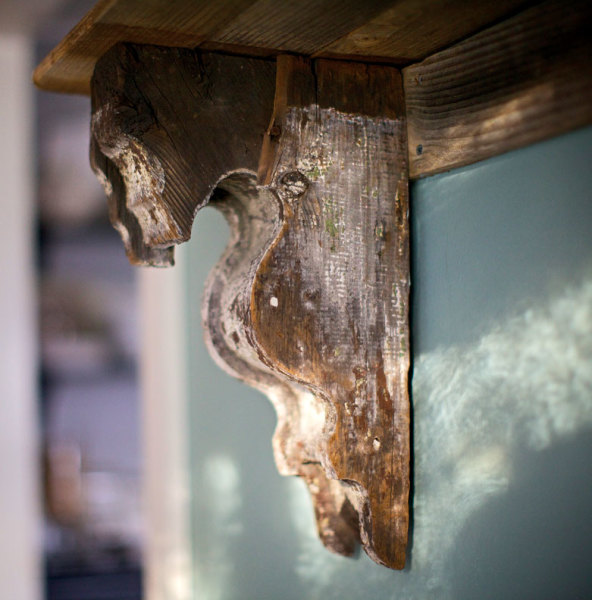
An extra piece of wood along the back of the shelf adds stability and anchors it to the wall. (Photo: Kyle Dickson)
3. Attach the corbels
On your shelf, measure and mark the locations where you want the corbels—they should be equidistant from each end and aligned with the back side of the shelf. Attach the shelf with 1¼” screws, driving them down through the shelving material and into the top of the corbel. Use two screws per corbel, about 1½” away from the front and back edges. For extra stability, Camille also screwed a piece of salvaged fencing across the back of the corbels just below the shelf.
4. Mount it to the wall
Using a level, measure and mark the location for your shelf. Because it will be heavy, use wall anchors when mounting it. Drill three pilot holes, spaced 4″ to 5″ apart, and insert the anchors in the wall, then screw the shelf to the wall through the backing piece. (If you don’t want a backing piece on your shelf, you can attach the corbels to the wall first, then screw the shelf on once the corbels are in place. A level is essential if you’re using this mounting technique.)


