

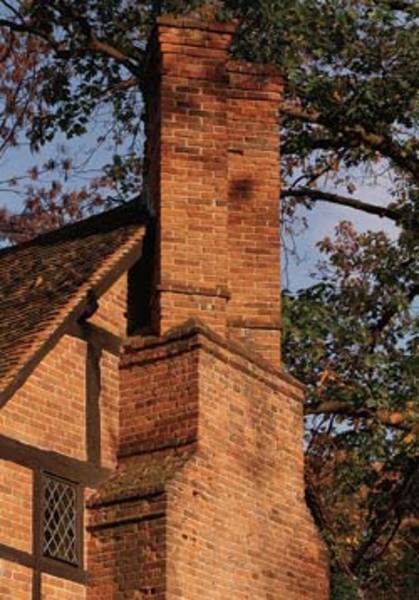
Many old-house chimneys serve a hearth on each floor with multiple flues that snake through offsets within the masonry. (Photo: Paul Rocheleau)
Most old-house owners savor the warmth of fireplaces or heating stoves, so they know it’s important to routinely inspect and clean a working masonry chimney. The National Fire Protection Association (NFPA) recommends that chimneys burning solid fuel—wood, coal, or pellets—be inspected yearly and cleaned as often as needed. Such upkeep helps to ensure structural integrity, identify defects that might allow deadly combustion gases to vent into living spaces, and prevent chimney fires caused by the buildup of creosote, a natural byproduct of burning wood.
However, few homeowners who use their chimneys merely to vent gas or oil-fired furnaces and boilers are aware that maintenance and sound conditions apply to them, too. That’s a problem because the byproducts of burning gas and oil are just as insidious as those from solid fuels. Chimneys—or more specifically, the flues within them—must be clean and sound to carry heat and gases safely up and away from the chimney top, but these combustion byproducts can also deteriorate a flue’s inner surface over time.
So let’s say that you get your chimney inspected, and let’s say that the report recommends that your flue needs to be relined. We’ll explore what that means, as well as the best way to go about correcting the problem for your particular chimney and house.
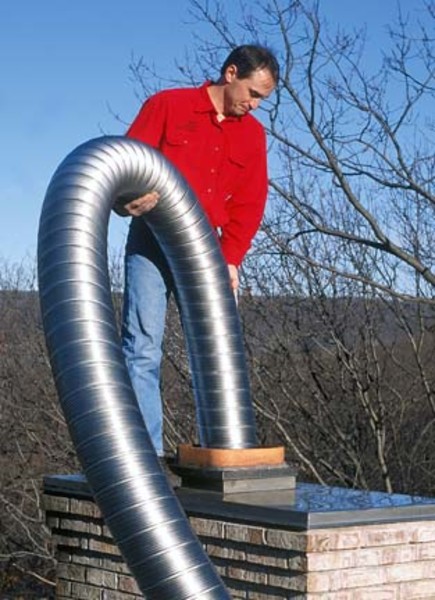
Flexible liners, such as this corrugated, stainless steel one, are well-adapted to retrofitting flues with offsets or tight dimensions. (Photo: Chimney Supply/Chimney Safety Institute of America)
The Line on Liners
Among the best reasons for relining a masonry chimney is that it wasn’t built right in the first place—that is, without a flue liner, a material that provides a smooth, relatively seamless surface as well as insulation. Historically, well-built chimneys were parged with mortar to line the flue, and clay tiles have been standard liners since the 1900s. Nonetheless, linerless chimneys remain very common in old houses as well as newer ones. Builders and heating equipment installers don’t always keep up with recommended practices, and even if they do, they may not take the trouble to observe them.
If your chimney does have a liner, another reason you may need to reline is because it is defective. Age and use can open cracks in tiles, and combustion gases combined with rain will erode parging and masonry joints between bricks or stones. If the preponderance of evidence points to relining, you’ve got some choices to consider.
You can 1) reconstruct clay tile flues with new clay tile liners, 2) reinforce the chimney and create new flues with poured-cement liners, or 3) reline existing flues and run new ones with metal flue liners. Each method has its benefits, limitations, and challenges. The approach you ultimately choose should be the one that’s best suited to the problems of the particular chimney and the appliances vented through it.
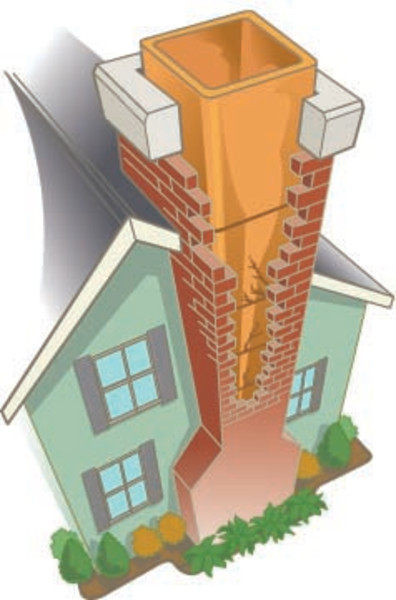
Clay flue tiles are rectangular or round ceramic units 24″ tall that are stacked with mortared joints to make a liner. While highly durable, tiles can crack due to age or damage, and their weight and rigidity make them complicated to retrofit. (Illustration: Randy Sweitzer)
Clay Tile Liners
Clay tile flues are the traditional favorite. Flue tiles are virtually impervious to the heat and corrosive byproducts of burning any and all fuels. With refractory mortar joints properly finished, a clay tile flue’s service life can be projected at 50 years or more with very little maintenance other than regular cleaning.
But square and rectangular flue tiles are not the most efficient shape for venting smoke. By nature, smoke spirals upward through a flue in a helical pattern, leaving incongruous air spaces at the margins. At best, these air spaces simply take up extra room within the chimney that may be needed for additional flues; at worst, they reduce draft. Round flues are much more efficient.
Clay liner tiles are relatively inexpensive-about $10 for a typical 24′-tall unit. But what you save on materials will most likely exceed the cost of installation labor. Clay flue liners are hard to retrofit in an existing chimney, especially if it isn’t straight. Even for a straight run, it’s necessary to break through chimney walls every few vertical feet to gain access for removing the old flue tile and laying up the new tile.
For chimneys with offsets (bends), flue tiles need to be cut at precise angles for acceptable joints. In some areas, it’s difficult to find anyone who has the skills for this kind of installation, and it’s definitely not an owner-restorer job.
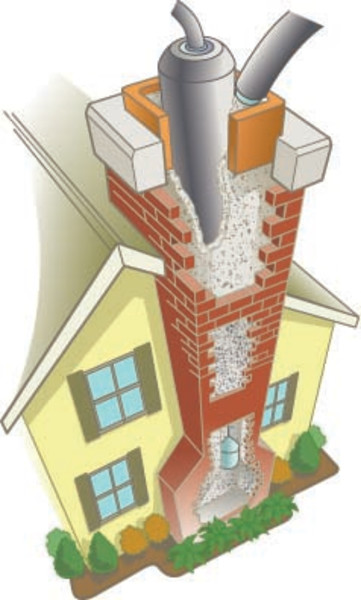
Cast-in-place liners are proprietary processes that pump mortar within the chimney to form a new flue. One method, illustrated at top, employs an inflatable bladder to form the flue. An alternate process, shown at bottom, draws a pointed bell up the chimney to form the flue. (Illustration: Randy Sweitzer)
Cast-in-Place Liners
Where new clay tiles are not an option, it’s possible to create a new flue within a damaged masonry chimney by using one of several poured-cement processes. Generally speaking, this approach offers all the advantages of clay flues, plus a couple more. Cast-in-place flues are virtually impervious to the harmful effects of heat, acids, and condensation, regardless of the type of fuel that is burned. Temperatures inside cast-in-place flues are generally high because of their insulation properties, so they burn cleaner and reduce creosote accumulation.
Expect poured-cement flues to last at least as long as clay tile—50 years or more. Some companies claim that cast-in-place flues can stabilize unsound clay flues and chimneys, since they’re poured inside either the existing flue or the chimney walls.
While a cast-in-place process can be less laborious and invasive than reconstructing clay flues, there are a number of different proprietary methods for casting. In some projects, the cost of labor required can equal or exceed that for relining with clay tile. As always, the best approach depends on conditions specific to the particular job. In no case is casting flue liner in place a do-it-yourself job. The materials and equipment for casting flues in place are supplied by a number of different manufacturers to distributor/technicians who perform the installations.
If the problem chimney has one or more clay flues within it, the installer will determine whether the tile can be left in place or needs to be removed. Determining factors include the structural condition of the existing flue and chimney, and how much space is needed based on the size and number of flues required.
In the first of the two prevalent flue-casting methods—marketed variously under the brand names Golden Flue, Solid/Flue Chimney Systems, and Supaflu Chimney Systems—relining starts with a preparatory flue cleaning.
Then, technicians insert one or more inflatable bladders from the heating appliance outlet to the top of the chimney. Next, they install formwork at the base of the chimney and place spacers around the bladders to separate them from chimney. At this point, they pump a mud-like mixture of lightweight refractory cement and insulating aggregate is into the chimney until it fills to the chimney top. Once the cement hardens, the bladders are deflated, the formwork is removed, and any necessary finish work is performed. The result: one or more structurally rigid, smooth, continuous, amply insulated flues.
In a second flue-casting method—marketed under the brand names Ahrens Chimney Systems and Guardian Chimney Systems—technicians slowly pump mud-consistency lining material into the chimney as they draw a vibrating bell (a pointy forming tool) up through the cement to form the flue opening. In the Ahrens method, there’s a second step where the technician sprays a slurry topcoat onto the flue channel to provide a smoother, non-absorbent surface said to increase draft and facilitate cleaning. Both casting methods have been used in Europe for more than 70 years, and in the U.S. for more than 30.
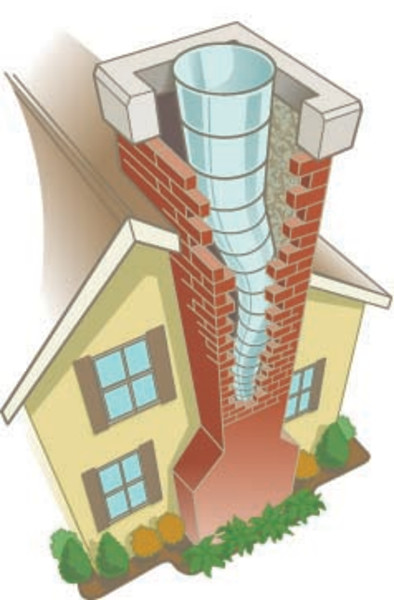
Stainless steel flue liners come in rigid and flexible forms and a variety of designs and alloys, making them among the most versatile liners. One of the advantages of flexible metal liners is their ability to accommodate offsets and other old-flue surprises. (Illustration: Randy Sweitzer)
Metal Flue Liners
Pragmatists, including many installers and fire-protection experts we consulted, tend to like stainless steel flue liners. They generally require less labor to install than other types of liners, and they’re readily available in types and sizes for all common heating appliances, including fireplaces and wood stoves. Installed by a pro, a metal liner costs about $100 per foot.
The trouble for old-house restorers is that there are so many different metal flue types and sizes that it can be hard to sort out which is best for a given application. The good news is that most of the commonly used flue liners are available in kits, complete with insulation wraps and fittings to hook up to fireplaces, stoves, furnaces, and boilers.
Stainless steel flue liners come in rigid and flexible formats. Rigid flue pipes are available in diameters ranging from 3 to 10, while flexible corrugated metal tube runs from 2 to 10 in diameter. Rigid flue liners shouldn’t be confused with double- or triple-wall chimney pipe, which is designed for unenclosed chimneys and shouldn’t be used as flue liner. Rigid liners are best only for straight chimneys with no offsets or bends.
There is some discussion about whether rigid flue liners are easier to clean than flexible liners, which have a corrugated surface. Our most trusted expert says that flexible liners tend to collect less creosote when used to vent wood fireplaces and stoves because they flex as they expand and contract with temperature fluctuations, causing buildups to loosen and fall away.
For venting a fireplace, choose the diameter that provides a vent opening equal to one-eighth of the total area of the fireplace opening. For wood stoves and other heating appliances, consult the manufacturer’s recommendations for flue diameter. The trickiest aspect of selecting an appropriate stainless steel liner is choosing the correct alloy based on the type of fuel being burned. Careful selection prevents corrosion, which is the main cause of premature failure in stainless steel flue liners.
It’s also good practice to insulate metal flues with wraps or jackets designed specifically for the purpose. Insulation is particularly important around vents for high-efficiency heaters and stoves, since their flue temperatures are typically lower than conventional models. Insulation not only helps to maintain higher temperatures within the flue to reduce corrosive condensation, but it also prevents heat transfer from flue pipes to the home’s structure—an added measure of safety, which is what flue liners are all about in the first place.


