

Plaster—common in old houses built between 1700 and 1940—is usually a mixture of lime putty, sand, and animal hair applied over wood lath. (Gypsum was later added to the mix.) Properly installed, plaster is squeezed through spaces between the lath to form “keys” (a kind of hook) that help keep it in place. Of all the problems affecting plaster, separation and cracking from the lath is the most common.
Today, you don’t need to know how to apply three-coat plaster to repair cracks and holes. Repairing loose plaster is straightforward, and consists of two distinct tasks: reinforcement and cosmetic surface applications. By reattaching the plaster to the lath, you’re using the lath to bridge and stabilize the plaster. Fix the structural issues, and any surface treatment will last.
All plaster failure starts as small cracks, actual holes, or missing keys. In a well-maintained home, your plaster walls and ceilings should last forever.
Before You Start
Press on the plaster to see if it’s loose. On cracks, place one thumb on the crack, and use your other hand to alternate pressing on one side of the crack and then the other. Any movement felt under your thumb is a sign the plaster needs reinforcing. You also can drill a 3/16″ hole through the plaster to the lath. Feeling a little jump as the bit drills through the plaster, before it hits the lath, signifies a gap between the two and means the plaster needs to be reattached.
Tools & Supplies
- Plaster repair adhesive kit
- Patching plaster to use in deep holes that extend down to the lath (Look for one specifically made for repairing old plaster.)
- Ready-mix joint compound for filling drill holes and cracks, and topping patches (available at many good hardware and building supply stores)
- Disposable drop cloths and plastic sheeting to protect adjacent surfaces
- Drill
- 3/16″ masonry bit
- #2 Phillips driver bit
- Shop vacuum with fine dust bag
- Caulk gun
- Putty knife
- Joint compound “mud pan”
- Plastic washers and drywall screws, for clamping
Step 1
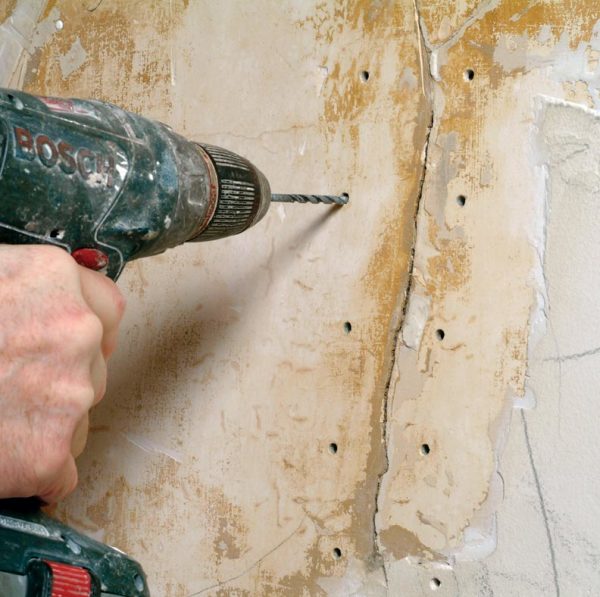
Along the crack’s length, drill 3/16″ holes on both sides, about 1½” apart, in every other lath. (Most lath is 1¼” wide, spaced ¼” apart, and laid horizontally on walls.) If there are existing damage holes extending down to the lath, drill 3/16″ holes 1½” away from the edge of the hole, around the perimeter—one in every lath. Next, vacuum out the holes you drilled. You now should have clear access to the space between the plaster and lath.
Step 2
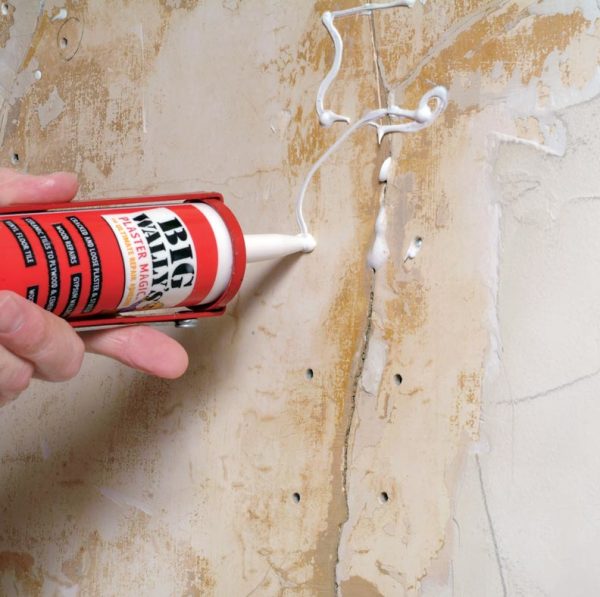
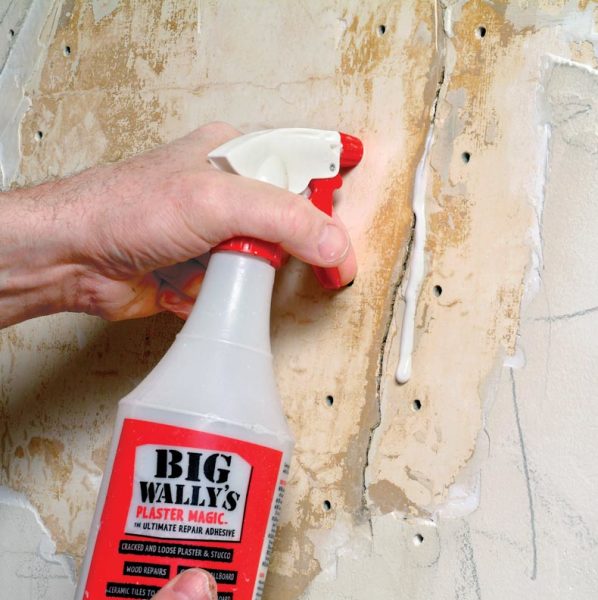
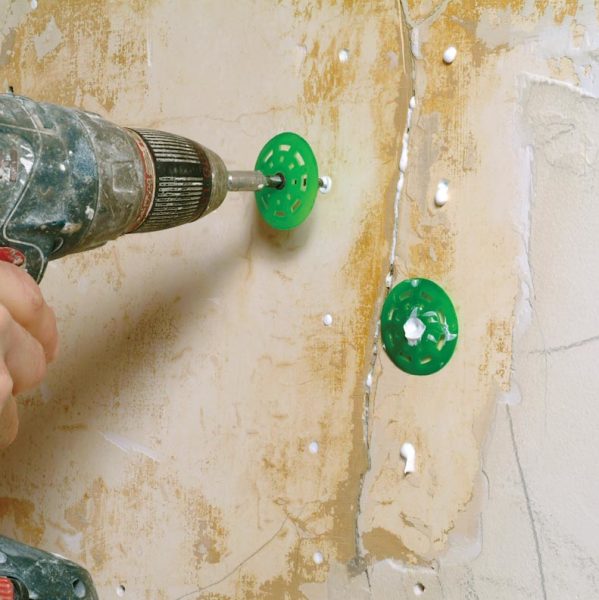
Spray the conditioner from the adhesive plaster repair kit into each hole and on any exposed lath (left); it will soak into plaster and lath, preparing them to bond to the adhesive. Use the caulk gun to squeeze up to one handle-pull of adhesive into each hole (right).
Step 3
Use the plastic washers and screws to clamp the plaster into “soft contact” with the lath—pulling the plaster to just touch the lath, while leaving room for the adhesive to flex. In 24 hours, after the adhesive has cured, remove the clamps. The plaster is now stable, bridged subsurface with the lath, and will not re-crack.
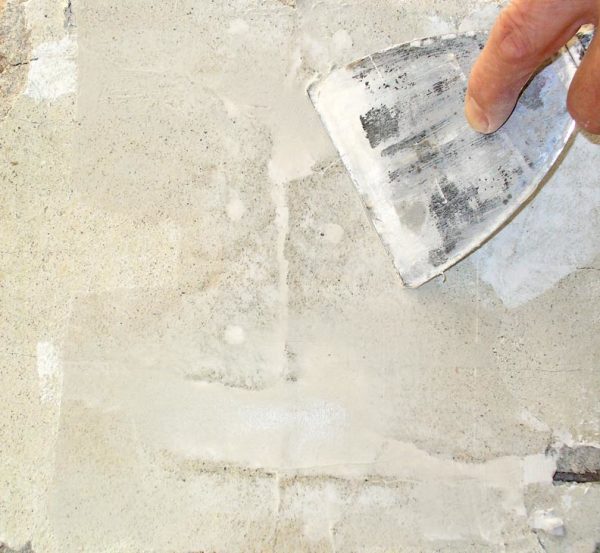
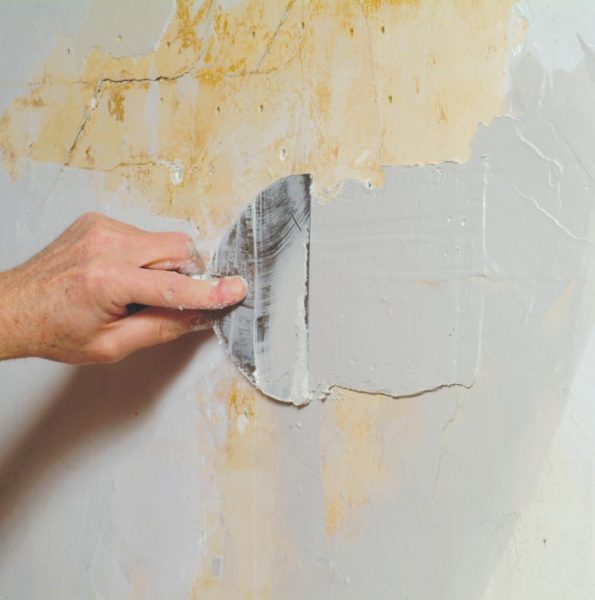
Step 4
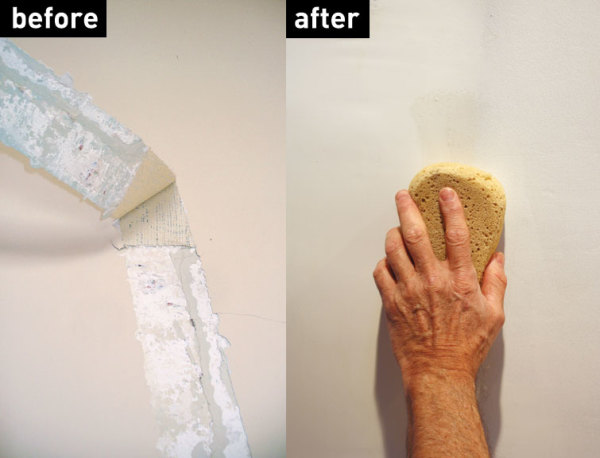
Using patching plaster, fill the deep holes down to the lath (left), then scrape the patching plaster with a putty knife, leveling it with the edges of the hole. Skim plaster over the drill holes and patch with three very thin layers of joint compound (you should still be able to see the plaster surface through it), scraping ridges and bumps between the layers. Scrape the compound one last time with a putty knife (right), then wipe it down with a damp sponge, and wait for the surface to dry before priming and painting.
Online Bonus: 6 Tips for Successful Plaster Patching
1. The first instruction on every construction adhesive is some form of cleaning—surfaces must be free of dust, debris, oil, and dirt. If you skip this step, adhesives will adhere very well to the debris between the plaster and lath while doing nothing to reinforce the plaster. It is important to use a plaster repair adhesive system.
2. Dust on the lath and old plaster is a bond-breaker that needs to be consolidated in order to give the patching plaster a firm surface to grip to when applied. Soaking the lath and edges with conditioner from the adhesive plaster repair kit will accomplish this consolidation; the technique also works for friable or crumbly plaster.
3. Don’t open up or rake out plaster cracks—this weakens the plaster and creates dust and additional unnecessary work. Also, simply filling the cracks with plaster will do nothing for adherence or stability of the old plaster; without stabilization, the plaster will re-crack.
4. Nothing needs to go on the surface of the plaster, and in many cases shouldn’t. Just fill the cracks and holes; the adhesive attachment to the lath is reinforcing the crack below the surface. Anything on the surface will only be as attached as the paint layer underneath it and be unnecessary except for cosmetic reasons.
5. Don’t use modern plaster for patching. Because it’s harder than old plaster (700 to 1700 psi vs. 450 psi), cracks will eventually reappear at the junction of these two types and necessitate the use of tape and compound on the surface. Use a patching plaster specifically designed for use in your old house.
6. Using the adhesive method of plaster repair will not trigger the EPA lead paint threshold of disturbing six square feet of paint per room. (You’d need about 23,000, 3/16” holes to cover 6 square feet.) Additionally, this method generates less mess and takes less than half the time of more conventional approaches.


