


Weatherstripping helps keep winter weather at bay on even the coldest days. (Photo: Joe Hilliard)
When people decide to replace the original windows on their old houses, it’s usually because they think new ones will save them money and energy. But there’s a much cheaper way to increase energy efficiency than writing a check for replacement windows—and one that maintains your home’s historic integrity, too. Good weatherstripping—which limits the amount of air that freely flows past closed windows and doors—can drastically improve the performance of drafty old windows and is simple and inexpensive to install yourself.
Weatherstripping can be applied almost any time of the year, but up North, we start thinking about it once the weather turns cold. (Conversely, in the South, weatherstripping comes into play when summertime temperatures start to soar and air conditioning seeps out through cracks around windows and doors.) Making plans now to weatherstrip the windows and exterior doors in your house can make a significant difference in both your energy bills and your home’s comfort level.
To figure out where you need to install weatherstripping, start with this simple, eye-opening test. On a day when a breeze is blowing through your neighborhood, take a candle and a box of matches and head for your windows and doors. Light the candle, and let it burn for a few moments before blowing out the flame. As the plume of smoke drifts from the smoldering wick, slowly move the candle around the window a couple of inches from the interior stop molding and the sash. Even slight drafts will disturb the rising smoke and reveal areas that could benefit from an application of weatherstripping.
Getting a Tight Fit
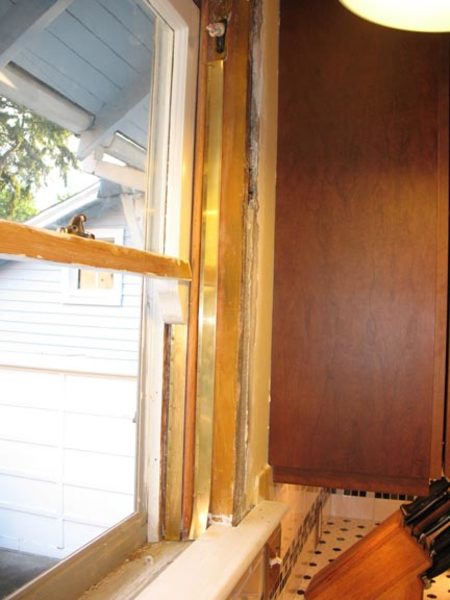
The brass flange installed here is one of many ways to tighten up drafty areas around windows. (Photo: Joe Ernst)
A few factors account for many of the leaks that develop over time around old-house windows and doors. First, wood expands and contracts with changes in humidity, which adds friction to surfaces that fit together tightly. This friction slowly wears down the wood on surfaces that rub together—you may not see it, but you can feel it in the form of a draft. Add this to the fact that houses settle over time (some of them drastically), and it’s easy to see why old homes can be drafty indeed.
Weatherstripping is a layer that’s added to fill in gaps and keep the drafts away, and it comes in a wide variety of shapes and sizes. Some weatherstripping products—like those made of silicone rubber or vinyl bulbs and felt—can be compressed between meeting edges and are good to use in areas like the stop molding or latch side of a door. Some weatherstripping materials—like leaves, brushes, and flanges—are intended to fill in gaps between sliding surfaces, and work well between sash windows and door jambs. The ideal weatherstripping for any application will be effective; easy to install, repair, or replace; inexpensive; and almost invisible.
If you need to weatherstrip a door or a casement window, choose a compressible weatherstripping product, which will work on all sides of the door or window. You’ll find that some stop moldings are available with an attached compression bulb (a long foam tube). These work reasonably well for the top and sides of the door. You may have to adjust the weatherstripping on the hinge side, however, so the door isn’t blocked from closing by the foam’s extra bulk. Door bottoms are usually weatherstripped with brushes or rubber strips mounted to thin pieces of wood called sweeps, which are simply nailed or screwed to the lower edge of the door.
Although weatherstripping can be applied to several surfaces, I prefer to avoid application to the sash or the inside jamb since it can interfere with proper functioning of the sash weight system, and will require sash removal for replacement or repair. Instead, I’ve found it’s possible to get very good results using weatherstripping on the interior and exterior stop moldings and the parting bead. These small pieces of wood are somewhat sacrificial, allow sashes to remain intact, and, perhaps best of all, let sash weights remain readily accessible for any needed repairs down the road.
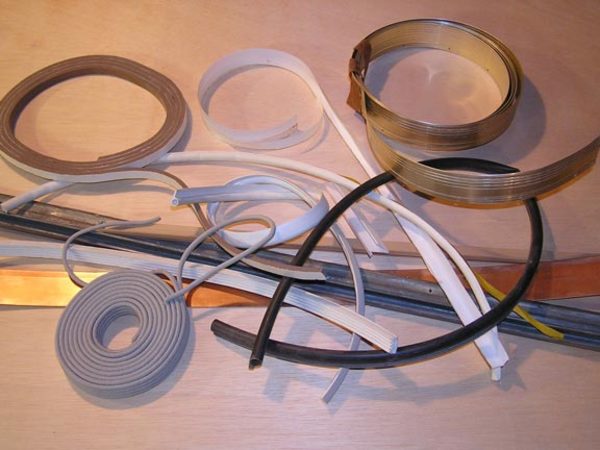
An array of current weatherstripping options shows the wide variety of materials available today—from metal and rubber strips to silicone rubber tubes. (Photo: Ray Tschoepe)
Sealers: Metal vs. Plastic
Windows have been the object of weatherstripping efforts since the 19th century—while most houses only have two or three entry doors, windows often number in the dozens. The simplest weatherstripping on the market today is a low-tack rope of caulk that can be pressed into the cracks around windows and doors that won’t be opened during the cold months, and removed in minutes once the weather warms. While you’ll have to reapply this type of weatherstripping each year, installation only takes about 10 to 15 minutes per window.
At the other extreme in terms of installation labor lies the integral, interlocking metal weatherstripping that was introduced in the 1920s. It is still available today, and requires that a thin cut be made around the perimeter of each sash to accommodate a metal flange nailed to the inner side of the window jamb. Under ideal conditions, it’s an excellent way to seal windows, but it does suffer from a number of shortcomings. Whenever the sash is removed for repairs or painting, the weatherstripping must be removed with it. Paint buildup is common at the upper end of the strip where it peeks above the lower sash, and raising and lowering the window over this lump of paint can be quite difficult, or even impossible.
On thinner sash (smaller than 1 1/4″), the groove cut into the sash perimeter is so close to the edge that the sash is likely to split if stressed. Additionally, the slot usually runs into the groove that houses the chain or cord, increasing the likelihood that these will get snagged on the upper edge of the weatherstrip. Finally, the interlocking strip at the meeting rail requires the removal of a fair amount of original material—a fact that can raise concerns about maintaining historic integrity, and one that makes this method less popular today. Repairs to this weatherstripping are best accomplished through replacement—whenever I come across this type of weatherstripping, I remove it, fill in the grooves, and replace it with a less invasive material.
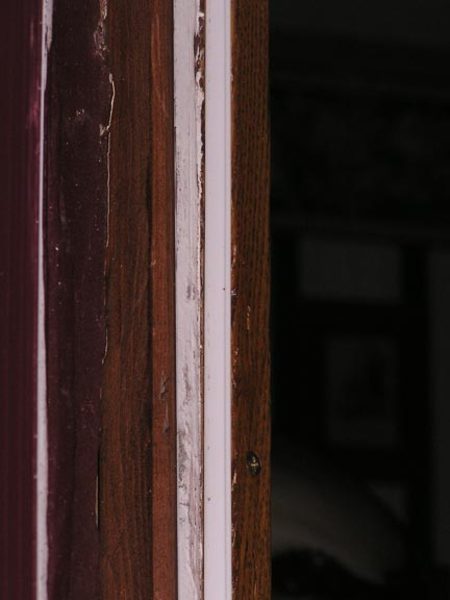
Leafseal weatherstripping rests within a slot cut in stop molding for a snug fit. (Photo: Ray Tschoepe)
A more common type of metal weatherstripping uses thin metal strips that are nailed to the inside of the jamb and then sprung so that the edge of the leaf presses against the sash. These afford an easy installation, although one that’s a bit tedious, as it requires placing nails approximately every inch or so and “springing” the metal strips by prying up their unfastened edges to create a tight fit against the sash. These strips are generally made from copper, bronze, brass, or zinc—metals unlikely to corrode but still stiff enough to retain their spring so they keep the air out. Be wary of versions sold at big-box home centers, though. They often are made of aluminum, which, due to its softness, doesn’t retain its spring action and will begin to fail a short time after installation.
There are a variety of spring plastic strips (or leafseals) and bulbs that are easy to install and quite effective. Those backed with adhesive can be installed effortlessly in minutes, and are easily replaced. A better plastic spring weatherstrip is one installed in a thin (approximately 1⁄16″) groove, which holds better than adhesives, lasts for many years, and also is easy to replace.
Ray Tschoepe, an OHJ contributing editor, is director of conservation at the Fairmount Park Historic Preservation Trust in Philadelphia.


