

What lies beneath the older the walls and ceiling, the more chance that you’ll find old calcimine paint embedded under successive layers of paint or wallpaper; one clue is that the surface layer will be peeling or flaking. Calcimine (also known as kalsomine or distemper) is essentially ground chalk blended with water with glue as a binder. Popular throughout the 19th century and into the first third of the 20th, calcimine paint had a dead flat, soft pastel look that permitted builders to “finish” plaster walls quickly.
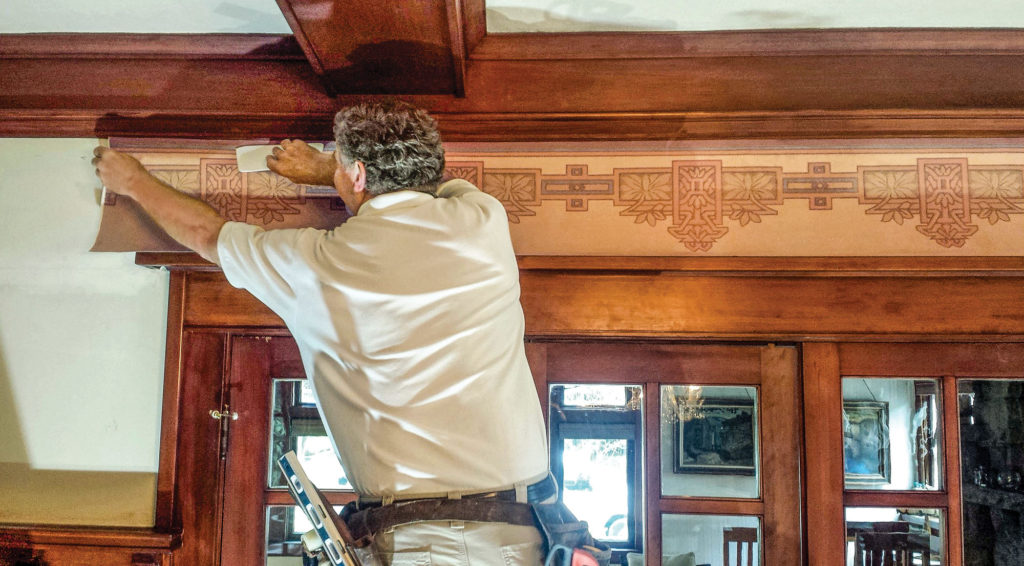
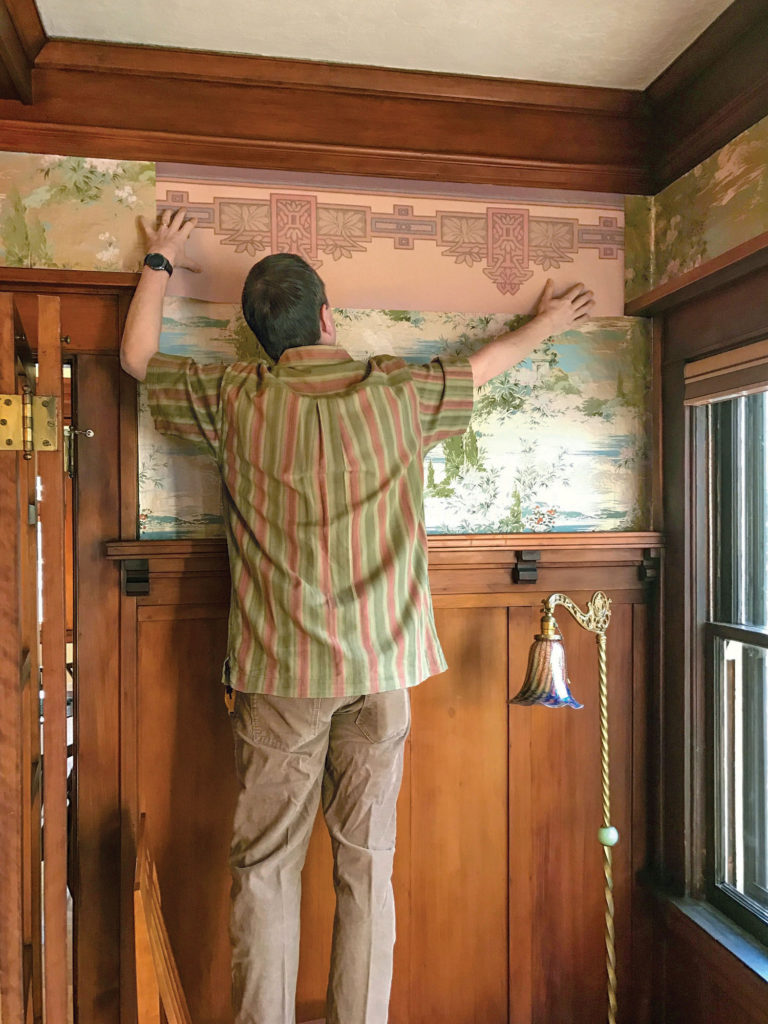
Proper preparation of plaster surfaces is critical when the new papers are this eye-catching. These are Dresser designs from the ‘Centennial’ collection, Bradbury & Bradbury. 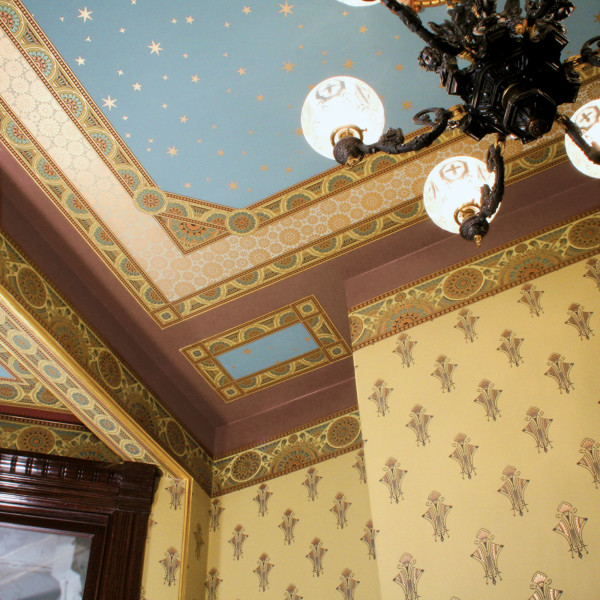
Calcimine paint is not very durable. It was meant to be washed off before fairly frequent reapplication. Because it lacks active binders, calcimine can prevent modern oil and latex paints from adhering properly. Eventually, the top paint will pull away and begin to flake. Calcimine can be detected by rubbing a damp finger on an area where paint has chipped off. If your hand comes away with a chalky residue, it’s likely this venerable old paint was used sometime in your home’s history.
If you do have calcimine paint, simply repainting the surface will not solve the problem, especially if there are layers of both oil- and water-based paints over it. There are two methods of dealing with old calcimine, and neither is easy. The first is to remove the calcimine completely—a project that’s as messy and time consuming as it sounds, involving multiple washings with and without solvents, scraping as you go. (One pro went so far as to brush 13 coats of wallpaper stripper on an old calcimine ceiling. The solution delaminated every coat of paint on the wall, which then had to be scraped away.)
The second method is to encapsulate the calcimine by sealing it. The first step in this process is to scrape away all areas of peeling or popping paint. Follow by washing the surface with a well-dampened sponge. (Some experts recommend mixing in a little vinegar, then cleaning with fresh water, then repeating the process three times.)
Allow the cleaned walls or ceiling to thoroughly dry before applying a sealer coat. While any number of products can give results that last several years, none will solve the problem forever. Options include priming the surface with an alkyd- or oil-based primer that can be followed by latex paint; applying a “calcimine recoater” such as Benjamin Moore’s Super Spec; or using other problem-surface coatings, including Scotch Paints’ Draw-Tite and Zinsser’s Gardz.
Painted-over Wallpaper
If you encounter wallpaper that’s been painted over, first try the wallpaper stripping techniques recommended at right. If the paper is impossible to remove, you’ll have to intensively prepare the wall before painting.
Remove any areas of loose paper first. Then apply joint compound to all seams, nail holes, bumps, or other damaged spots. After the walls are thoroughly dry, sand smooth. The more time spent filling holes, patching, smoothing, and sanding, the better the end result. As a final test, close your eyes and rub your hand over the entire wall surface. If it’s not perfectly smooth, it will be evident to all that old wallpaper remains underneath your new paint.
In an abandoned house in Maryland, multiple layers of peeling paint and visible seams are indicators of the many wall treatments in this room’s long history. Brian Vanden Brink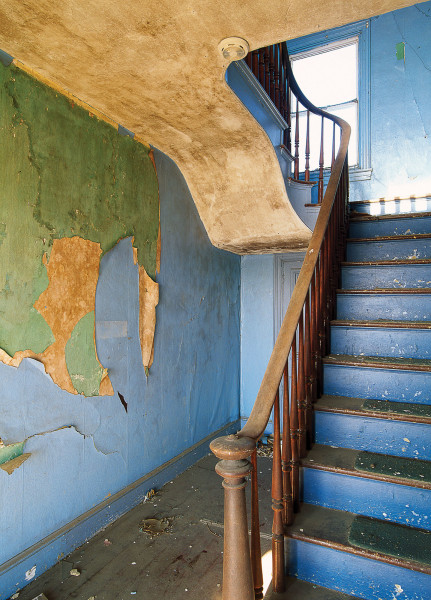
Stripping Wallpaper
It’s time consuming and labor intensive, but it isn’t difficult if you follow these tips from the Wallcovering Installers Association:
Step 1 Strip off the outer face of the wallpaper, leaving only the backing material and glue. If there’s only a single layer of paper, try a stripping solution of water mixed with a few drops of dishwashing liquid. Apply with a large sponge, or put the solution in a plastic container with a spray nozzle and spritz the paper until it is completely damp.
Step 2 Allow the solution to soak in, rewetting as necessary, for at least 10 minutes.
Step 3 Using a wallpaper scraper or a wide putty knife, scrape away the backing material. Rewet as needed. The more soaked the paper, the easier it will be to remove.
Step 4 For tougher papers or when there are multiple layers, try a solution of 2 parts water to 1 part white vinegar, or use a commercial wallpaper stripper, such as Dif. (The vinegar method only works on wheat- and starch-based adhesives.)
Step 5 Remove the glue behind the backing; otherwise it will show through the fresh paint. Mix a solution of 2 tablespoons of liquid fabric softener to a gallon of water and apply it to the surface, then rinse with clean water. To check for evidence of glue, wet the wall and feel for slick areas. Repeat until all the glue is gone.
Step 6 For vinyl and denser wallpapers that won’t budge, score the surface with a wallpaper scoring tool such as Zinsser’s PaperTiger. The tool may damage drywall underneath the paper, but it should not hurt plaster walls. Then follow the steps outlined above until the walls are clean and smooth.
Expect to use an arsenal of products to remove wallpaper, from steamers and scrapers to proprietary wallpaper strippers. 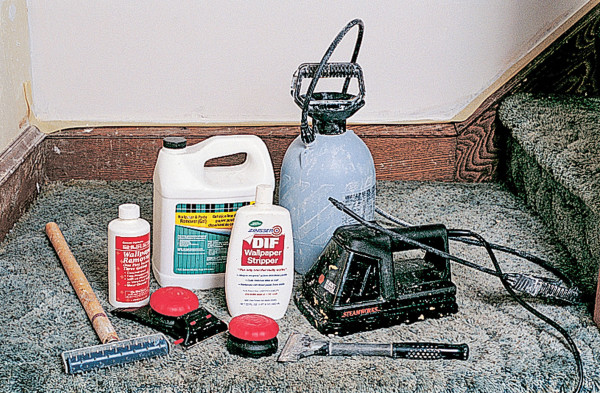
Oddly enough, the Association does not mention using a rented wallpaper steamer, perhaps the primary way OHJ readers have stripped wallpaper over the years. The steam saturates the old paper quickly with the added advantage of heat to loosen the adhesive. This method is recommended for plaster walls only; steam may delaminate the surface of drywall. Prep the room carefully, taping over outlets and using waterproof dropcloths on the floor. Perforate or score the paper as described above. The steamer will make a mess, and create streams of super-hot water, so wear heavy gloves and eye protection.
Fiberglass wall liners like Texturglas provide a smooth, optimal surface for new paint or wallpaper. Courtesy Pinturas Apliastig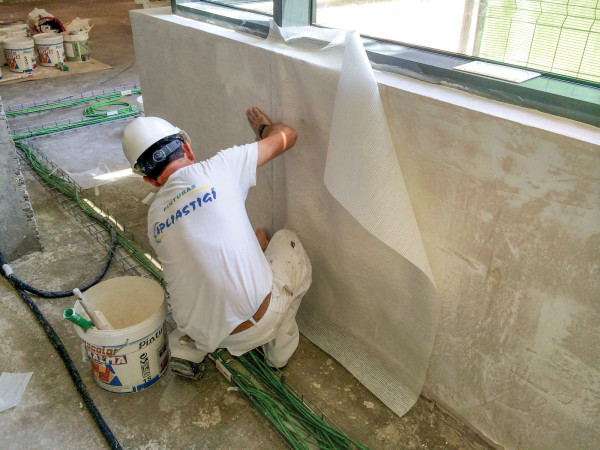
Pro Tip: Instead of trying to butt seams, trim the edges of wall liner about 1/8″ to 3/16 ” short on all sides. This helps keep the liner edges from showing and allows the finish paper to have a tight bond directly to the wall.
Wall Liners
Walls in older houses present all sorts of problems you don’t find with fresh drywall or plaster. The solution for previously patched plaster, small cracks, bumps, and cracked and flaking paint—even for old wood paneling and sand-finish plaster—is to use a wall liner. A time-honored tradition, wall liners smooth away defects so that almost any wall can accept new paint or wallpaper.
To a professional, a wall liner is the best way to guarantee a long-lasting, trouble-free wallpaper installation. The techniques date to the early 18th century, when delicate imported papers were pasted to strips of canvas before hanging.
Since a liner is essentially monochromatic, it goes up faster than a patterned wallpaper with repeats. Pasted and unpasted wallpaper liners are usually available from wallpaper dealers as well as online. Other options include acid-free lining paper and blankstock (try paper-hangings.com) and fiberglass mat systems like Nu-Wal.
Acid-free papers These moderately heavy papers are ideal for situations like historic restorations where longevity is a goal. Made from traditional rag paper, acid-free liners are highly porous and can expand about 1 percent. Paper-Hangings recommends applying acid-free papers with a paste with a high water content, such as a thinned premixed clear paste or a wheat/cellulose blend.
Blankstock This traditional product provides a smooth, receptive surface for wallpaper, especially block-printed papers that contain distemper inks. It absorbs excess moisture from the finish paper, allowing it to dry quickly. It’s also a good choice for very thin papers, such as handprints. Blankstock requires sizing, or prewetting with a wheat-paste sizing product, followed by overnight drying.
Fiberglass Durable fiberglass matting makes an excellent substrate for wallpaper, especially over walls that have surface flaws. The matting is cut to rough size and applied with an elastomeric saturant that’s vapor retardant. Once the excess material has been trimmed away, a second coat of saturant is applied. When the walls have cured, they can be painted or papered. Although the system is very forgiving, the walls still have to be stripped of peeling paint or paper, and any damaged plaster repaired and reinforced before installation can begin.
Hanging Fiberglass Liner
Installing a fiberglass wall liner is something you can do yourself. The material is strong, doesn’t need sizing, and can be ordered with all necessary materials, including the saturant that also acts as the adhesive. Here’s a step-by-step guide:
> Measure a section of wall and cut the fiberglass mat to size, with about 4″ to 6″ of overage on all sides.
> Apply the saturant to the section with a paint roller. Use a paintbrush for hard-to-reach areas. Apply the mat to the wet wall surface, smoothing in place with a 4″ or broader putty knife.
> Trim the excess material at ceilings, baseboards, mouldings, and outlets. Smooth out any air bubbles by dragging the putty knife over the liner. Follow with another coat of saturant.
> Once all the sections are hung, apply a second coat of saturant and allow to dry for at least 48 hours before priming walls.
Illustration of double cutting. Rob Leanna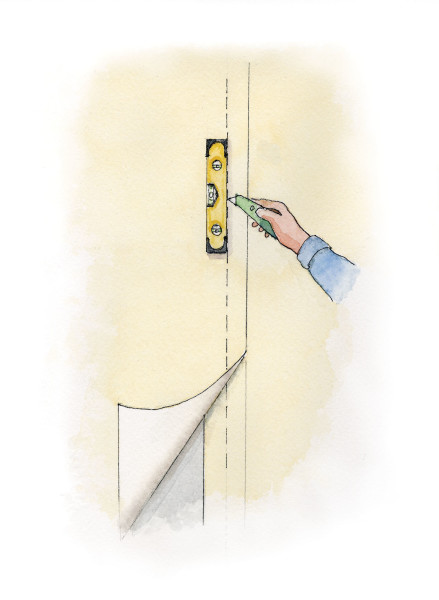
Double Cutting When you hang a new section of liner next to the previous one, here’s a trick to make the seams disappear. It’s called double cutting.
• Hang the second section of liner so that it overlaps the first by about 1″.
• Once it’s in place, hold a 6″ level or another straightedge down the center of the lapped seams.
• Run a sharp utility knife or new razor blade along the straightedge. If the cut is a long one, change the blade every couple of feet so that it’s sharp.
• Carefully peel away the strips of liner on both sids of the cut.
• Smooth the panels back together. You should have an almost invisible seam between the two sections.
If you plan to hang a dark-color wallpaper, prime or paint the walls in a similar shade before you begin. Once the paper is on the wall, it may shrink slightly; a dark color underneath eliminates the potential for white lines to appear between the panels.
This frieze was one of several “virtual room” digital mock-ups. 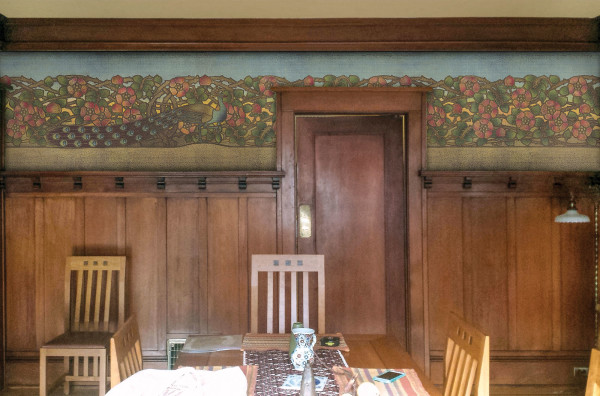
Customizing for the Room
Lavished with original stained woodwork and built-ins, the dining room in a 1912 Arts & Crafts home was near pristine. The scenic wallpaper hanging above the plate rail, however, had seen better days. Dating to the 1950s or ’60s, it was cracked, peeling, and discolored from water damage.
To replace it, the owners asked Bo Sullivan and Gwen Jones of Bolling & Co. to create a custom paper based on a period original. After looking through the studio’s collection of vintage wallpapers and sample books, they decided to do trial runs of several options from around 1910 to 1915. Rather than reproduce new papers based on each design, Bolling & Co. created digital mock-ups of each pattern, shown in the context of the room, to be previewed on a computer screen.
After considering an English paper with a peacock motif, a subtle “leather” embossed paper, and a hawthorn-berry frieze, the winner turned up: an Arts & Crafts pendant frieze with a coordinating border paper. Machine-printed on a buff oatmeal paper with soft colors and gold metallic accents, the ca. 1915 paper had a nice balance of detail and simplicity, with warm colors in a subtle yet rich palette.
Original paper (right), and the rescaled version. 
There was enough of the full design repeat in the sample that it was possible to scan and re-create the paper without losing any distinctive details. Digital printing allowed Sullivan and Jones to tweak the size, scale, and layout to make the frieze easier to apply, especially around corners and doorways. Bolling & Co. also tested the design in different colorways to get just the right blend to coordinate with other furnishings in the room.
Since the height of the wall area was only about 36″, it made sense to print the new paper in a horizontal orientation rather than the more typical vertical strips. That eliminated most vertical seams and allowed the decorative pendant and border patterns to be integrated
directly into the plain oatmeal fill paper in a single printing.
The overall design was adjusted for size so that it perfectly fit the wall space, with
a bit of blank space at the edges to accommodate changes in wall height and trim lines. Additionally, to minimize waste, the pendant pattern for areas over the tops of doors, windows, and cabinets was printed separately in multiple side-by-side strips.
Subtle and geometric, the custom paper designed by Bolling & Co. brings out the rich tones of the original woodwork and built-ins in a 1912 Arts & Crafts dining room. 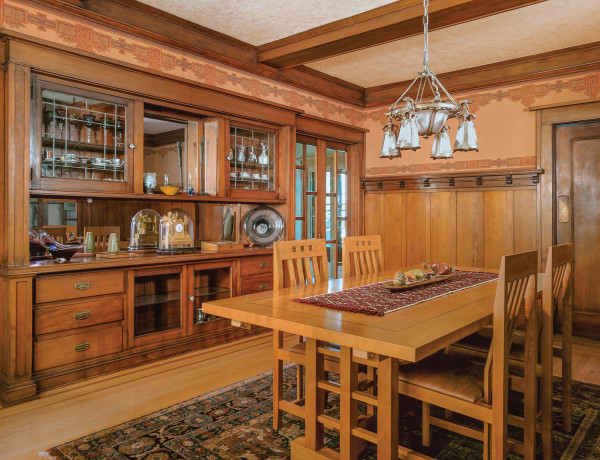
Beast Before Beauty
After stripping two layers of existing wallpaper and an original liner paper from the walls, wallpaper pro Shannon Russell made an interesting discovery. The original plaster had been painted with a cold-water or distemper paint in an intense deep blue. (Other common colors of the time included deep red and deep green.) This original paint was made by mixing ground pigments with cold water, the usual formula for calcimine.
As everyone quickly realized, the old cold-water paint posed a problem for the new installation. Calcimine paints are notoriously unstable and tend to cause delamination of successive applications of paint or wallpaper. Once all surrounding surfaces were protected with plastic and drop cloths, Russell moistened the layers of wall covering with a diluted solution of Dif, an enzyme-based wallpaper stripper. Once the solution had soaked through the layers, Russell carefully removed the mess, using a scraper and broad knife.
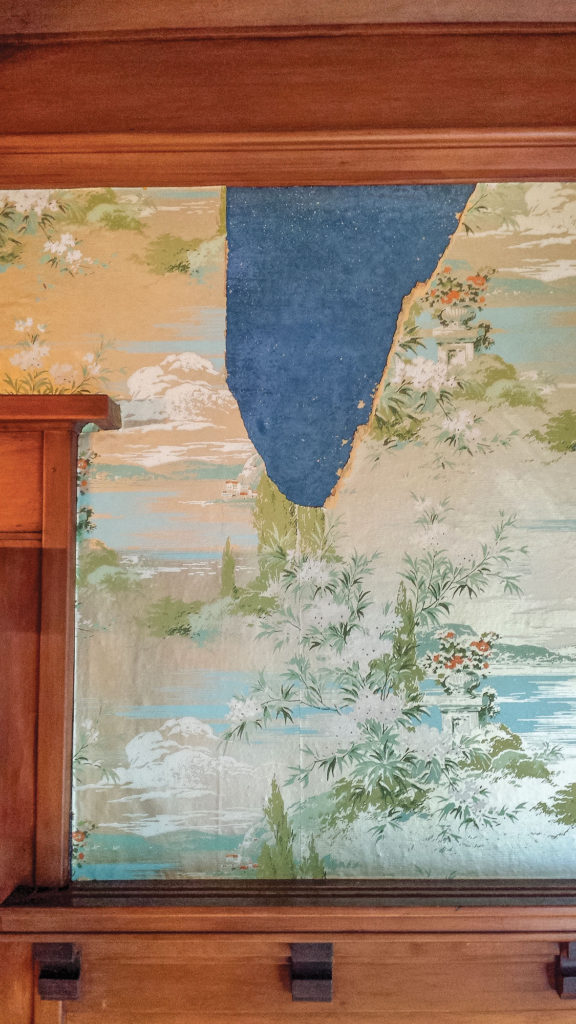
Once stripped, the next task was to remove the original wallpaper paste. The moisture from the stripper had freshly dissolved the pigments underneath, and the deep matte color spread everywhere. To stabilize any remaining colorants, Russell primed the walls with Draw-Tite, a penetrating sealer designed for chalky surfaces. Once the walls were fully dry, plaster cracks were repaired using mesh tape secured with screws. All the walls were then smoothed, sanded, and primed with a Gardz, a paintable wall sealer intended for use over chalky surfaces with adhesive residues. Russell finished the preparation by adding a white, acid-free wall liner to help achieve strong cohesion and a smooth installation. Finally, the new paper was ready to hang, using a premixed clear paste, Pro-880 from Roman Adhesives.
Pro Tip: Before installing new wallpaper, lightly sand any surface covered with oil paint. This helps the new paper grip the surface.


