

Whether the existing cabinets are painted or stained, refinishing them for a new look is an affordable choice. If the finish is in good shape and you’re going darker with the new paint, you’ll only have to clean, sand, prime, and paint. If the old paint is thick or you are going lighter, you’ll probably have to strip the old paint. Solid wood and MDF can be refinished, but not so easily cabinets made of vinyl or laminate, or those that were
finished with a penetrating oil.
To prep, remove doors and mask surfaces. Rob Leanna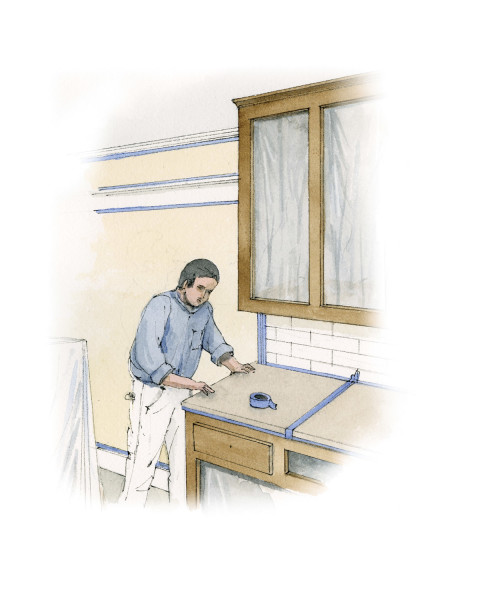
STEP 1
As with any refinishing job, prep is critical. Remove all the doors and drawers from the cabinets, then remove all the hardware, even hinges. Label all hardware for position, and label each door and drawer in an inconspicuous, unpainted spot, as under a hinge or the underside of a drawer. Cover appliances with tarps, drop cloths, or plastic secured with tape. Neatly tape kraft paper over floor and countertops. Cover the backsplash and door openings with taped plastic. If you’re stripping, tape plastic over the inside of cabinets. Clean cases, doors, and drawers with a wood cleaner or diluted TSP; use a degreasing cleanser, in any case. Damp-rinse and dry; don’t leave water on wood cabinets. Allow time for air-drying.
STEP 2
If you need to strip paint, work in a well-ventilated area (open windows in the kitchen when stripping the cases, and take doors and drawers to a workshop or outdoors). Use a paste chemical stripper, which won’t drip from the cabinet frames. Citrus-based strippers take longer to work, but are a safer option; still, even “safe strippers” are heavy-duty. Wear protective clothing, a respirator, and goggles as recommended by the manufacturer. Test first, then proceed. The chemical won’t remove all of the finish; after it bubbles, use a flexible putty knife, awls and old spoons and crevice tools as needed to get the paint off. Repeat with more stripper if needed. Use an orbital sander in successive passes, starting with medium grit paper and moving to fine (at least 220-grit). Use a shop vac to remove dust. Wipe surfaces with a damp tack cloth and let dry.
Chemically stripping paint. Rob Leanna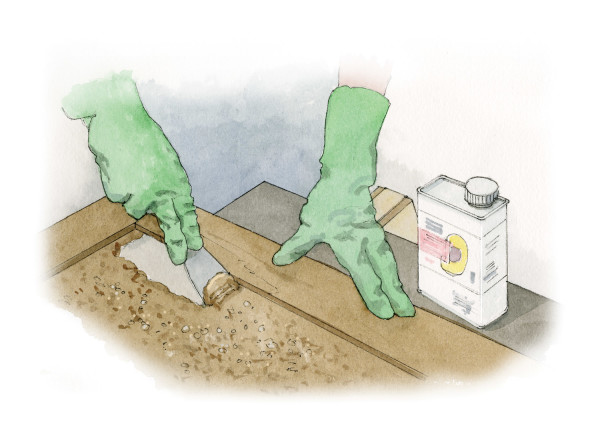
STEP 3
Fill any defects with wood filler. Don’t fill in the hardware holes unless you are replacing it with new hardware of a different size or spacing. Sand the filled areas smooth. Repeat the vacuuming and wiping process, and allow it to dry. If you will be staining wood cabinets, apply a coat of sealer/wood conditioner, thinning it 1:1 with denatured alcohol (or follow label directions). Once dry, scuff the surface with 000 steel wool. Wipe with a damp tack cloth and let dry.
Prime and paint cabinets. Rob Leanna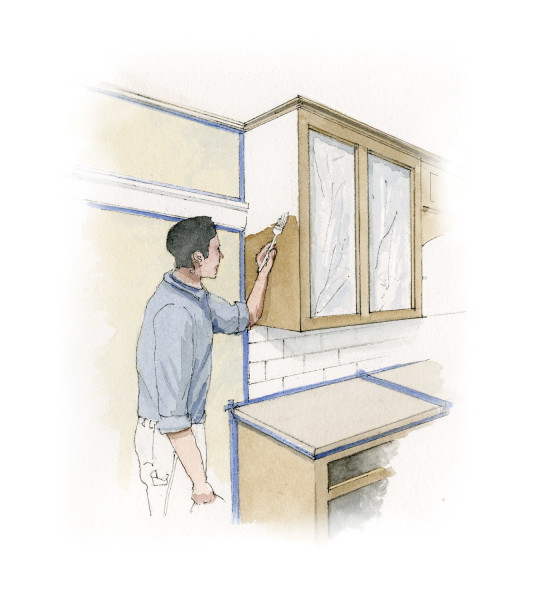
If you will be painting, use a primer compatible with the finish paint, preferably from the same manufacturer. (Ask at the paint store.) If the finish paint is dark, consider using a tinted primer. Spraying is fast but requires additional prep and masking and is hard for a novice to control. Alternately, lay on the paint in a thin coat with a high-quality roller or a paintbrush, working quickly in long strokes and keeping a wet edge.
Lay doors flat and do the backs first; allow to dry and then prime the fronts. Place the face of the drawers upright. For the cabinet face frames, start at the top and work down.
STEP 4
To stain: Test the color and application time. (Dark stains take multiple coats. If the color is becoming too dark, wipe before it dries.) Apply the stain with a brush or clean cotton rag. Allow the stain to dry between coats. When the right color has been achieved, lightly scuff the surface with 0000 steel wool, and repeat the vacuum/damp tack cloth process. Finally, apply a compatible polyurethane varnish, making sure everything is dust free. Check manufacturer instructions to see if the varnish needs to be thinned.
Rehang doors and insert drawers in original spots. Rob Leanna
To paint: Lightly scuff the primed surface with a medium-grit sanding block and repeat the vacuum/damp tack cloth process. Apply paint, using a paintbrush, or by rolling on paint and then brushing it out, for a historical finish. You will probably need two coats.
Reinstall the hinges and hang the doors in their original positions. Slide in the drawers. Install pulls and knobs.
Install New Hardware
Hardware is the finishing touch. Swapping it out can make a big difference. The easiest swap is to find new hardware that matches the existing drill holes. (Measure center to center, meaning the space between the center of two screw holes; most pulls are between 3″ and 5″ on center.)
Hold the template in place over the pencil mark and tap an awl or a finishing nail through the hole. Rob Leanna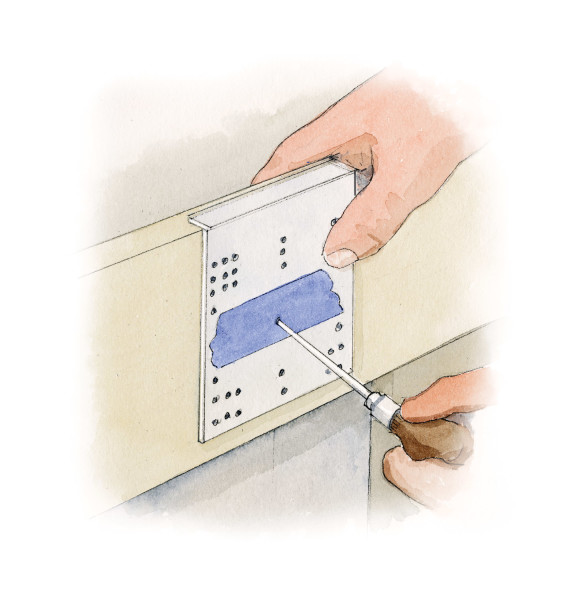
If you choose hardware of a different size or configuration, fill in the old holes in Step 3. After refinishing is complete, mark and drill the new holes. Use a template to ensure the placement is straight and consistent across the cabinetry. You can make a cardboard template, but inexpensive plastic ones are available at most hardware stores. On a pre-made template, mark which hole you’ll use, with a Sharpie or a bit of painter’s tape (so that you don’t accidentally use the wrong hole guide as you move to the next door). Mark the drill spot with a pencil, and work on adjacent doors at the same time. Do this process through the entire kitchen. Check that marks are level across the doors and positioned where you want them. Then check again—before you drill!
For stile-and-rail doors, align the center point of the bottom screw with the top of the rail.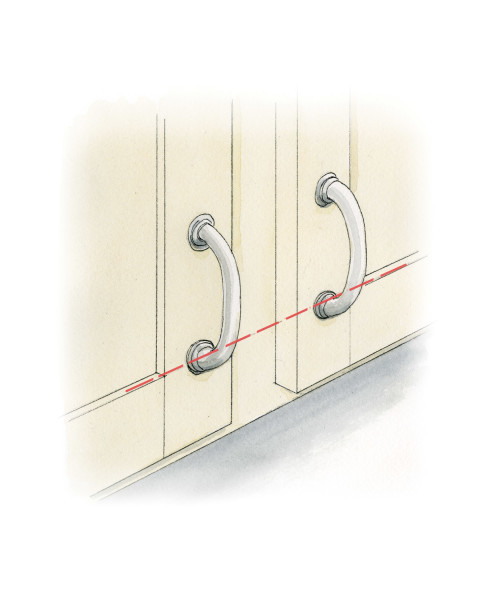
Hold the template in place over the pencil mark and tap an awl or a finishing nail through the hole. This indentation is a guide for the hole. Use the smallest drill bit possible to prevent splintering. (Using masking tape over the indentation avoids damage but may hide the mark.) Knob screws are usually 3/16″ in diameter. Test the bit on a piece of scrap wood. Keep the door or drawer open as you drill to avoid going into the face frame. Check that holes are level. Insert the screw and attach the pull or knob, and tighten it by hand with a screwdriver. Overtightening can damage the door.
Placement of knobs and pulls takes into account both appearance and function. For cabinet doors, knobs or pulls are usually placed 2 ½” to 3″ up from the corner, centered left to right on the stile. For stile-and-rail doors, align the center point of the bottom screw with the top of the rail. For plain-faced doors, measure up from the bottom edge of the door. Pulls or knobs are typically centered in the middle of drawers. Mixing pulls and knobs gives a traditional look.


