

With the effects of time & gravity, all buildings tend to settle as they age, but they don’t settle uniformly. In what’s known as differential building settlement, the interior wood framing shrinks and settles more than the sturdier outer walls. Since most stairs are attached to an interior wall on one side, differential building settlement may cause the staircase to sag away from the wall, toward the newel post or stair well. Repairing a staircase with a significant settlement problem is best done from below.
Before that work can begin, however, it’s essential to figure out the center line of the stair, says Steve Payne, co-founder of Payne-Bouchier Fine Builders in Boston. “If you don’t do that, the stair is never going to work out right.”
Finding the center line is simple if you follow this rule: the line always follows the handrail. The edge of the staircase and the positioning of the risers around any turns are controlled by this center line, from the handrail down through the balusters or spindles. It’s the fixed point around which all the other elements of the stair move.
This is especially true in certain row-house neighborhoods in Boston, where the typical mid-19th century stairs are elliptical-well, continuous-rail staircases that run up a party wall. They were well thought out when they were installed, “but they were framed sort of casually,” says Payne. “That’s why they sag. We’d never dream of framing stairs that way now.”
His firm usually encounters one of two repair scenarios.In the best-case situation, the stairs did all their settling in the first 25 years after they were built and haven’t sagged since. Repairing them begins with the removal of the balustrade, leaving the bottom newel in place. Then the treads are detached and slowly jacked up using wedges underneath, until they’re roughly level. “We’ve left the crooked carriage in place, and just moved the treads,” Payne says. “That’s a fairly typical fix. We don’t even have to remove plaster. You have to raise every tread the same amount, so the balusters fit right back into the same holes.”
Repairs are much more complicated when the stair structure is still moving. If the tread wiggles where it goes into the skirt board along the wall, the fix begins by peeling the plaster off the stair soffit underneath. Then the crew builds a jacking assembly—designed on the spot to fit the situation, Payne says. It’s a trial-and-error process, and requires careful attention to stress points. “The stair is never going to be exactly level, but you have to move the whole stair up at the same time, so you don’t bust something in the structure.”
Once the staircase has been cranked up as much as it can go safely, the team adds steel L-shaped brackets that bolt to the wall and support the stringers. Plywood gussets are added to stringers to make them less likely to flex, then attached to the steel.
The steel must be attached in such a way that, when new plaster is applied, the steel doesn’t interrupt the plane.
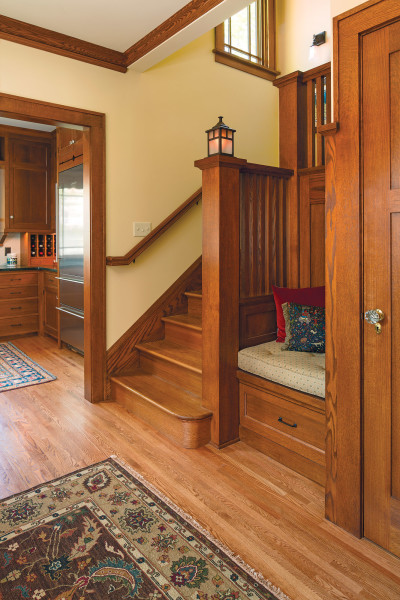
Balusters on Greek Revival and other period stairs often have a dovetail on the bottom—a pin that’s covered at the end of the tread. When new or replacement balusters are required, Payne–Bouchier almost always mills them with that pin. “They give an enormous amount of stability to the rail,” Payne says. The dovetail “indexes everything so exactly and is a time-honored, high-quality approach to setting balusters.”
The main issue he encounters with freestanding stairs built before about 1840 is that they tend to be “catastrophically steep and unsafe.” On the bright side, “They tend not to be out of level because they’re so narrow.”
The cure for a stair that’s too steep is to rebuild it, Payne says, adding a riser or two at the top and at the bottom, and expanding the stairwell hole. This, of course, will gobble up more square footage on not just one but two floors in a house that may already be small. If expanding the stairwell hole is not possible, replacing a mid-stair landing with winders to make the 90-degree turn is another option that may improve safety. “If you want to make [the staircase] more comfortable, it is going to have to grow.”
Step at a time
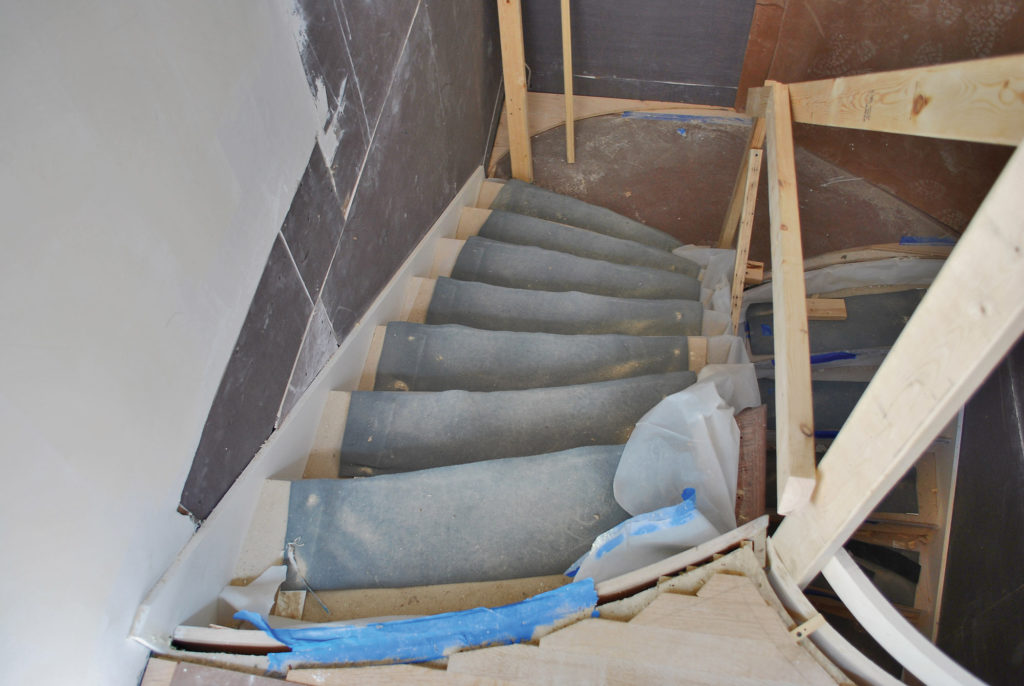
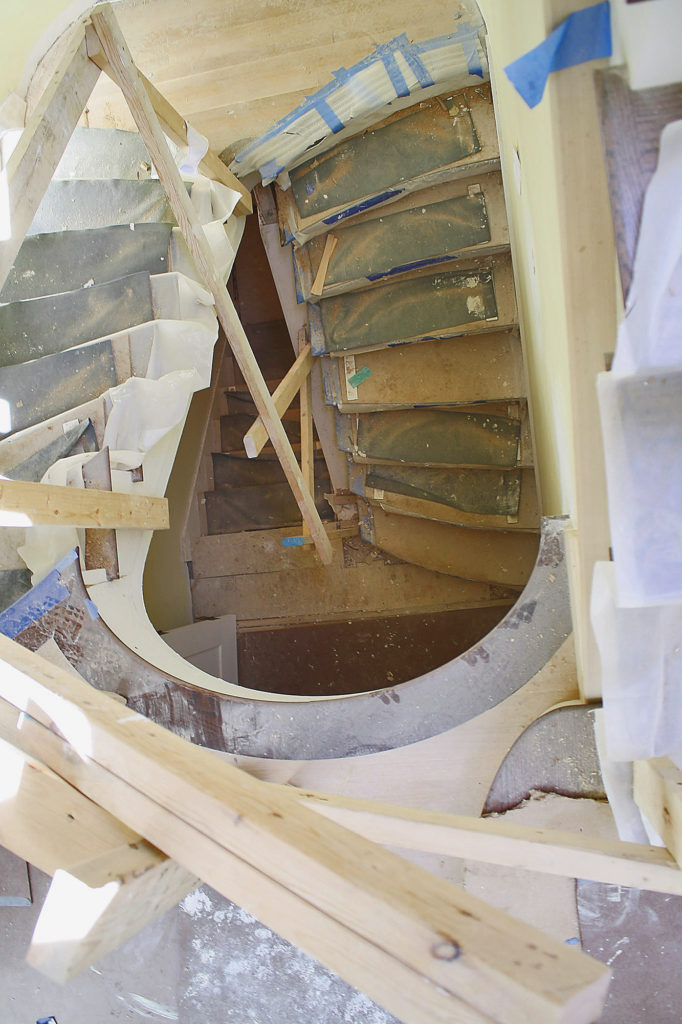
Rebuilding a historic staircase requires careful calibration, following the center line of the stair. As runs are completed, they’re braced as needed (1, 2). The balusters and balustrade assembly not only finish the stair, but also help anchor all of the elements in place (3).
Tension & Poise
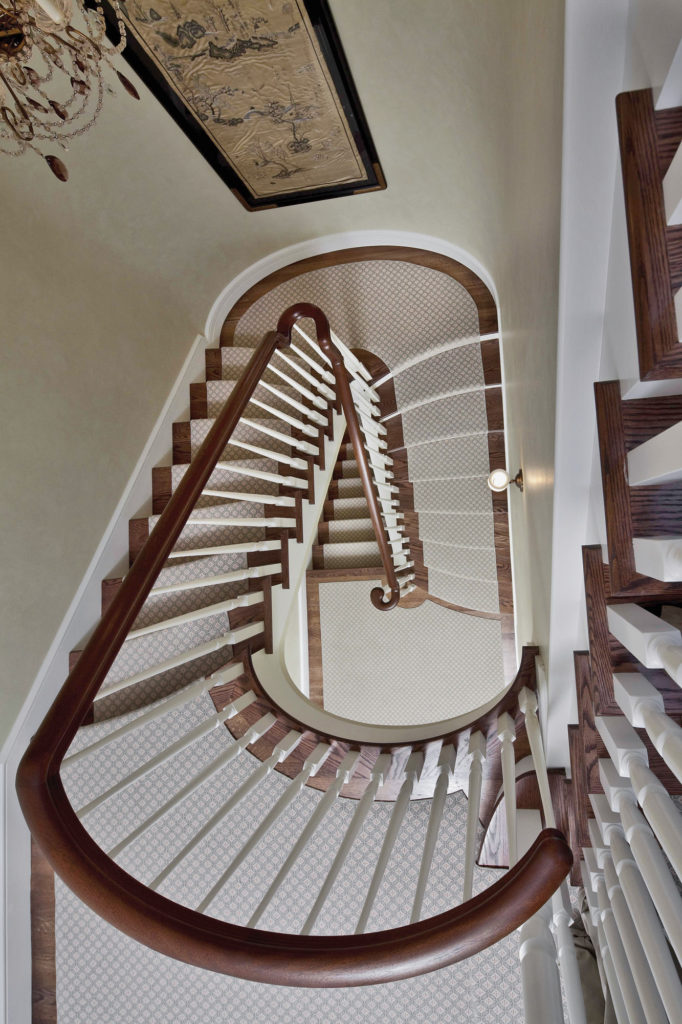
A beautiful balustrade is not merely the sum of its parts. A large part of its architectural finesse comes from the subtle coordination of how the various turnings align and follow the pitch of the rail. For example, note how the turned blocks on each baluster align horizontally from step to step.
A large part of its architectural finesse comes from the subtle coordination of how the various turnings align and follow the pitch of the rail. Rob Leanna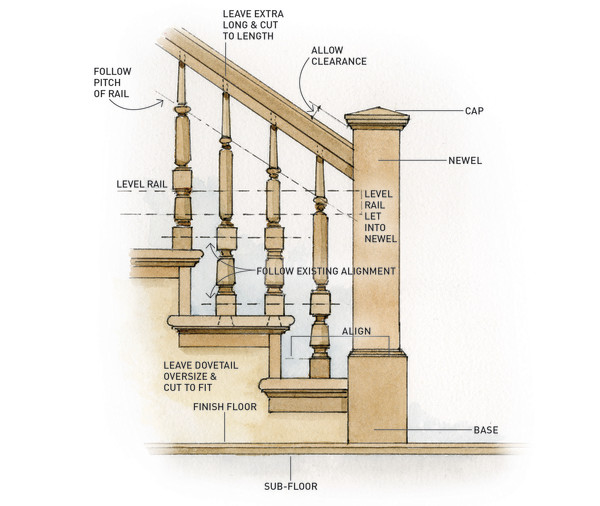
Squeaky Stairs
Squeaks are usually caused when treads that are nailed down loosen. “The squeak you’re hearing is the tread rubbing up and down with the nail,” says builder Steve Payne. A quick fix is to screw the tread to the stringer with a brass countersunk screw, finished with a wood plug. While that’s a completely legitimate fix, don’t be surprised if another tread starts to squeak. After all, all parts of the stair are interrelated. The best fix is to address the problem from below with wedges.
Tread Repair
Treads and risers usually slot into pockets in the stringers, the inclined boards that carry the stair. To replace a damaged tread, pry or cut it out without damaging the stringer. If there is an open stringer on one side of the staircase and access from beneath, remove the open-side mouldings and release balusters. Then knock out the supporting wedges with a hammer and screwdriver. Pry the riser back from the tread, pulling or cutting nails as necessary. Once the tread is free, pull it out gently and replace it with a new tread of the same dimensions.
Rob Leanna
If the stair has closed stringers on both sides, remove the defective tread by cutting it carefully in half. Release pieces from stringers, then clean out the tread mortises on both sides. Deepen one of the mortise pockets by about ¼” using a hammer and chisel. (Make the pocket at least ½” deep.) Fabricate or buy a new tread of the same depth and thickness.Cut the tread to the exact width between stringers. You should be able to shoehorn one end of the tread into the deepened mortise. Then adjust it slightly so it sits between the two stringers. Toenail tread into stringers with finishing nails.
Repairing Balustrades
If the assembly is out of plumb, remove the bottom newel post, then push the rail by hand into position. (Use a plumb bob in-between balusters.) If the balustrade resists, loosen or remove a tight baluster or two. Once the balustrade is plumb, brace it temporarily with a 2×4 nailed to a stair riser.
The newel post should be of the correct height to fit the corrected position of the balustrade, with overage to adjust for unevenness in the floor. (If this geometry is beyond you, call in a pro.) Square-up and repair any damage to the newel opening. The newel should be “let in” to the finish floor, resting on the subfloor. When it is in position at the correct height, trace the profile of the level rail onto the newel. With a hand chisel, mortise out a recess to accommodate the end of the rail.
Once the mortise is cut, brace newel against wall or get a helper to hold it in position for toe-nailing. Drive finish nails through the newel base into subfloor, bottom riser, and stair string. Toe finish nails through handrail into newel. Install any additional newels in the same manner. (Mortise cuts may vary.)
Balusters With dovetails: drive a 6d or 8d common nail through the dovetail. No dovetail: toe-nail baluster diagonally into tread. If balusters are old hardwood, use forged square-cut nails that won’t split wood fibers. Tighten loose joints with wood shims before nailing. Never use glue for balusters.
Brackets, Nosings, Cove Mouldings Have replacements remilled as needed. Be sure newels are in place and balusters are set. Working from the top of the flight, install return nosings after placing brackets on the riser above. Install cove mouldings last to hide joints.
Staircase Anatomy
Critical parts of the staircase revealed: The support system begins with either closed stringers (where the treads are housed in grooves) or open stringers (the treads rest on the stringer). The carriage stringer adds support at the center of the staircase. Treads and risers generally aren’t nailed into place, but supported by wedges glued from underneath.
Staircase anatomy. Rob Leanna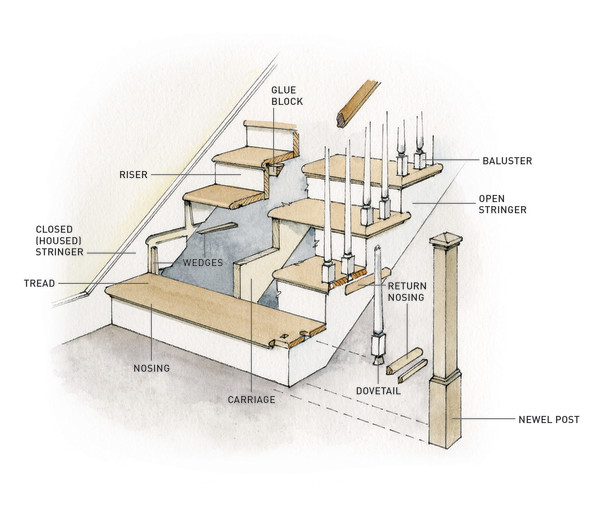
Basic Repairs
Settlement issues, loosened joints, and a lack of support to the substructure are best addressed from the underside of the staircase. If you don’t have direct access, remove any paneling or plaster under the stairs. (Preserve or take detailed drawings of any plaster or wood ornament that will be disturbed, before removing it.)
Once you have access, the carriage, stringers, and the undersides of the treads and risers should be visible and accessible. You’re also likely to see wedges and glue from installation and previous repairs. Pull out and discard all suspect or loose wedges. Clean all old glue away from the stringers, treads, and risers.
If the stair is seriously out of level or pulling away from the wall, it will require gradual jacking and bracing (seek professional help at this point). If the staircase is reasonably level, it may be possible to solve squeaking and deflection problems by reinforcing the carriage stringer and tightening up the treads and risers from underneath.
Carriage Repair If the carriage has moved away from the header at a landing or run of stairs, secure it with screws, lag bolts, or metal joist hangers. Add shims wherever gaps appear: at the bottom of the carriage or under treads. If the carriage sags uniformly or in multiple locations, improve support by adding cleats cut from 3/4″ plywood. Fit the cleats snug under each tread with screws, alternating sides of the carriage for greater stability.
Enhance this reinforcement by adding glue blocks to each corner where treads and risers intersect. The blocks prevent squeaks by increasing the surface area of the tread-to-riser joint. Dip each new block in carpenter’s glue, then rub it back and forth in the proper position until the glue grabs. Tack in place with finish nails while the glue dries.
Wedging Stair treads and risers generally aren’t nailed together in older staircases. Instead, they’re held in place by glue blocks and by wedges hammered tightly between the tread or riser and the stair frame. After removing all the unsound wedges, replace them with new wedges cut from pine. (Cut the wedges in an alternating pattern to maximize the amount of long grain in each wedge.)
Glue each wedge in place, inserting each one from the top of the flight to the bottom. Always wedge the tread before the riser below it. The wedge must make even contact on both the surface of the step and the string. If not, there’s a greater chance that the string will split when the wedge is driven in place. Hammer the wedge in until snug, but be careful not to apply too much force. To secure, drive a nail through the wedge and tread into the string.
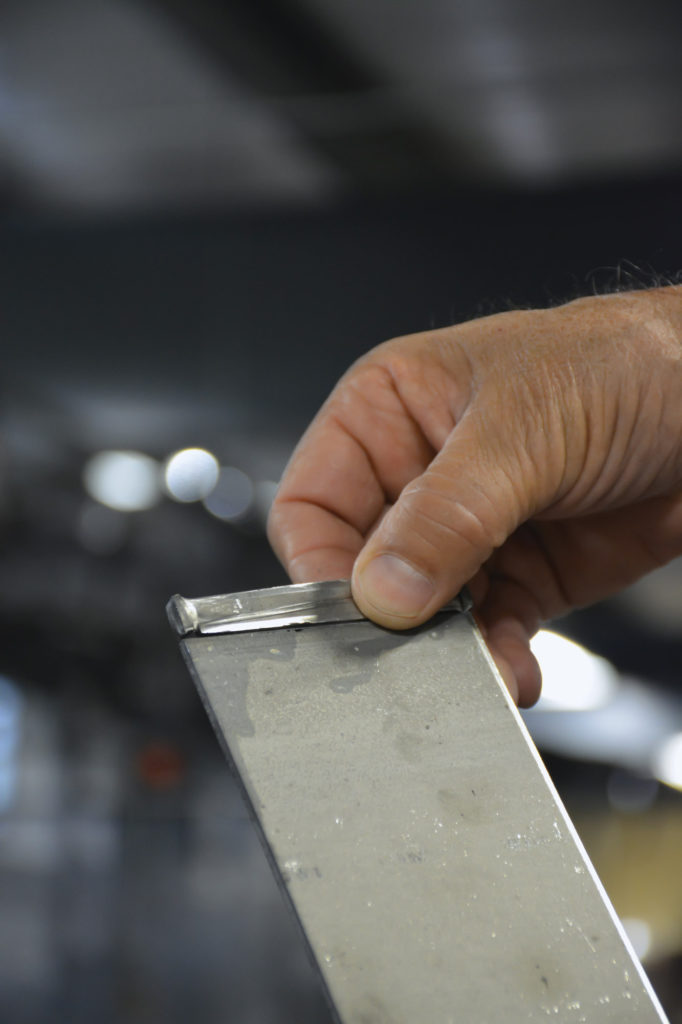
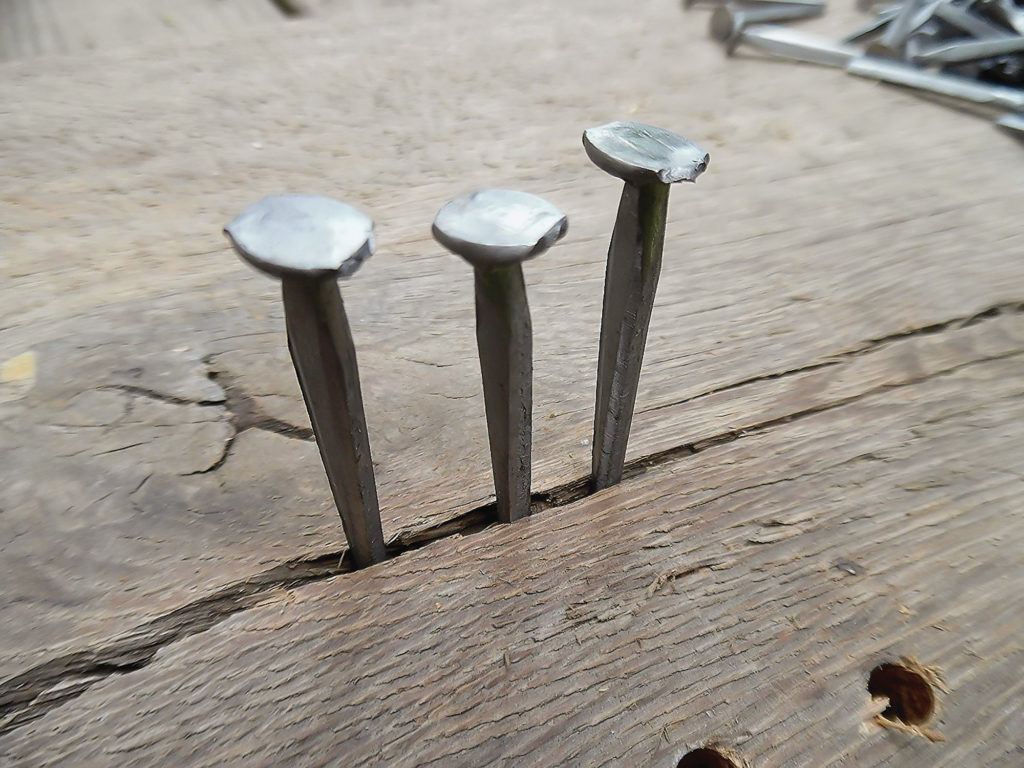
Eric Delong of Tremont: Nails .1/4″ or more thick, like this spike, are hot forged. Jim Polson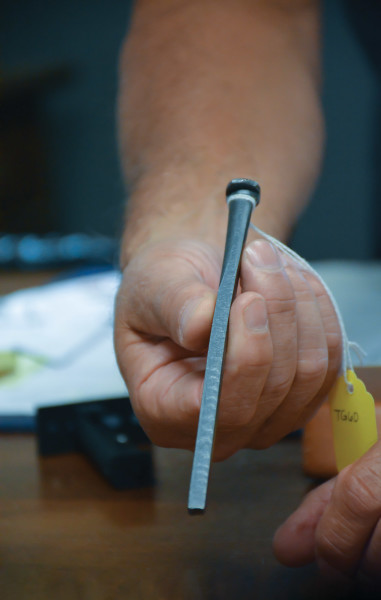
Shop Tour
Tremont Nail has been making square-cut nails in Massachusetts for more than 200 years, far longer than any other U.S. nail maker. There are 29 different types of nails in their catalog, from common, masonry, and clinch roseheads to the fine finishing nails used in flooring and stair repair.
While they’re slightly more expensive than modern wire nails, these wedge-shaped nails are significantly stronger, with almost twice the holding power. Because of their square shape, forged nails “will actually cut into the grain of the wood rather than splitting it,” says owner Eric Delong, who also owns Acorn Manufacturing, a third-generation family business.
Delong bought Tremont Nail in 2006, moving it from its long-time home in Wareham to his Mansfield headquarters in 2007. (All but one of Tremont’s workers at the time came along.) Remarkably, nails are still made using the equipment that came with the purchase. “Most of the machines we have are mid- to late-1800s,” Delong says. Since it’s impossible to buy parts for a 150-year-old nail-making machine, “we either make them ourselves, have them made, or scavenge from older machines that we have here.”
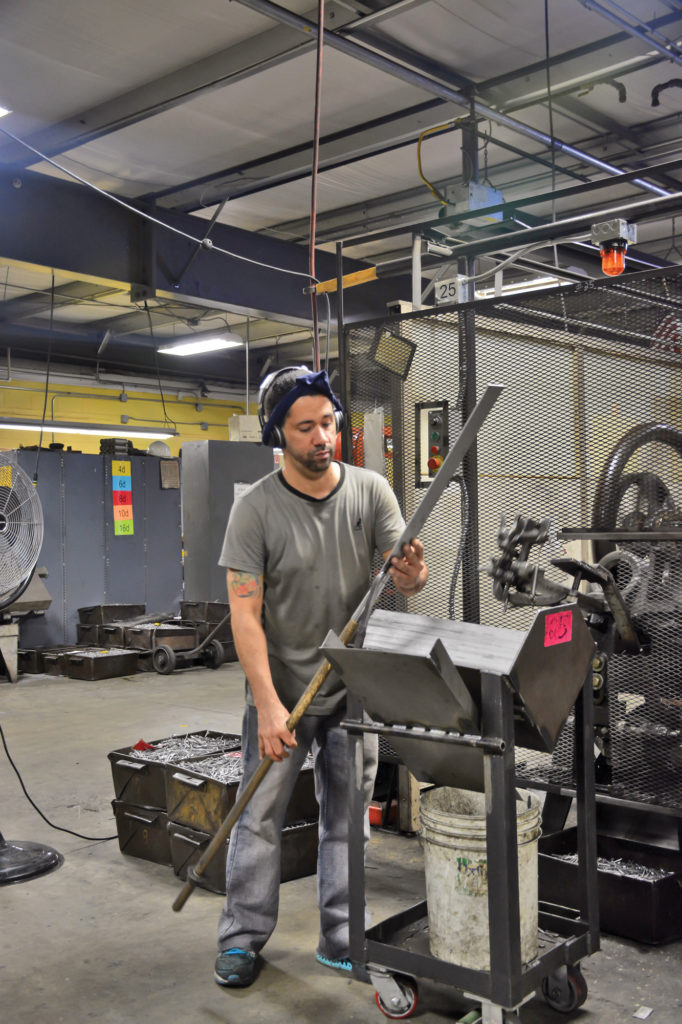
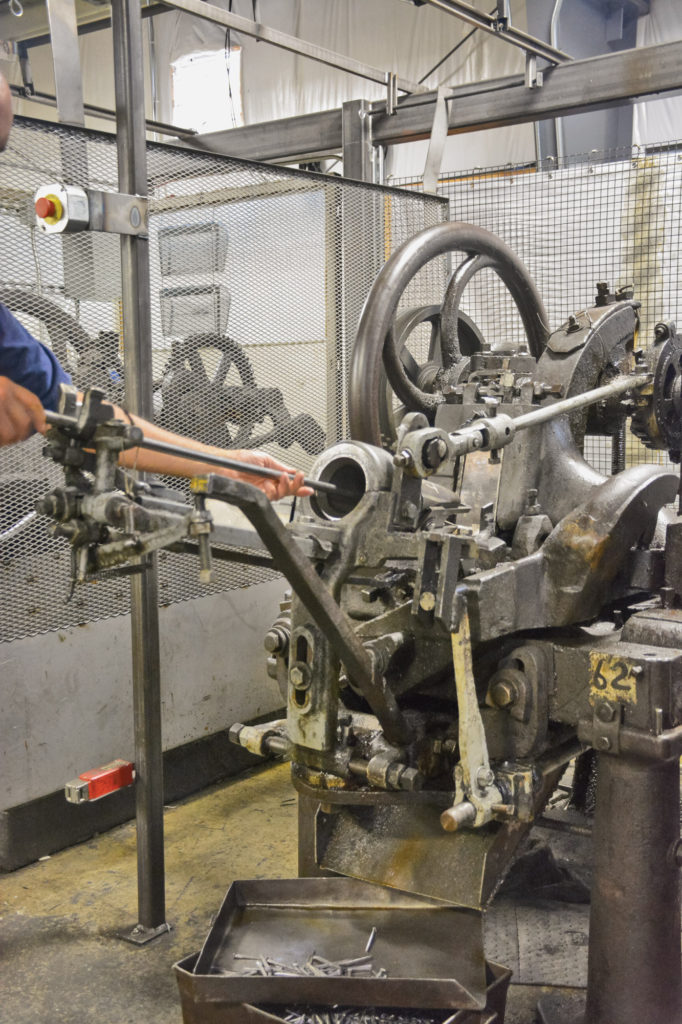
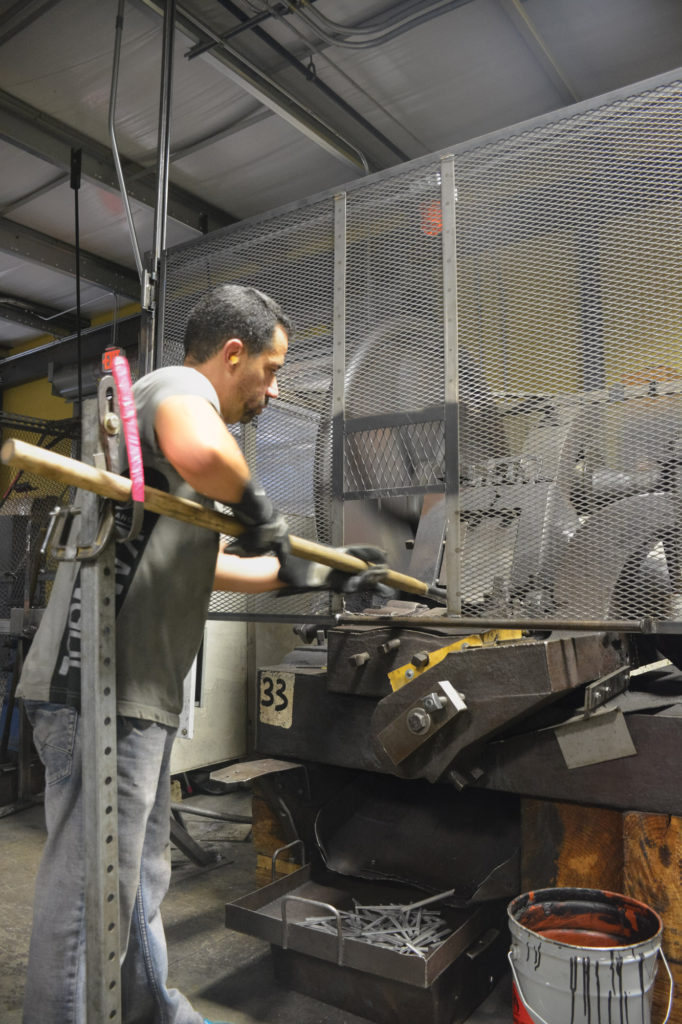
About 30 of the heavy, black, grease-encrusted machines are operational at any one time. To make nails, a worker fits a steel blank onto the end of a long tool holder, where it’s held in place by serrated teeth. He then places the blank into the hopper on the nail machine, which rapidly begins cutting nails, flipping the steel sheet after every cut to minimize waste. As the nail is cut, it drops down and is grabbed by the machine, which cold-forges the head, then drops it into the bin at the bottom. Just-finished nails are still hot to the touch.
When one blank is finished, the worker pulls the tool out and fits a new strip on the end from a waiting stack of blanks. Workers usually tend two or three machines at a time. Each machine makes from 4,000 to 8,000 nails per hour. Despite the cachet of square-cut nails as a restoration item, Tremont’s biggest demand is for masonry nails, which are used to connect decking and other wood to masonry. Masonry nails are common nails that have been heat-treated to 1800 degrees F, quenched in water, and annealed at a temperature of 600 to 800 degrees. Like all Tremont nails, masonry nails are tested for strength every half hour. (Masonry nails are also bent-tested to a 45- degree angle to insure they won’t break.) All nails are packaged in 50-lb. boxes that may be ordered direct.
Language of the Staircase
Tread Horizontal surface of a step.
Riser Vertical surface between each tread.
Nosing The edge of the tread that projects over the riser below.
Balusters Vertical posts that support the top rail of the balustrade; may be called spindles, especially if slender or square.
Balustrade The entire railing system of an exposed stair, including a handrail and balusters.
Carriage Another word for stringer, especially for a third, center support.
Flight A continuous series of stairs from one landing or floor to another.
Landing A level part of a staircase, where one flight ends and another begins.
Coffin Niche In a tightly formed spiral or elliptical stair, a hollow or niche in the wall into which a large object can rest and be maneuvered.
Newel A structural post and support that anchors the handrail and balustrade. The newel is usually bolted to the floor joist.
Volute A handrail end element for the bottom step that curves inward in a spiral.
Stringer An inclined board that supports the ends of the steps from below, usually placed on either side of the staircase. Side stringers are often slotted or trenched to receive risers and treads for increased support.
Winders Steps that are narrower at one side than the other, used to change the direction of the stair without the need for landings.
Stairwell A vertical well or shaft in which stairs are located. Stairwells can be square, spiral,
elliptical, etc.
Skirt board A trim piece similar to a baseboard installed on the finished wall once the open side of the stair has been completed.
Although the treads and risers don’t meet modern building codes, early staircases like this Federal-era example are so compactly built, they tend not to settle as much as later stairs. Brian Vanden Brink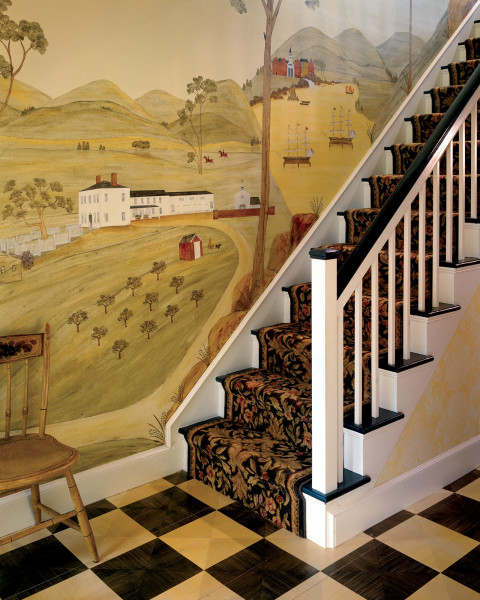
Familiar stairs
- Box(ed) A stair supported and enclosed by walls.
- Cylinder A stair with a tight, cylindrically shaped radius where each flight ascends to a hallway at every floor before sharply turning and continuing up.
- Dogleg A configuration of stairs between two floors in which one flight ascends to a half-landing before turning at a right angle and continuing upwards.
- Elliptical A stair that winds around an elliptically shaped well.
- Flying A freestanding stair cantilevered from the stairwell without a newel, high enough to walk under.
- Rail-to-post Stairs with a combination of straight flights followed by three winders, followed by another straight flight, and so on.
- Spiral A flight of stairs whose treads circle and rise in a helix shape, often using very little space. Variations include circular, elliptical, and oval.
- Straight Stairs that rise directly from one floor to another, without turning or winding.


