

Because wood-frame houses are basically boxes, the power of earthquake forces works to collapse the structure by racking walls, separating joints, and upending vertical supports such as porch columns. (Photo: Courtesy of FEMA)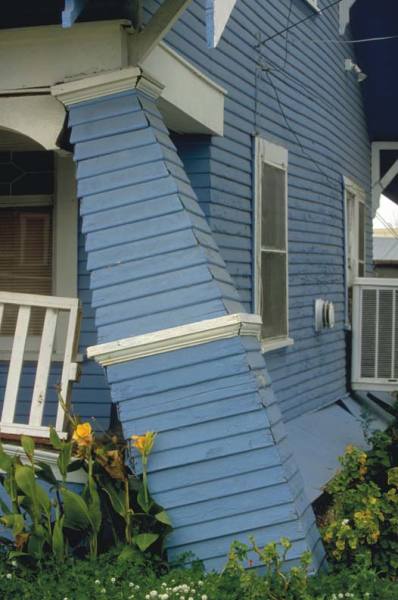
Earlier this year, we San Franciscans celebrated (if that is the word) the centennial of the great earthquake and fire of 1906. Along with the hoopla came many stern warnings from seismologists and public health experts about the widespread injury we might see in people and buildings from the next Big One, slated for sometime in the next 30 years or so. They presented big, colored charts showing the location of the damage, the Hayward Fault, which runs down the east side of San Francisco Bay, and suggested that the citizenry was a little too blasé about the whole thing. They are probably right. Just because you don’t live on the West Coast, though, doesn’t mean that earthquakes—or other powerful natural events—can’t affect you.
The reality is there have been earthquakes in almost every U.S. state since North America was first settled. What’s more, many of the methods and materials that can strengthen a house to resist earthquake forces are also useful for resisting hurricane or tornado forces. Note, however, the operative word: resist. Buildings cannot be made earthquake-proof, only earthquake-resistant. Because the majority of old houses are built with wood frames, a relatively flexible construction method, they can sway in an earthquake like a palm tree in a stiff breeze. Some flexibility in a house is good, but it can’t be allowed to bend so far that it will break or separate into pieces at its seams. That is the point of seismic retrofitting: to strengthen the joints and connections in the building so that it can absorb earthquake forces without coming apart, a process we’ll explore here.
Let Them Eat Quake
There are two kinds of forces in an earthquake: lateral (producing side-to-side movement) and uplift (producing up-and-down movement). Let’s imagine that the earth is a rickety card table upon which sits your house in the form of a sheet cake (the foundation), a three-tier wedding cake (the building frame), and a croquembouche (the chimney, represented by a cone-shaped confection of cream puffs cemented together with sugar). If you shake the table violently, like the lateral force in an earthquake, what happens? The sheet cake simply slides back and forth, but the plastic columns supporting the wedding cake tiers fall over, causing the cake to collapse and the cream puffs to fly all over the room. In the case of uplift forces, the analogy is more like shaking out a tablecloth. The difference is the sheet cake goes up in the air and comes back down, while the other two cakes fall apart in the same ways as before. The lesson is that in an earthquake it’s best for a house to be like the sheet cake.
Like popping popcorn, earthquake forces shake a house side to side and up and down, twisting unreinforced walls out of square and rolling over freestanding posts, which are unbraced and therefore structurally weak. (Photo: Andrea Booher/FEMA)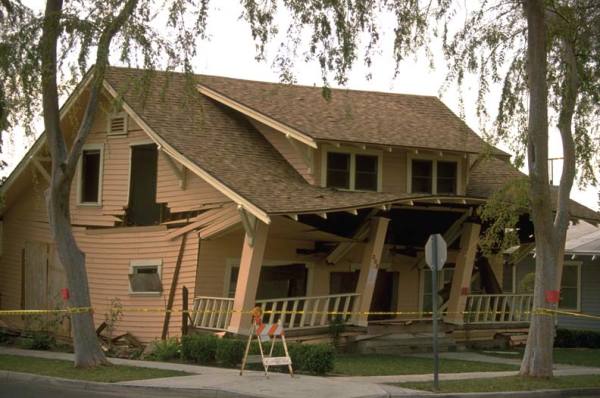
Now that I’ve backed myself into a metaphorical corner, let me put the situation in simpler terms. To make a wood-frame house more earthquake-resistant, you need to prevent it from turning into a parallelogram by tying together all the joints in the frame, and connecting the house to the foundation. Generally, the way to do this is with plywood and specialized metal fasteners. The specifics of how best to install these materials are an ongoing discussion between engineers, building officials, and contractors, and they do not always agree. Nevertheless, the following information, based upon the seismic codes adopted by Los Angeles and other California cites after the 1994 Northridge earthquake, seems to be fairly widely accepted. Be aware, too, that any strengthening will be for naught if the framing is damaged by wood-destroying insects or rot, so be sure to repair these areas before beginning any seismic work.
Retrofitting a house to resist earthquakes begins with having the best possible foundation. Ideally, the foundation is reinforced concrete and shaped like an inverted T with a wide base, called a footing, that spreads the load like snowshoes. Unfortunately, few old houses have such a foundation. A foundation of unreinforced concrete (poured without steel reinforcement bars) is okay, but unreinforced brick, stone, or concrete block foundations are not good because they will disintegrate in an earthquake like our proverbial croquembouche. Other types of foundations, such as those comprised of individual piers, built on hillsides, or constructed as garages under the house, are beyond the scope of this article and should be evaluated by an engineer. In general, consulting an engineer is a good idea for any sort of house, particularly those built with balloon framing and cripple walls (more on this later).
The 1994 Northridge, California, earthquake lasted only 15 seconds, but left 25,000 buildings uninhabitable, leading to the latest seismic standards. (Photo: Courtesy of FEMA)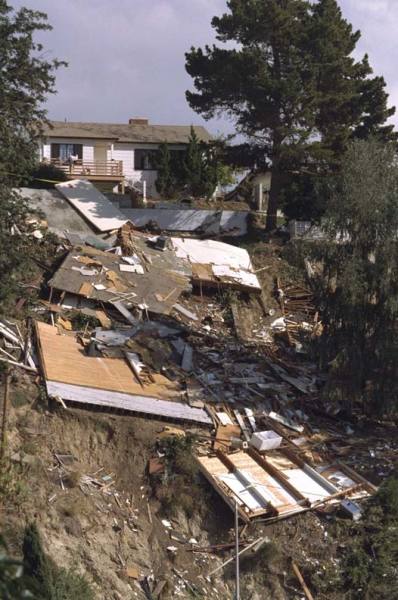
If the foundation is acceptable, the first phase is to bolt the mud sill to its perimeter in order to prevent the house from sliding or jumping off in a quake (as well as in a flood or severe storm). In a retrofit, that means renting or buying a rotary hammer and boring holes about 1/16″ larger than the bolt diameter all along the foundation. Anchor bolt location is specified by code, but generally you will be boring holes every 4′ to 6′ and 12″ in from the end of each piece of sill plate. Once you have holes, you can either install anchor bolts (which secure themselves with a mechanical wedge), or anchor the bolts with epoxy (which is considered to work better in poor quality concrete). With epoxy, it is important to first clean each hole free of dust, typically by using a bottle brush and plastic tube fitted to a shop vacuum. Once the bolts are anchored, nuts and large, 3″-square washers, called bearing plates or plate washers, attach the mud sill to the foundation.
In addition to foundation bolts, it is regular practice to install hold-downs (heavy L-shaped brackets) to tie the foundation to the vertical framing members common on corners, the sides of garage doors, and at the ends of plywood shear panels. The bolts for hold-downs should be epoxied in place. If there’s no access for boring holes in the foundation, the alternative for foundation bolts is to use another group of hardware, various kinds of metal straps called mud sill anchors or anchor plates.
Shear Pleasure
Depending on the house’s construction, there may or may not be a cripple wall. This feature is a short wall about 36″ high between the foundation and the first-floor framing that is commonly found on late-19th-century houses on the West Coast, especially row houses. The cripple wall is the weakest part of the house, usually relying on nothing more than diagonal bracing to keep it from collapsing into a parallelogram. The way to greatly improve a cripple wall’s resistance to lateral forces is to reinforce it with shear panels of plywood. Because the mud sill is typically wider than the 2×4 uprights, you must add blocking between each stud, as well as at the top and bottom, to which the plywood can be nailed. The blocking is typically pieces of 2×4 and needs at least four 10d nails per piece. Pre-drill the holes to keep the nails from splitting the short blocks, and don’t use pressure-treated green wood for blocking. For shear panels, plywood is preferred over OSB (oriented-strand board), and the sheets should be five-ply material at a minimum of a 1/2″ thick (or 15/32″, which is what passes for a 1/2″ thickness these days). For optimum strength, the panels should be installed horizontally rather than vertically using the longest piece of plywood possible.
Old houses come off their foundations in earthquakes and floods because they are unanchored. Adding bolts through the mud sill keeps the building in place. (Photo: Courtesy of FEMA)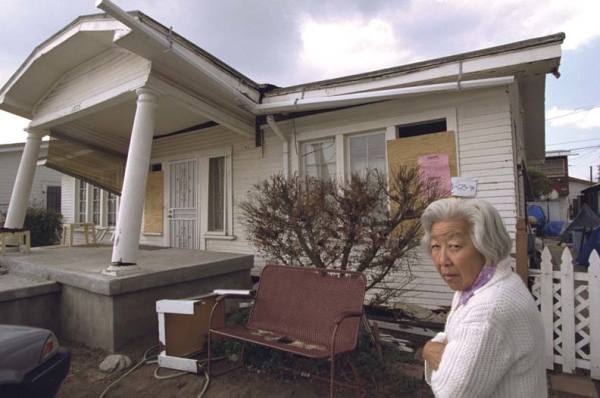
At a minimum, house corners should have panels at least 4′ long, with more panels spaced out evenly along the length of the cripple wall. In a single-storey house you need to brace at least 50 percent of the length of each cripple wall, while in a two-story house you need to cover at least 80 percent of the length. For instance, in a single-story house, if the cripple wall is 48′ long, you need to cover 24′, which could be accomplished with a 4′ panel at each end and two 8′ panels evenly spaced in between. Contractors tend to cover the entire wall, but whether this practice is good or bad is an ongoing argument. Hold-downs are then installed at the end of each panel.
Shear panels work best when supported by framing on all four edges, and they should be nailed using 8d common nails every 4″ along the perimeter and 12″ in the field. (Local codes may differ.) As you nail, take care not to break the surface of the plywood. This is a lot of nails, so a nail gun can be extremely handy, though there are those who believe nail guns shouldn’t be used. In addition, you will need to bore ventilation holes 2″ to 3″ in diameter in each stud bay, about 2 1/2″ above the mud sill and 2 1/2″ below the top plate, and a minimum of 6″ apart in between. Locate the lower ones so you can visually inspect the mud sill bolts. Obviously, you will also have to cut openings for foundation vents, flues, plumbing pipes, and other penetrations. While you’re at it, add straps to tie the shear panels into the floor framing above. These connectors, called shear transfer ties, keep the floor joists from sliding off the top of the cripple wall. If you feel like it, also add joist hangers to attach the floor joists to the rim joist.
Unreinforced masonry does not fare well in earthquakes, and the brick chimneys common to many old houses are prime examples. Though there’s little to do in the way of retrofitting that will keep chimneys from toppling, adding plywood to roof decks or attic floors can limit damage when they do. (Photo: Courtesy of FEMA)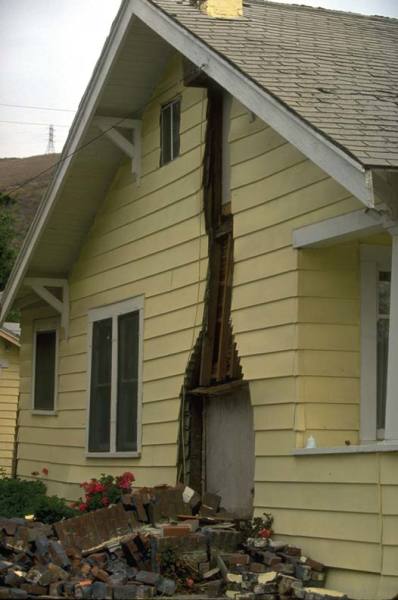
Keep Your Head
Having done everything you can in the basement or crawl space to strengthen the structure, the next area typically exposed enough to work on is the attic. Install seismic or hurricane ties to connect the rafters to the top plate and to keep your roof from sailing across the street during the quake. If you’re planning to re-roof, it’s a good idea to add plywood or OSB sheathing to increase the shear strength of the roof. Because unreinforced masonry chimneys tend to break off at the roofline first, the added bonus of this measure is that the sheets help stop a masonry chimney from breaking through the roof and into the living space. Studies find that bracing the chimney does very little to prevent failure during a quake. Short of replacing the chimney with a boxed-in metal flue, about all you can do is repoint the old mortar, which has probably deteriorated. If there is no plywood on the roof, you may want to think about adding some to the attic floor around the chimney to prevent it from breaking through the ceiling if the chimney smashes through the roof.
Any other structural retrofitting you want to do between the basement and the roof will require removing either interior or exterior finishes. If the walls are open for some other reason, it’s a good time to install hold-downs or strapping to tie the first-floor walls to the cripple walls, or the second-floor walls to the first-floor walls. If the siding is off, you may want to take the opportunity to add plywood shear panels to other outside walls. You might also want to add some connectors, bracing, and shear walls to the porch to keep it from tearing away during a quake.
Much of the damage from earthquakes stems not from the shaking but from the fires afterward. Far more of San Francisco was destroyed by fire in 1906 than was damaged in the quake. Fires are caused mainly by broken gas lines. Make sure all gas appliances are supplied by flexible stainless steel connectors, and strap water heaters to the framing to keep them from falling over. Installing an automatic gas shut-off valve at the meter is also a good idea.
The good news is that the old-growth timber and quality building methods used to construct old houses are likely to make seismically retrofitted old houses far more resistant to damage from an earthquake than newer houses. For a fairly small investment of time and money, you and your house can be ready to ride out the next Big One with minimal damage.


