A 1918 bungalow in Mount Ranier, Maryland, displays beautiful, original tongue-in-groove pine floors that had been covered for decades by vinyl tiles—then subsequent layers of plywood, vinyl tiles, and carpeting—until they were refinished and restored in 2003. (Photo: Courtesy of City Lights Realty)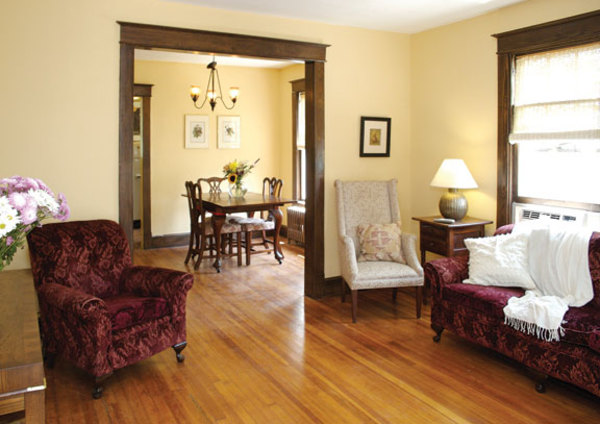
In a world of laminates, composites, and wood choices like “Brazilian cherry,” modern flooring appears to be a disposable feature. But owners of historic homes know better. While our floors sometimes get chipped, splintered, and worn, they were made to last. And given that they’ve survived a century or more, we feel a special responsibility to preserve them for as long as possible. When original floors show problems from years of wear, knowing how to replace damaged floorboards or splice in a Dutchman patch is crucial to lengthening their lifespan.
Most damage to traditional wooden floors is a direct result of wear and tear (including pets, stains, heavy furniture, termites, or fungal decay), but some comes from misguided maintenance. New owners of an older home often think the best way to spiff up their worn and stained floors is to sand and refinish them, but often, in order to achieve the desired like-new results, they remove too much flooring material. This can leave the upper edge of the groove in tongue-and-groove floors dangerously thin—so thin that breakage is common. When this happens, the original board needs to be replaced or repaired.
Replace a Floorboard
Replacing a floorboard is a fairly straightforward job, and the process is the same whether working on interior floors or outdoor porches. Start by delineating the damaged material and marking it with a piece of chalk. Make sure you allow enough space beyond the damage to reach sound wood, particularly if the damage stems from termites or fungus. Test the wood by poking it with an awl; if it easily penetrates, the wood needs to be replaced.
A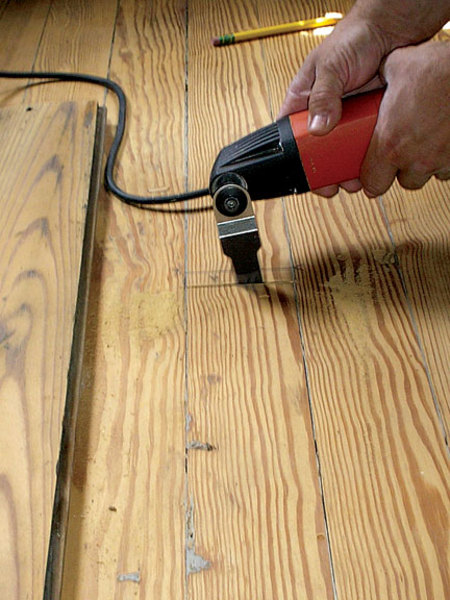
The simplest way to make these repairs is to cut the floorboard directly over the floor joist or just to the side of the joist (which will provide ample room for nailing the new board), so the next step is to locate the floor joist. If your floor is exposed from below, this is as simple as going into the basement or under the porch and measuring the spacing. You also can drill a small hole beside the joist and up through the flooring, where it will be visible from the finished side. If neither of these techniques is possible, look across the floor and note the seams between the ends of other boards; measuring one seam to the next will give you a good idea of the spacing between joists, which will be uniform except in very old houses (dating to the 17th and early 18th centuries). Measure the distance between joists, and transfer that measurement to the boards that need replacing. If the flooring has separated so that there are gaps between the floorboards, you also can slide a thin piece of metal through the gap until it hits a joist. Draw a line across the board at the floor joists at a right angle to the groove.
Next, cut across the individual board along the line [A]. You can use a very sharp chisel to cut across the grain, or use a drill to make a series of holes across the board and then finish the cut with chisels, a circular saw, or specialized hand saw. I like to use oscillating-blade saws (Fein, Bosch, Dremel, etc.) because they are a safe and effective way to sever flooring, particularly when removing just one board.
B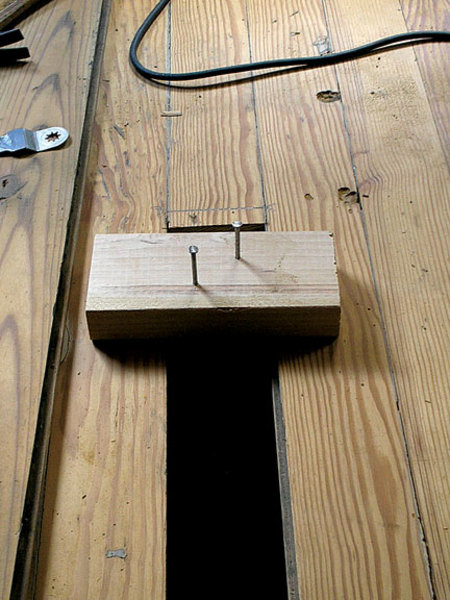
When cutting directly over the center of the floor joist, expect to encounter nails from the original installation. To avoid damaging your tools, cut the floorboard at the edge of the joist. (Oscillating saws are the exception—they can be outfitted with a blade that cuts both wood and metal, making cutting directly over the joist possible.) After you remove the board, nail and glue a small piece of wood (2×3 or 2×4) to the side of the joist [B] to create a new nailing surface for the board you’re about to install.
Removing a floorboard joined by tongue-and-groove or shiplap joints requires special attention. If you are able to insert a thin blade—such as that from a reciprocating saw (Sawzall), an oscillating saw, or a thin kerf blade in a circular saw—between the floorboards, cut the board along the tongue side [C], which removes the tongue. If you set your circular saw to a depth just 1⁄16″ deeper than the flooring, you can make this cut without seriously damaging the joist.
C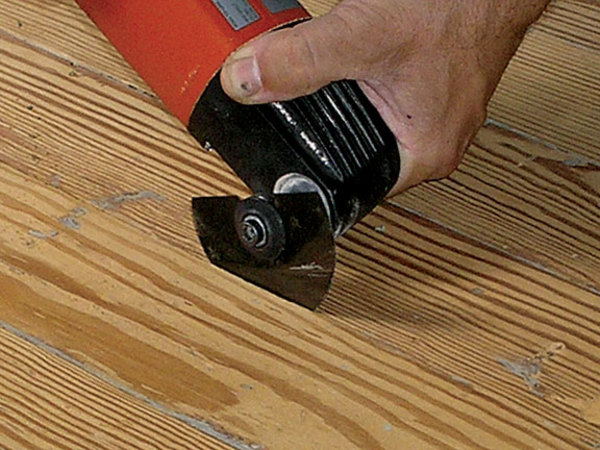
If the gap between your floorboards is too narrow to insert a blade without damaging surrounding boards, use your circular saw to plunge cut two parallel cuts through the center of the board. Then, use a drill or a sharp chisel to connect these parallel cuts so you can remove the center of the board. With the board’s center removed, you’ll be able to easily pry both remaining edges away from the surrounding material. If your damaged piece extends over several joists, expect some resistance on the tongue side since it will likely be blind-nailed (i.e. nailed through the tongue and covered by the adjoining board).
D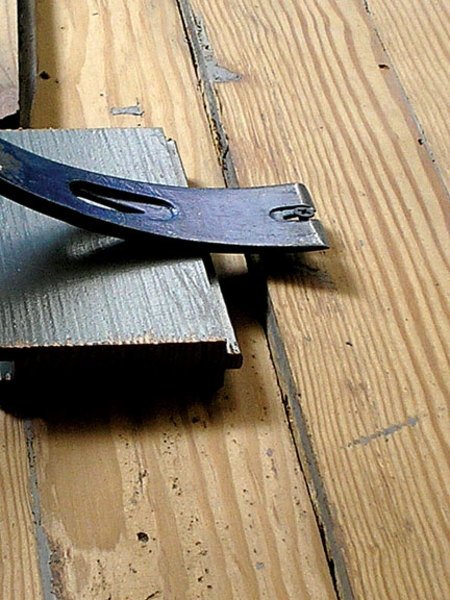
Once the end cuts have been made and the tongue is removed, it’s time to pry up the floorboard [D]. To keep from damaging the end of your good flooring, try turning a screw into the board you plan to remove, and pry up on the head with a pry bar (place a block of wood between the bar and the floor to protect it).
Next, it’s time to cut the new replacement piece to length. To install a single piece of flooring into a tongue-and-groove floor, you’ll need to remove the lower portion of one of the grooves. This is most easily removed with a table saw or a router, but it also can be removed with a chisel and a plane. This allows your new board to be installed tongue-side first, and close like a hatch into the groove side.
E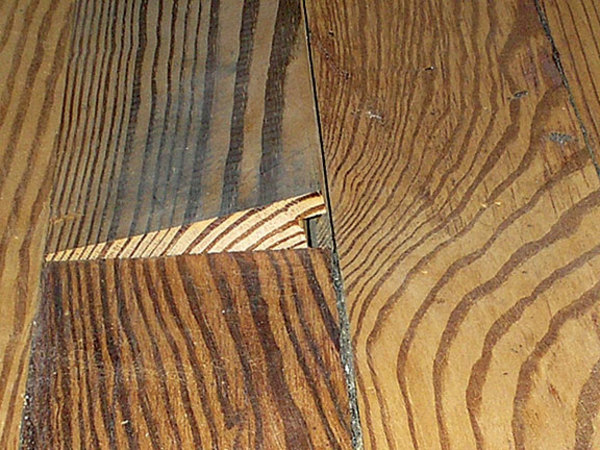
Tap the new board into place [E]; if it seems too tight, it can be judiciously planed to fit along the groove side. Fastening a single board usually requires face-nailing, but you can countersink the nail head and fill the hole with wood putty to match the finished floor. When replacing multiple boards, blind-nail them through the tongue wherever possible.
Create a Dutchman Patch
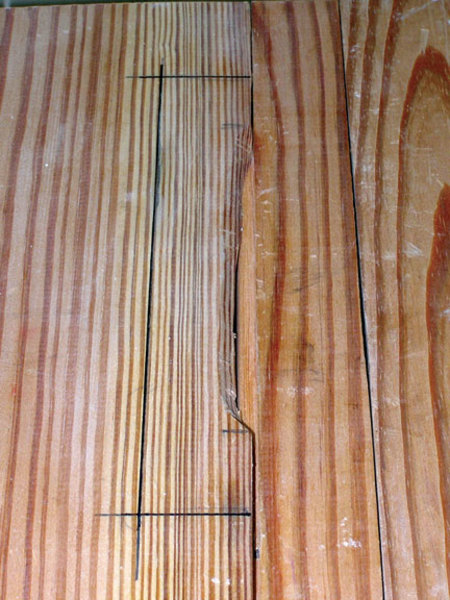
In rooms with well-worn floors, gaps often appear between individual boards, mainly caused by repeated weather-related expansion and contraction cycles. When joints separate on tongue-and-groove boards, the upper edge of the groove is vulnerable to splitting, which can expose the tongue of the adjacent board.
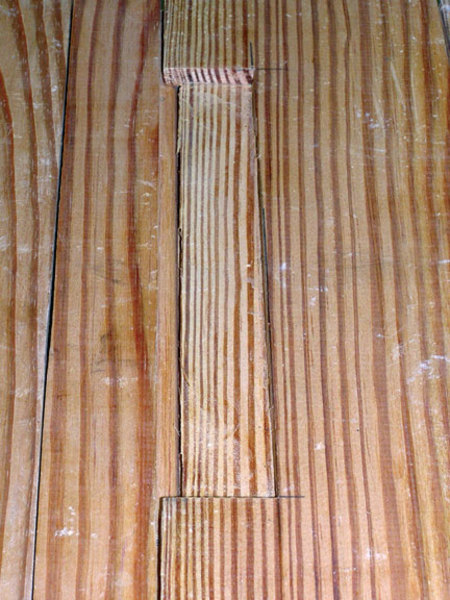
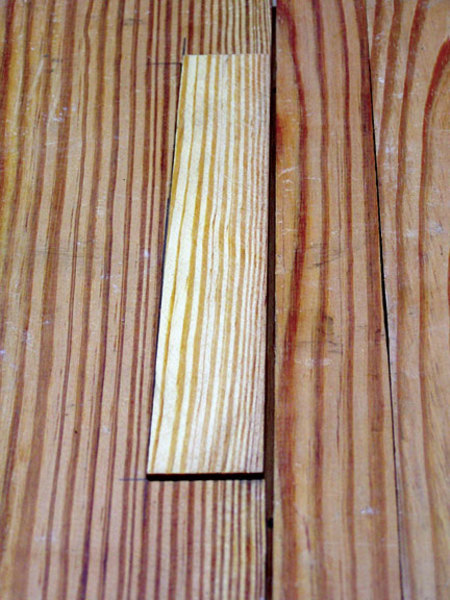
F G The easiest way to repair this kind of fracture is by replacing the upper half of the broken groove with a Dutchman patch. Mark the ends of the fractured area, then measure 11⁄4″ further and mark this measurement across the width of the board [F]. Next, use a router and/or a sharp chisel to carefully pare away wood within the scribed lines to the depth of the original groove [G]. Work slowly, checking the depth every few passes. You’ll need a piece of closely matched wood to finish the repair. Carefully choose wood of the same species and grain pattern as the piece that was removed. You can sometimes take a piece of matching wood from original flooring in an out-of-sight area like an attic, crawl space, or closet. Cut the new board to fit, leaving it a little higher than the neighboring surface. H Once you have a good fit, carefully tape the top to the edges of the new wood and the surrounding material (to protect from glue squeeze out), and apply epoxy to the mating (flat) surfaces. Drop the board into position [H], and rest something heavy on it to keep it from shifting. Any glue squeeze-out will be removed with the tape. After the glue has fully cured (follow manufacturer’s recommendations for curing), remove the tape and carefully plane the new piece to match the neighboring surfaces. Finish up with sandpaper to soften any rough edges, then paint or stain and apply a clear finish to match the original floor. Ray Tschoepe, one of OHJ’s contributing editors, is the director of conservation at the Fairmount Park Historic Preservation Trust in Philadelphia.