

Typical for a caustic stripper, the lye solution softens a century of paint into sludge that lifts easily with scraping, but leaves the iron unaffected.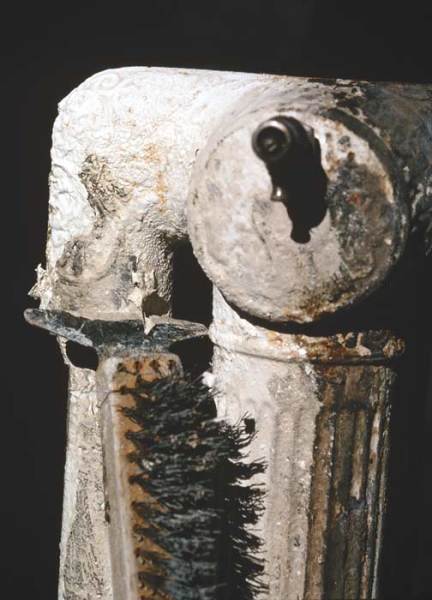
One of the passions that separates old-house devotees from average homeowners is their love of radiators. While the rest of the residential world is happy to chuck their radiators whenever possible, restorers cherish them— the quirkier the better—and that includes decorating with period painting techniques. Unfortunately, the cast-iron ornament that makes early radiators so nifty is often buried under decades of paint, turning a bold filigree pattern into a vague, vestigial squiggle at best.
Stripping off this buildup is the first step to a crisp paint job but, like any stripping project, the process is easier said than done. The two common approaches for stripping a radiator in place are 1) slathering it with chemicals (a messy affair), and 2) chipping the paint away with hammers and wire brushes (time consuming). When it’s disconnected from the system, some folks pay to send the radiator out for off-site stripping (usually sandblasting). However, if the object of your desire is small enough to move yourself, you might try this technique for dip-stripping radiators.
Step 1: Build a Tank
Plastic makes the tank watertight and corrosive-proof. Build your box big enough to soak the radiator on two or more sides.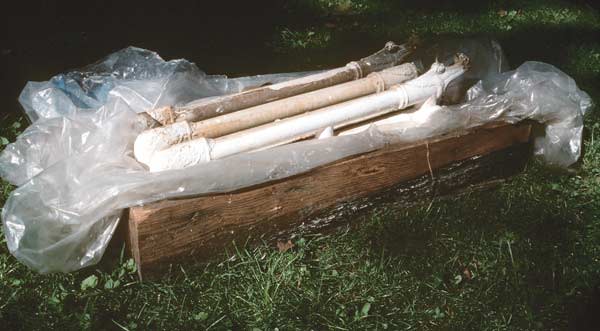
Unless you have some kind of radiator-sized, corrosive-proof container already on hand, you’ll need to build a “tank” for dipping your radiator. Taking light lumber—3/4″ thick pine, 5/8″ plywood, or scrap lumber suitable for a packing crate all work well—construct an open-top box or crate slightly larger than the radiator you intend to dip. The box does not have to be watertight or massive, but it should be strong enough to hold 100 pounds or so of cast iron and water without breaking, and deep enough to submerge at least half the unit. When you’re done with the carpentry, line the box with a layer or two of heavy (4-mil or better) polyethylene plastic dropcloth or similar sheeting.
Step 2: Prepare Your Radiator
Besides scraping off any easy-to-remove paint or wallpaper, you’ll probably want to plug your radiator to prevent stripper from flowing inside. While there’s no threat to the metal, stripper in the radiator columns doesn’t help soften the paint outside, and it makes the radiator that much heavier to maneuver.
Screw common pipe plugs into the steam or hot water ports just far enough to keep out the stripping solution.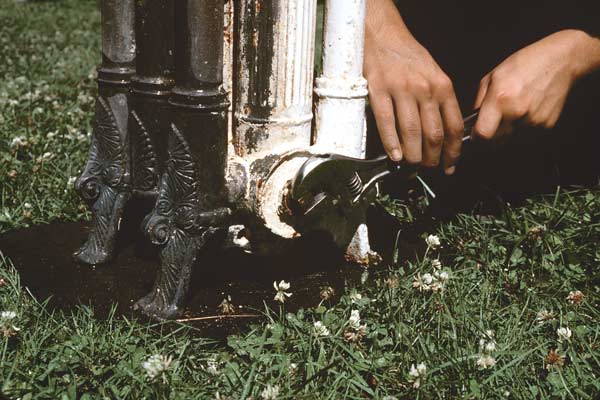
Remove any steam or air vents and then plug these holes, along with the steam or hot-water inlet and outlet, with standard pipe plugs (available at good hardware stores or plumbing supply houses). Later, when the radiator is stripped, you can remove the plugs and flush the insides free of system scale, if you so desire.
Step 3: Fill with Stripper
Place your radiator in the tank. Next, fill your tank with enough water to cover half the radiator, then stir in a dose of household lye to make your stripping solution. You won’t need much— approximately six ounces per tankful. One container should be plenty for stripping one average-sized radiator, assuming two changes of solution.
Follow the safety instructions on the container— lye is corrosive and the crystals will burn eyes and skin— and be sure to add the lye to the water, not the other way around. Let the radiator soak for several hours—overnight is typical.
Step 4: Brush, Rinse, and Repeat
Stripping outdoors allows you to hose down the radiator after each wire brushing. Note the regained detail on the left side.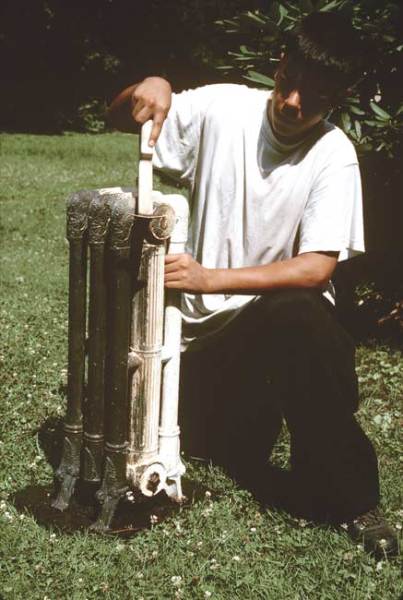
Depending upon the nature of the paint, the number of layers, and the strength of your stripper, the lye will begin to noticeably soften and decompose the paint after about 12 hours. At this point it is practical to lift the radiator out of the solution and remove the sludge using any of the old-house restorer’s typical arsenal of stripping tools. Putty knives and scrapers are fine for large areas; wire brushes—particularly small toothbrush-sized tools—are a must for details and tight spaces between columns. You might also invest in spiral wire brushes made for cleaning pipes in the plumbing trade. A good spray gun on a garden hose—or even a pressure washer—will help dislodge some paint. As you work, be sure to protect your eyes with goggles and your hands with rubber gloves.
As with any paint-stripping project, it will probably take several baths in the stripper, along with periodic brushing and detail chipping, to get your whole radiator down to clean cast iron. When you’re satisfied with the results, give the entire radiator a thorough rinsing with fresh water and then dry it immediately. While there’s no need to neutralize the metal surface, you should wash it free of all residues so the stripper won’t impair the new paint. Also, now that your baby is down to bare metal, keep it away from water so that your naked radiator won’t rust before it gets its new coat of paint.


