

Under my friend’s pea soup-green vinyl floor, I discovered the original bathroom’s white hex tile. Eureka! I thought. It’s still there. But next to the W.C., a plumber had pulled up three rows of tile and filled the trough with a concrete patch—the beginning of the tile’s untimely demise.
Repairing unsightly tile can make a world of difference in your bathroom.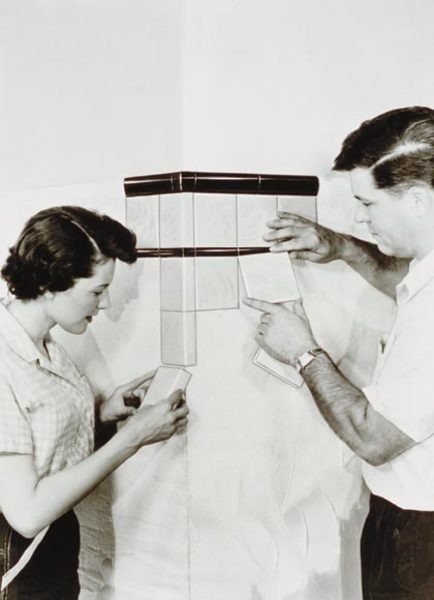
Many unsightly tilework patches begin with the rush to fix leaky pipes. In a typical old bathroom, most of the tile will be intact except for damage below the sink, between the shower head and faucets (where the shower riser has been replaced), or below the tub spout. At their best, such patches use whatever tile generally matches the color of the adjacent tile. At their worst there’s no attempt to make the whole ensemble mesh. If this sounds like your bathroom, cheer up. There are battle-tested ways—six steps the way I do it—to remove and replace those unsightly tiles or any similar spot damage in a field of tilework.
Getting Ready
Although tile installed on a traditional bed of 3/4 sand-lime-and-cement mortar will stand up for decades to the onslaught of showers, cracked grout can trap moisture inside the wall. Or perhaps no one has thought to Quik-Seal the rim of the tub in years. When the mortar base crumbles, tiles detach. As long as you have the original tile, however, you’re in great shape. Remove the grout, lift out the loose tile, clean the back, then duct tape 4-mil plastic sheeting over the damp area until it’s dry.
Wipe tile clean when finished. Karolina Grabowska from Pexels
Matching grout is as tricky as matching tile. To remove old grout you might get away with a church key can opener for one or two tiles, but the serrated blade of a grout saw works better. For narrow joints, you’ll have to resort to a metal nail file or hacksaw blade. If you’re only regrouting the patch, matching the original color is crucial. Start with clean grout. Tilex cleaner works extremely well to remove mildew stains on walls. Use undiluted bleach on floors.
If you’re going to regrout the bathroom—the best way to disguise the patch—invest in a tile and grout router. Standard 1/16″ router blades remove grout from most joints, but if the joints are tight, remove the grout by hand or you’ll risk chipping the edges of the tile.
Remove
Step 1: Rake out the joints, freeing problem tile from adjoining tile.
Rake out the joints to free tile.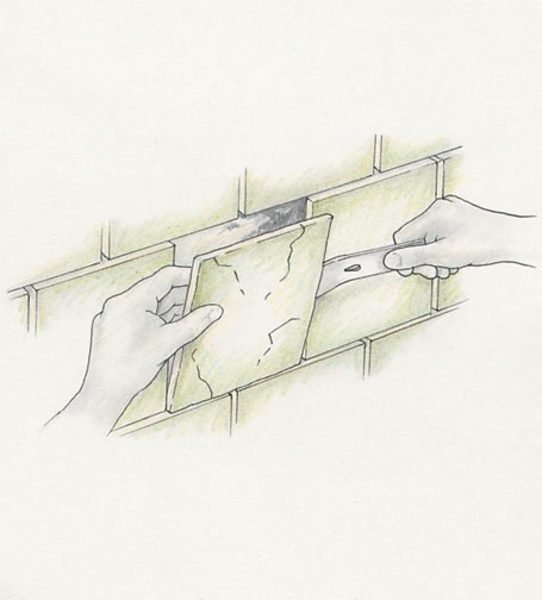
Step 2: For tile that is not solidly attached, tap lightly with a 1/4 a carbide chisel or small pry bar. The goal is to create a loose square of mortar behind the tile (depending on how mushy the mortar has become and how much room you have to slide a tool into the grout joint). Then pry gently to lift out the first tile.
Step 3: For mismatched tile, do not pry. Instead, score the tile with diagonal lines using a glass cutter. Use a center punch or nail set to dimple the surface. Then drill through the center point with a 1/4″ masonry bit.
Remove mismatched tile.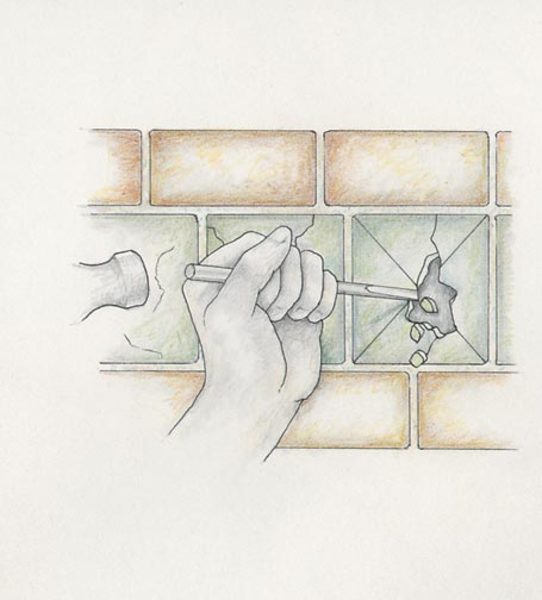
Step 4: With a 1/4″, carbide-tip, cold chisel, strike the diagonal lines, working outward. Check for any remaining grout before prying loose pieces along the edge.
Repair
If you discover water damage—punky, soft mortar—chip out the bad stuff behind adjacent tile and keep removing mortar until you reach solid ground. If the repair spans two studs, I find Dens-Shield tile backer easier to work with and more moisture-resistant than either green drywall or concrete backerboard. For smaller repairs, use a method similar to that used for patching plaster walls.
Step 1: With wire cutters, cut a section of aluminum lath, the kind plasterers use on inside corners. Thread tie wire through the holes.
Step 2: Push the lath into the opening. With a pencil, twist the tie wire to position the lath 1″ from the tile’s surface.
Repair damaged backing.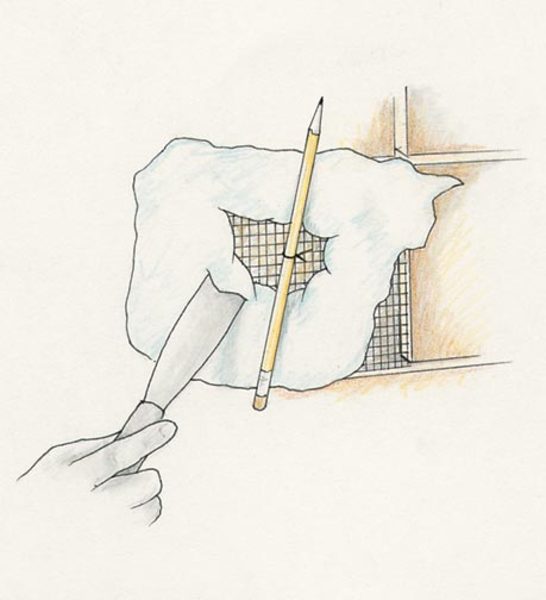
Step 3: For one tile, mix 2 cups of Durabond 20 adhesive with water. With a 1″ plastic putty knife, push the Durabond through the lath. Form a key behind the original mortar. Get as much around the edge as possible. (If you’re repairing the damaged subsurface of a floor, use a cementitious filler/leveler.)
Step 4: Remove the tie wire. Fill the middle, leveling the surface even with the original mortar. Crosshatch the Durabond to provide “tooth” for the tile adhesive.
Replace
Now that you’re ready to set tile, you’ll find professional tilesetter’s tools reduce breakage:
- 5⁄8″ carbide-tipped, tile nipper for making round cut-outs around pipes
- tile cutter (a rental tool) or an electric tile saw (also a rental tool)
- 60-grit rubbing brick to smooth rough edges
- tile spacers to maintain uniform grout lines
- 12″ carbide hacksaw blade for square cut-outs
You’ll also need a notched spreader to apply adhesive, a rubber tile float or squeegee, a sponge, and a toothbrush to finish the grout joints.
Step 1: Mark tile for cutting with a strip of masking tape. For cutting with an electric tile saw, transfer the cut line to the back, using a wax crayon to prevent the line from washing off. Shave rough edges or plane them with a 60-grit rubbing brick.
Step 2: To make square notches, clamp tile on a rubber pad and use a 12″ diamond, hacksaw blade or rod saw.
Step 3: For round holes, place tile on a rubber pad (such as a mouse pad), and outline a circle with holes drilled with a masonry or ceramic-tile drill bit. For rare tile, consider using a “hole breaker tile vise.” This tool reduces breakage. Then cover holes for pipes with escutcheons.
Reattach
While there are several types of adhesive, from solvent-based to epoxy, the one I prefer for wall tile is a Type I acrylic. (Type I means the adhesive is water-resistant.) Super-Tek Dual Purpose Adhesive can be used on almost any subsurface, and a tile pressed in place, top or bottom first, won’t slide down. It also has a long “open time,” which allows you time to place additional tile, clean tools, and remove the excess that squeezes up through the grout joints.
Space tiles.![]()
On floors, use a cementitious, thin-set adhesive (with an acrylic or latex additive, depending on the product). Thin-sets support more weight, so they’re needed for floors. To set fixtures, such as soap dishes, use a fast-setting adhesive, such as Super-Fixset, which hardens in 10 minutes. Hold the fixture in place meanwhile with duct tape.
Step 1: With a notched plastic spreader, apply Type I ceramic tile adhesive from edge to edge over the patched subsurface.
Step 2: Position tile, using plastic spacers to maintain joint width. Tap lightly on a padded 2×4 to flatten high spots.
Regrout
Grout your tiles 24 hours after they have been set. Use the waiting period to make up trial batches, working with powdered colorant and sand until the dry sample matches the original. Use teaspoons and measuring cups to keep color uniform. Scale up, if you’re regrouting a large area.
Grout tiles.
Step 1: Working diagonally, push grout between the tile with a rubber tile float. Wipe off excess with squeegee or float.
Step 2: Sponge tile, rinsing frequently. Run a toothbrush handle down the grout joints to compact them. When a powdery film forms on the tile, polish the haze off with a soft cloth.


