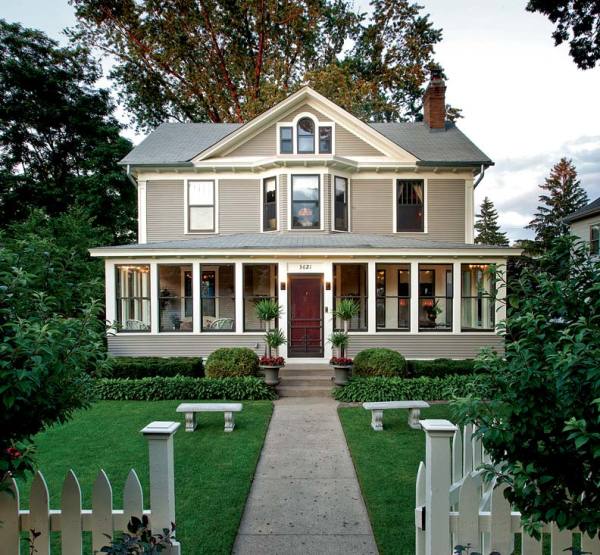
All of the house’s exterior wood has been completely stripped and repainted; it now looks as good as the day it was built.
As you approach Ryan Knoke and Montana Scheff’s house in Minneapolis—a two-and-a-half-story Colonial Revival designed and built by Minneapolis master builder Barclay Cooper in 1905—you know you’ve happened upon something special.
The matched topiaries flanking the front gate are like palace guards with plumed helmets—standard bearers, but also standard setters. They communicate clearly that this house has been restored with sincere attention to detail. Nowhere is this more apparent than in the finishes Ryan and Montana have applied to wood, both inside and outside the house.
New Old Moldings
Homeowners Montana Scheff (at left) and Ryan Knoke.
Ryan and Montana bought the house in 2004 from a 101-year-old man who had lived there since 1932. Luckily, most of the home’s original cherry woodwork remained intact with its original finish. However, the living room had been “modernized” in the 1950s, and as a result, the room’s ornate moldings—topping the walls, doors, and windows—had been removed. In addition, the living room’s remaining woodwork had received a thick coat of dusty rose paint.
Ryan and Montana began the room’s restoration by stripping away the paint and vinyl wallpaper, which uncovered ghosts of the original cornice moldings. Determined to restore the room to its former grandeur, they tapped the expertise of Gary Anderson, a third-generation cabinetmaker and carpenter who lives across the street. (Gary hand-shaped some of the pieces; others were off the shelf from various specialized suppliers.)
Gary guided Ryan and Montana to use cherry for the moldings to match the surviving trim, then created the crown molding in two layers: a picture rail, and a 4″-high piece with ogee and flute. Next, he assembled the door caps in three layers, milling the bottom piece on his shaper to match original moldings elsewhere in the house, customizing the profile of the main piece with a hand molding plane, and adding a flat piece on top to give the ensemble some heft.
Interior Finishes
After they had settled on the wood and design, Ryan and Montana turned their attention to the finish. They wanted the new moldings to match original finishes in other parts of the house, but there was a problem. “Modern stains were never dark enough,” explains Montana. “I wondered if we had to use an ebony stain with something else on top of it.” After a bit of Internet research, Ryan and Montana decided to visit a nearby woodworkers’ supply store, where a salesclerk advised them to try a dye with the brand name Trans Tint, but he couldn’t tell them how to apply it. “I experimented with dye, but when I put shellac over it, the dye re-liquefied and became very streaky,” says Montana. “I knew there had to be a better method.”
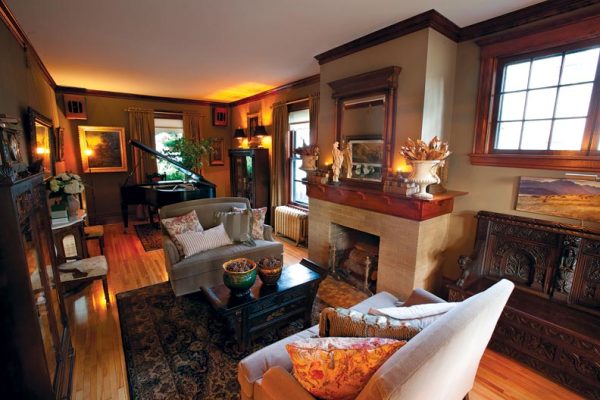
The living room got a dramatic makeover, with the remaining woodwork stripped of dusty rose paint. The crown molding and door caps also had to be rebuilt; they were stained to match the original finishes in the rest of the house.
So the two went back to the store—and had better luck the second time around. They were introduced to Kevin Southwick, a freelance furniture conservator who teaches wood finishing and answers questions at the store on Saturdays. Southwick confirmed that dye plus shellac is the key to achieving the deep, dark finish Ryan and Montana were after, explaining how wood finishers applied this mixture 100 years ago. But because their techniques weren’t documented, “unless you have years of experience, it’s almost impossible to apply dye mixed with shellac without getting dark lines where the brush strokes overlap,” Kevin says.
In the absence of documentation, Kevin developed his own multi-layer process, which is time-consuming, but possible for amateurs to master. He says that even with the multi-layer approach, you still need to distribute the materials evenly and avoid overlap marks. Ryan and Montana followed his exacting directions (see “Dye-Staining Woodwork,” below) to stain the new woodwork. Throughout the rest of the living room, they hand-stripped paint from the surviving original wood trim and used Southwick’s method on the surfaces. The result is woodwork that glows with a deep, dark cherry color.
5 Steps to Dye-Staining Woodwork
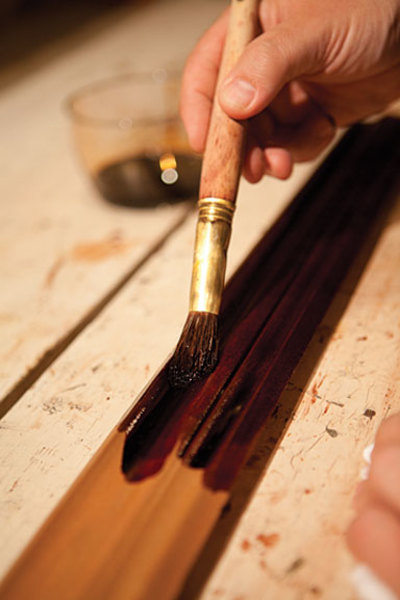
1. Dilute water-soluble dye according to the package instructions. Then, use extra pieces of wood to test the proportions and number of coats for your desired finish. (Your test surfaces should match the actual finished surface as closely as possible.) After some experimenting, Ryan and Montana ended up with a 2:1 mix of two different colors, red mahogany and brown mahogany.
2. Apply the dye quickly with a large, natural-bristle artist’s brush (purchased from an art supply store), then wipe it off. Don’t be alarmed if the color isn’t what you’re expecting. “Our particular dye color looked very pink before we put the shellac over it,” says Montana.
3. Brush on an oil-based urethane to prevent the dye from re-liquefying.
4. Apply two to four coats of amber shellac with a thick, 2″ natural-bristle varnish brush. Montana dipped the brush into the shellac and blotted it on an old towel to remove excess, then applied it quickly using long, even strokes.
5. Wipe on a satin-finish, oil-based urethane. “Shellac has a shiny look; the satin topcoat cuts the sheen and makes it look older,” says Kevin Southwick.
Exterior Approaches
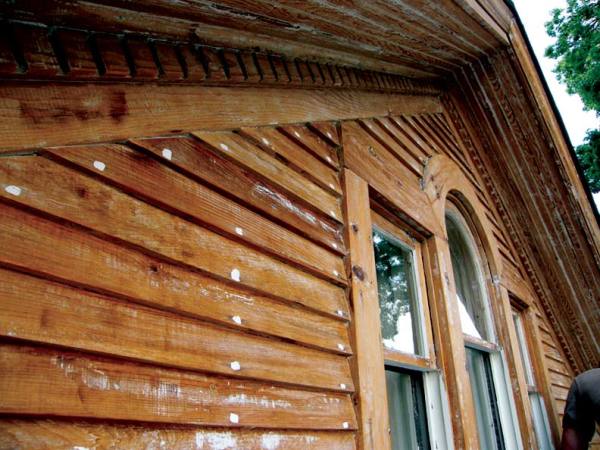
Ryan and Montana carried the same attention to detail to their work on the house’s exterior. “The previous owner painted and retouched the exterior all the time, so there was a huge buildup of paint—but the wood was well-protected,” Montana says. They began by using a heat gun and paint scraper to remove the paint. Then they used carbide scrapers to take off the remaining thin layer of residue, first making sure the clapboards were tight, with no nails sticking up that might nick their scraper blades. (They hammered down all nails flush with the wood—taking care not to hit them too hard, which can split the wood—and didn’t countersink the nails, because the resulting holes would need filling.)
After using carbide scrapers, the wood was very clean; also visible are nails primed with a rust inhibitor.
For clapboards, fascia boards, window trim, window sash, and other similar flat, relatively broad surfaces, Ryan and Montana fitted their scrapers with 2″ blades. “They’re so sharp that they act like mini-planes, removing any residue left over from the heat gun process,” explains Ryan. The two used various profiles to get into small spaces between dentils and in curved, recessed areas. “By the time we were done with all the stripping, the wood was so clean that we joked about how it looked like we’d just refinished a giant piece of furniture,” says Ryan.
Next, they lightly sanded the wood to prepare it for finishing. “Sometimes the edge of a clapboard gets a little furry from the stripping process,” says Ryan. “We removed that with sanding blocks and used folded sheets of sandpaper to get into really small places.”
They then reinvigorated the wood by brushing on a mixture of one part linseed oil thinned with two parts turpentine, wiping away excess with a towel, then letting it dry in the hot sun for a couple of days. The linseed oil treatment helps with paint adhesion.
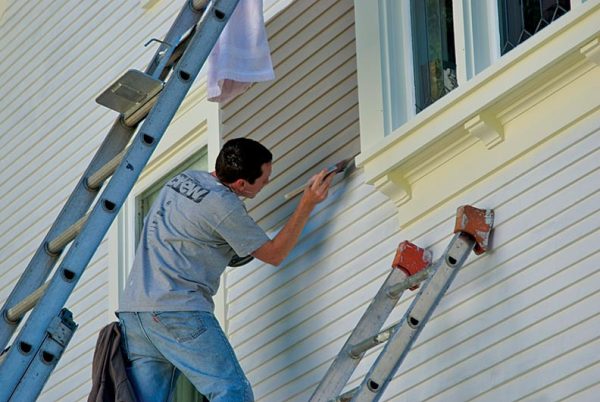
Ryan carefully applies a coat of finish paint.
Next, Ryan and Montana painstakingly covered each nail with an oil-based, rust-inhibiting primer. Once that dried, they went over every surface with a coat of oil-based exterior primer. Then they caulked every joint, including seams between clapboards and areas where clapboards meet the windows and moldings.
Finally, they applied two layers of high-quality latex paint. While it took them months to do just one side of the house, the results are worth the effort. Inside and out, the house is a picture-perfect testament to the sincerity of their restoration.