

Rough stone floors can be beautiful, but deep-cleaning them requires lots of elbow grease and multiple passes with an orbital floor polisher. William Wright
Keeping a floor in good repair goes beyond infrequent cleanings and the occasional spit and polish. For wood, that doesn’t always mean sanding and three coats of polyurethane; and stone, tile, and resilient floors all need special care to keep them beautiful.
Wood
Wood flooring covers a vast range of cuts, species, installation methods, and patterns. As a surface, a wood floor can last hundreds of years, or be played out in a matter of decades, depending on its durability and whether it’s been cared for properly or indifferently.
Many homeowners believe the best way to refresh a wood floor that looks dirty or worn is to sand and refinish it. While this can certainly produce good results in relatively short order, consider that every time a floor is sanded up to 1/16″ of the wood is removed. The old yardstick—that a wood floor could only be sanded three times before it needed to be replaced—is still valid today, especially since many 20th-century tongue-and-groove floors are only 3/8″ to 5/8″ thick. Over time, removing even minimal amounts of material can ultimately cause the upper edge of the groove to collapse, creating voids between boards.
If there’s evidence that this is happening to a floor you’ve inherited (signs include damage or patching with wood putty along joints), it could be a mistake to sand it. Consider a less aggressive and faster method of refreshment called screening.
Also called buffing, screening means scuffing up or abrading the surface of a floor prior to applying a fresh coat of finish to restore its shine, explains Debbie Gartner, a former flooring professional who blogs about floor finishing at The FlooringGirl.com. Instead of sanding a floor with a belt sander, screening is done with an orbital buffing machine fitted with mesh pads that have been embedded with abrasive particles.
While the scouring action of the pad takes off some of the old finish, it will not address deep scratches or stains that have caused changes in color (urine stains from pets, for example). Screening allows for a change in gloss level—from high gloss to matte, for example—but not an actual color change. To accomplish that, the finish must be completely stripped down to bare wood before a stain is applied.
Because screening can prolong the length of time between full sandings, it’s a shame that it isn’t used more frequently. As a preventative step, it’s essential to screen and recoat the floor before too much damage has been done. “As a general rule of thumb,” advises Gartner, “if you screen a wood floor every three years or so, you can avoid a full sanding for a very long time.”
If too much of the finish has worn away, revealing wood that is grey from oxidation, the floor is too far gone to screen. It’s ready for a full sand and refinish.
Screening, a technique that removes some but not all of the floor finish, can lengthen the amount of time between full sandings. Courtesy OSHA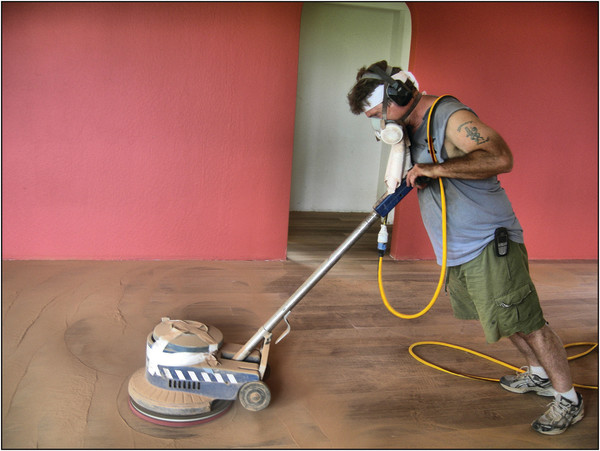
Screening Caveats
Screening multiple rooms can take an hour or two and up to a full day. Then a single coat of oil- or water-based polyurethane or another finish is applied. In essence, screening and recoating is comparable to the final steps in the sanding process. You’ll still need to move furniture out of the room, and let the finish cure for a few days before it goes back. Screening will not work on floors that have been waxed—unless the wax has been completely removed. Even floors with a slight buildup from common cleansers and polishes that contain wax will resist screening. Screening won’t address UV discoloration caused by area rugs.
Oil vs. Water
While it’s true that water-based finishes are lower in VOCs (volatile organic compounds) than oil-based ones, that advantage is halved when you consider that oil finishes typically last up to 10 years or more. In as little as five years, water-based finishes may begin to pop and peel, and the exposed wood starts to look grey. That said, some woods do look better with a water-based finish, particularly maple, a light wood that tends to yellow under oil-based polyurethanes.
Before committing to a stain color, apply samples to boards of the same wood species and cut as the floor. Courtesy Theoldflooring.com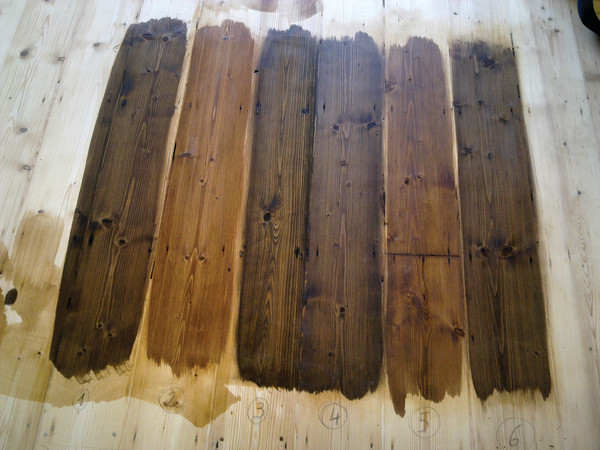
Staining a Wood Floor
Staining can lend new life to a floor that’s seen better days. Newly fashionable dark stains are especially effective at concealing changes of color caused by old pet urine and other damage, too. When considering whether or not to stain, remember that staining adds at least one extra step to the refinishing process, or two if a pre-stain conditioner is needed—to prevent blotchiness on a floor with an uneven wood grain, for example.
Before settling on a color, do a trial of different stains (or stain combinations, if you want to create your own blend) on sample boards closely matched to the wood in the existing floor. When you’re sure of the tint you want, prepare the floor to receive the stain by stripping it down to bare wood. If the floors are in rough condition, you may need to make two or even three passes with a sander, using progressively finer grit sandpaper, in order to end up with a smooth, stain-ready surface.
Variable width wide-plank floors in this early dwelling were probably cleaned, when they were new, with a mixture of lye and water. They’ve been painted to help preserve their character. Eric Roth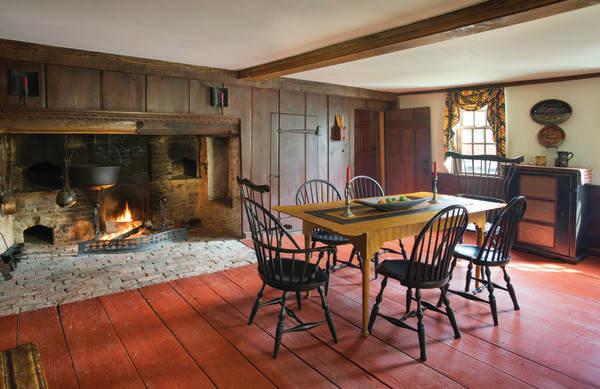
> Vacuum the floor thoroughly and wipe down just as thoroughly with tack cloths, changing them as they become coated with dust or debris.
> Once the floor is dust free, dampen it with a new wet mop, working from one side of the room to the other. Adding a small amount of water to the wood raises the grain. This makes it easier for the wood to absorb the stain—but don’t allow pools of water to form on the wood. Wring out the mop frequently.
> If you are working with a soft wood like fir or you suspect the finish might be irregular, apply a pre-stain wood conditioner before staining. Sold under several brands, these conditioners will reduce the likelihood of blotchiness.
> Apply the stain liberally, using a sponge or rag, working with the grain. Again, work from one side of the floor to the other. For the most consistent look, try to apply the same amount of stain to each board. After applying, permit the wood to rest about 5 to 10 minutes, then wipe off any excess stain so that the color penetrates evenly.
> Allow the stained wood to dry fully, at least overnight. If it’s not completely dry before finishing, it can smear or smudge when disturbed.
> Apply the top coat, which can be water- or oil-based polyurethane, tung oil, or a natural finish.
Top it Off
While early American floors were left natural and occasionally cleaned with sand or lye and water, most of us today prefer some sort of topcoat on a wood floor. Finishes are usually blends of natural plant or nut-based resins or oils suspended in or mixed with oil, alcohol, solvents, or water that cure to a hardened finish.
The most popular finishes are polyurethanes. Easier to apply, they last for years before they need refreshing. Whether water based or oil based, polyurethanes require multiple coats (with sanding in between) for durability. Water-based finishes dry quickly—hours between coats, ready for use in a couple of days—but they lack some of the depth of oil-based polys and such traditional treatments as tung oil. Refinishing a water- or oil-based polyurethane requires sanding the old finish before applying new.
Oil-modified polyurethanes are compositionally similar to water-based polys, except that the resins are impregnated with oil. Drying times are much longer, at least 24 hours and sometimes several days per coat. Oil-based polys cure to a deep, durable, and abrasion-resistant finish with a slight amber color that approximates period varnish. While water-based polys clean up with soap and water, oil-based ones require solvents to clean hands and brushes.
Tung oils and oil-impregnated tung oils penetrate rather than float on the surface of the wood. Like oil-modified urethanes, tung oils require longer drying times between coats, but they produce a true period appearance. Tung oils must be thinned with a solvent before use; Real Milk Paint offers an already thinned version called Half & Half that does the work for you. While polymerized tung oils dry faster than pure ones, a tung-oil floor usually takes 30 days to fully cure and should be treated carefully for the first few months.
Best of all, tung oil and low-VOC finishes made from natural proteins can also be refreshed with new coats without stripping. No sanding is required between coats, either.
Stirred, not ShakenUnlike paint, stain should be never be shaken before it’s applied, advise the folks at Minwax. Shaking not only adds unwanted bubbles, but doesn’t guarantee that all the ingredients are mixed. It’s important to stir the stain until all the sediment is evenly dispersed.
While modern-day linoleums like Marmoleum come presealed, vintage linoleum is often protected with coats of wax. The wax should be stripped and refreshed at least annually to keep floors in top condition.![]()
Removing Old Wax
Wax buildup is a problem on many types of floors that need some sort of wax protection, from vintage cork and linoleum to wood floors. While a buffed wax finish adds shineand depth, over time the surface of linoleum dulls and gets dirty. That’s why waxed floors need to be stripped of wax and refinished every few months or so.
• To remove the old wax from a linoleum or cork floor, mix together: 1 gallon white vinegar and 1 cup cream of tartar
• Gently mix the solution until the cream of tartar dissolves.
• Dip a scrub brush in the solution and apply to the linoleum with a gentle, rotating motion. Continue until the entire area has been scrubbed.
• Wipe the areas as you scrub them with clean towels that have been dipped in warm water and wrung as dry as possible. Go over stubborn areas a few times until all of the old floor wax is removed. Rinse thoroughly with fresh clean water, then dry the floor with clean towels or rags.
Slate, a favorite in many Mid-century Modern interiors, wears well and should be cleaned with a stone-specific neutral cleaner. Jim Brown, Courtesy Gibbs Smith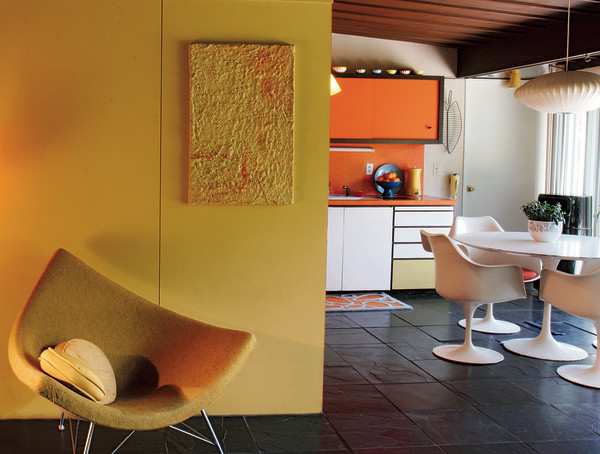
Stone
Marble, travertine, slate, soapstone, and other stones are all desirable for floors from the foyer to the kitchen. While stone is an exceptionally durable flooring material, some types are more porous than others and require special care.
Despite its historical association with monumental staircases and other high-traffic areas, marble is probably the most vulnerable because it pits and stains easily. A protective sealant should be applied on installation, and reapplied annually with a buff and polish. Clean up any spills immediately (even water) and sweep or mop the floor daily.
For regular cleanings, use a pH neutral cleaner. (This should be indicated on the label.) Never use acidic cleaners on marble; this includes cleaners that contain vinegar and those with a “fresh citrus smell” as well. However, it’s OK to use heavily diluted ammonia and water on a marble floor. The safest cleaner for marble is 1/2 cup of dish soap to 5 gallons of water.
Once the floor is clean, sop up any wet spots with a soft, absorbent towel. Marble is so porous that standing water can seep into the stone and discolor it.
Since limestone and marble are essentially the same material, treat any limestone or travertine floor with as much care as pure marble. Clean the floor frequently with a gentle, pH neutral cleaner and keep it free from spills and water.
Slate, a historic flooring material, is durable and easy to clean. It’s so tough that it has a long history of use in foyers and kitchens, particularly in the Northeast, where it is quarried. Slate is so dense that it does not require a sealer to be stain resistant. If you prefer a shiny look, however, use an installer-recommended sealer twice a year to keep it looking well polished and glossy.
It’s unusual to find an old soapstone floor, but this all but indestructible stone makes an excellent flooring surface in much-abused areas like the kitchen, mudroom, and entry. It’s non-porous and completely stain resistant, but it oxidizes with exposure to air. When water, oils, or acids come in contact with soapstone, it may oxidize unevenly, so manufacturers like Vermont Soapstone recommend conditioning the stone with mineral oil.
Pour the mineral oil directly onto the surface of the stone, rubbing it on with a clean, dry rag. Let the first application sit for about half an hour. Then wipe up any excess. The oil doesn’t actually soak into the stone; it simply speeds up the oxidation process and darkens the stone.
For about a year, the stone may need monthly touchup oiling to keep the color consistent. Generally, reapply mineral oil when the color fades and water begins leaving noticeable spots.
The steps in the Illinois State Capitol were cleaned with American Building Restoration’s Waterless Cleaning Poultice, which removes dirt, soot, and grease from masonry.
Stone Cracks and Patches
Small cracks and crevices can be professionally repaired in stone floors using a combination of stone dust and epoxy resin colored and polished to match the stone. For stones like travertine, where the naturally formed crevices tend to fill with dirt, a professional shop should be able to remove the grime and repair any damage.
• Techniques include grinding the damaged area, then repairing it with color-matched epoxy resins, with or without stone dust of the same color. Floors that are scratched or etched can be revived by rehoning them, followed by a buff and polish. If the floor is so far gone it’s lost color, it can be color enhanced with a modern sealer that will deepen the original color.
The Pro Tip
pH Neutral: Stone and concrete floors can be damaged by floor cleaners that are not pH neutral. The pH scale ranges from 1 to 14 and is a measure of a solution’s acidity or alkalinity. A pH of 7 is neutral, or balanced. Those on the lower end of the scale are more acidic and those at the upper end are alkaline. A pH-neutral cleaner is also kinder to the human body: highly alkaline or acidic solutions can cause severe skin burns.
A Saltillo-tile floor, as professionally cleaned and buffed by California Tile Restoration.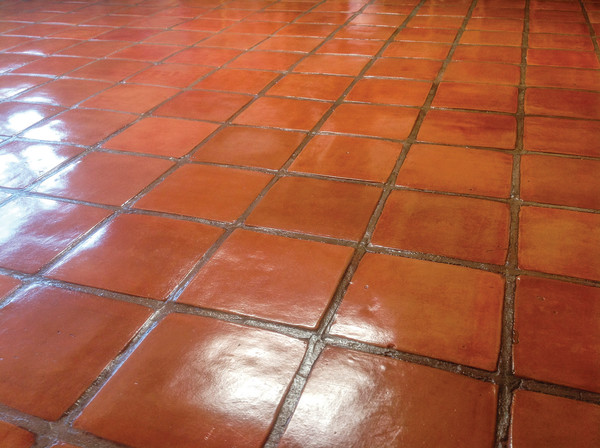
Tile
Hard-fired and impervious, ceramic tile is possibly the easiest care flooring surface there is—except for the issue of grout, of course. But not all tile is impervious, notably clay and concrete tiles. Historic terra-cotta and Saltillo tiles are both quite porous and need sealers and special care to remove dirt and keep in top condition. In the U.K. and Europe, cement encaustic tiles are sealed only after installation, but the newly popular cement tiles from Guatemala and other locales come pre-sealed from the factory.
Saltillo tile, originally from the village of the same name in Mexico, is fired at low temperatures and is the softest of the clay tiles. Saltillo tiles produce a fine dust to be removed before they are installed; they should be given an initial seal with a clay-specific topical sealer. At least two layers of sealer are needed to protect the tiles and grout; thus stains, scratches, and dirt become embedded in the sealer, not the tile. Frequent cleanings should keep the tiles in good condition. Every two to five years, the floor should be deep cleaned with a rotary cleaner and polisher, then resealed with two coats of sealer.
Terra-cotta tiles that originate in Europe are harder than Saltillos, but they too are porous and need extra care. As a rule, the floors should be resealed whenever water placed in the middle of a tile soaks into the floor in 15 minutes or less.
Terra-cotta floors are traditionally waxed or coated with boiled linseed oil. Cleaning a waxed terra-cotta tile floor usually calls for removing the old wax or oil and the dirt along with it, usually with a rotary scrubber equipped with clay-safe cleaning pads.
Geometric and encaustic tiles don’t generally show wear patterns, but tiles can get dirty. Clean frequently with a pH-neutral cleaner and occasional deep buffing.
One pro begins by spreading wax and finish emulsifiers over the floor, a small section at a time. The emulsifiers liquefy the old finish so that it can be removed with the rotary scrubber. Grout lines must be hand-brushed and scrubbed by hand, however.
Ingeniously, the rotary scrubber cleans, rinses, and removes all of the wet and dry debris at the same time, provided the tool is used with the right amount of pressure. After the floor dries overnight, it’s given a new, two-coat finish the following day.
Encaustic tile floors, like those supplied in the U.S. by Tile Source, are given a penetrating sealer according to the manufacturer’s instructions. Because the color and pattern go all the way through true encaustic tiles, they do not readily show wear patterns.
Encaustic tiles are prized for the patina they develop over time. They can get dirty, however, so they should be frequently cleaned with a pH-neutral detergent and occasionally buffed with a soft pad. Water spills should be cleaned up immediately, as water can soak into the concrete and discolor it. The floor may need periodic resealing, especially if it’s in a heavily used area or subject to grit or salt.
BEAUTY OF CLAY
Although they are durable and long-lived, both terra cotta and encaustic tiles
benefit from frequent cleaning and occasional resealing with the right product.


