

It’s possible to find the original paint on surviving cabinets, under layers of later paint; a good paint store can help you match the original color. (Photo credit: Blackstoneedge.com, courtesy Crown Point Cabinetry)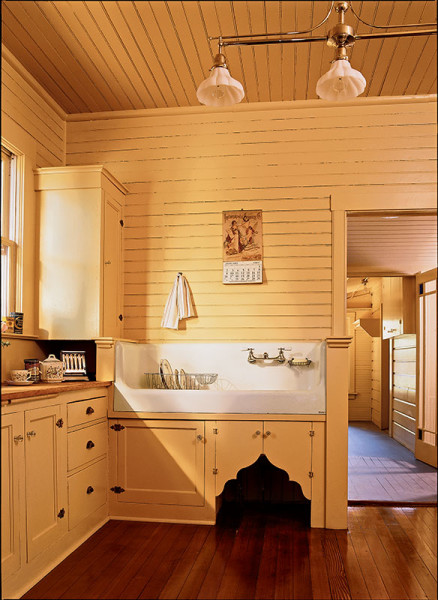
Cabinets
Despite daily use, cabinet fronts and interiors are often overlooked when it comes time to deep-clean the kitchen. Modern cabinets built or added to the house in the past 10 or 20 years are easy-care for a reason: Even restoration-quality cabinetry is typically finished with a hard, protective coating called a conversion varnish. More stable and long-lived than lacquer or traditional varnishes, these cabinet surfaces stand up to just about any type of household cleaner. Obviously, it’s a good idea to use one made for the finish on the surface, whether the cabinets are wood, steel, or another material.
To touch up worn finishes, nicks, and scrapes, first check with the cabinet manufacturer to see if they can supply a match for the stain or paint. If a match is not available, take a sample (a small drawer or door, for example) to a local building supply or paint store. A good one should be able to come up with a close match by blending commercially available stains or paints. Be sure the finish is also matched for sheen: matte, semi-gloss, or gloss.
Prepare the damaged and rubbed areas by sanding with fine-grit sandpaper, such as 220, or fine steel wool. Sand with the grain, and remove dust with a tack cloth. Test the stain or paint in an inconspicuous area, and adjust as necessary; this may require another trip to the paint store.
If you’re working with stain, apply it with a high-quality brush and wipe the stain away to see how quickly it takes to the wood. Repeat as needed to get the right amount of coverage to match the existing finish. Once it’s dry, apply a good furniture-quality paste wax to the repair; you may also want to apply wax to heavily used areas (see “A Good Waxing,” below).
Vintage cabinets come with their own set of requirements. Original wood cabinets that have held up for a century or more are often better made than new ones, but they’re subject to ground-in dirt, stickiness, and darkening. In most cases, cabinets built between roughly 1880 and 1930 will be made of Douglas fir, pine, or another resinous softwood, including early forms of plywood. Mid-century-era wood cabinets were often made of layers of wood topped with wood veneer. All were sealed with clear finishes that included shellac or varnish, or were painted with “enamel” (usually oil-based paint). Earlier cabinets were treated to a variety of paints, or simply waxed.
A good hand-rubbed paste wax will help protect old or newwood cabinets; these are made of reclaimed chestnut.(Photo credit: Blackstoneedge.com, Courtesy Crown Point Cabinetry)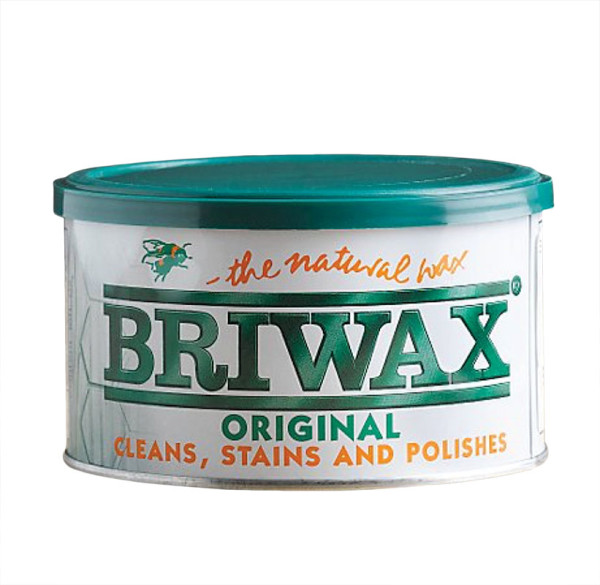
A Good Waxing
Furniture-quality paste wax may be used on bare wood cabinets as well as over any shellac or varnish. The wax should barely fill in the minute roughness of the surface, not sit as a layer on top of the wood. For best results, use a hand-rubbed paste wax made for wood furniture (Briwax is one brand), applied sparingly. After application, buff the wax well with a soft, clean cloth. This should take as much effort as hand-waxing a car. If the wax begins looking dull or worn in places, simply reapply and buff.
Stripping Hardware
Paint strippers or mineral spirits will quickly remove paint from hardware, but less toxic methods often work just as effectively. In every case, dry the hardware thoroughly once it’s clean to prevent rust. Lay the pieces in the sun for a few hours, or in an oven set to 150 to 200 degrees for about 20 minutes. Buff the clean, dry hardware to bring out the shine. For vintage brass hardware, apply tung oil with a soft cotton cloth. Let it sit for a few minutes, then buff off the excess with a soft dry cloth. Try one or more of these methods:
Immerse the hardware in hot boiling water with an ounce or two of vinegar. Allow it to sit for several hours or overnight. Rinse under hot tap water. Use an old toothbrush and/or a nut pick to scrape off clinging bits of paint.
Boil the hardware in a slow cooker on high for several hours. The heat and moisture will soften the paint, and often it will fall off as a single piece. This method may stain or contaminate the pot, so reserve one for non-cooking uses only.
Dissolve ¼ cup of washing soda (a detergent booster) in a plastic bucket or used coffee can, then add boiling water. Stir until the soda dissolves, then submerse the hardware. Let soak until the paint loosens.
The patina of this copper pantry sink in a 1915 bungalow evolved over time. (Photo credit: Dan Mayers, courtesy Preservation Station.)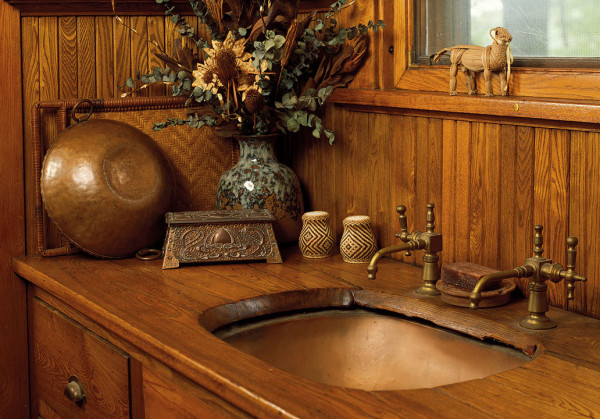
Copper Sinks
Copper has a living finish, which means it has the ability to change. If you’ve ever spilled lemon juice or yogurt in a copper sink, you are well aware of this. Luckily, even the most glaring spots and splotches will fade, sometimes in a matter of days.
To clean copper, use mild soap and warm water. Wipe the surface down daily with a soft, dry cloth. Avoid abrasive cleaners and copper polishes, which will strip any applied finish and interfere with the development of a natural patina. To clean dark spots or rings caused by pots and pans, use a non-scratch (plastic) scouring pad to lighten the surface. The copper will naturally darken to match the surrounding area after a few days. For extra protection, apply a wax formulated for metals, such as Flitz Faucet Wax Plus.
What Kind of Clear Finish Do You Have?
To determine what kind of clear finish you have, first test an inconspicuous spot with a little denatured alcohol. If it dissolves easily, the finish is shellac. If it doesn’t react, try lacquer thinner, which dissolves both shellac and lacquer. If neither solvent fully dissolves the finish, it’s varnish.
Once you have established whether the finish is shellac, lacquer, or varnish, you can begin to refresh it. Don’t automatically strip the finish down to the bare wood: it’s usually better not to, especially if the wood is thin or fragile. If the finish is in good condition, start by deep-cleaning the surface.
Shellac
Use a gentle dishwashing soap, applying only the suds. Wipe them away immediately. If this doesn’t loosen much dirt, try a stronger cleanser that’s safe for wood surfaces, such as Murphy Oil Soap. You can also try a small amount of denatured alcohol, applied with fine steel wool. The alcohol will melt the surface slightly and loosen built-up dirt. Refresh the finish with a coat or two of new shellac. Although sensitive to water, shellac is a very forgiving finish: each application partially dissolves the previous coats, then the entire film re-hardens to a single layer. To give the refreshed finish an aged look, sand lightly with fine-gauge steel wool.
Varnish
Oil-based varnish tends to darken with age, but if the surface appears to be in good condition, try cleaning it with Murphy Oil Soap or another wood cleanser. Dry the surface immediately after cleaning. For truly filthy solid-wood cabinets, apply a mix of equal parts turpentine, white vinegar, and boiled linseed oil. Once the cabinets are clean, polish with lemon oil or paste wax.
Touch up scuffs and scratches with a small amount of linseed oil, or a mix of linseed oil and varnish. Wipe on the oil, then immediately wipe it off; the limited contact should be enough to fill in small imperfections.
Painted Finishes
Wash painted cabinets with a mild, paint-safe cleaner. Rinse with water and dry immediately. If the paint is a glossy enamel, you can also use a mix of 1 teaspoon washing soda (Borax and Arm & Hammer make versions of this laundry booster) into a gallon of hot water.
If the paint is failing, the best alternative may be to lightly sand down all exposed surfaces and repaint with gloss latex or enamel. If you discover you have solid wood cabinets with a beautiful grain, however, another alternative is to strip the paint, then seal with shellac, oil-based varnish, or furniture wax.
Surface Materials
While many old-house kitchens are equipped with an all-purpose countertop, others include task-specific surfaces: stainless steel around the sink; butcher block or wood in the pantry; and marble for rolling out dough. Not surprisingly, these use-specific surfaces need a bit of coddling.
Natural Stone
Even an almost indestructible surface like nonporous granite or soapstone needs occasional care. Both stones wear beautifully, provided the surface is treated with a sealer that’s refreshed as it begins to wear. In the case of granite, that’s a penetrating stone sealer; for soapstone, the standard is mineral oil.
Soapstone initially has a longer break-in period. Installers recommend monthly mineral-oil treatments for the first year, with semi-annual touch-ups after that. Avoid using cleaners that may interact with the stone, such as those containing citrus. Scratches in soapstone can be buffed out with fine steel wool or a little medium-grit sandpaper wetted with mineral oil.
Granites that are porous, however, need extra care. Reseal them with a granite or stone sealer once you notice that water no longer beads up on the surface. Once water starts to seep into the counter, the stone may begin to etch or develop hazing. Granite seldom scores or shows scratch marks, but it can chip if you whack it hard with heavy cookware. Although professional countertop restorers can patch chipped areas, the repairs tend to wear away over time.
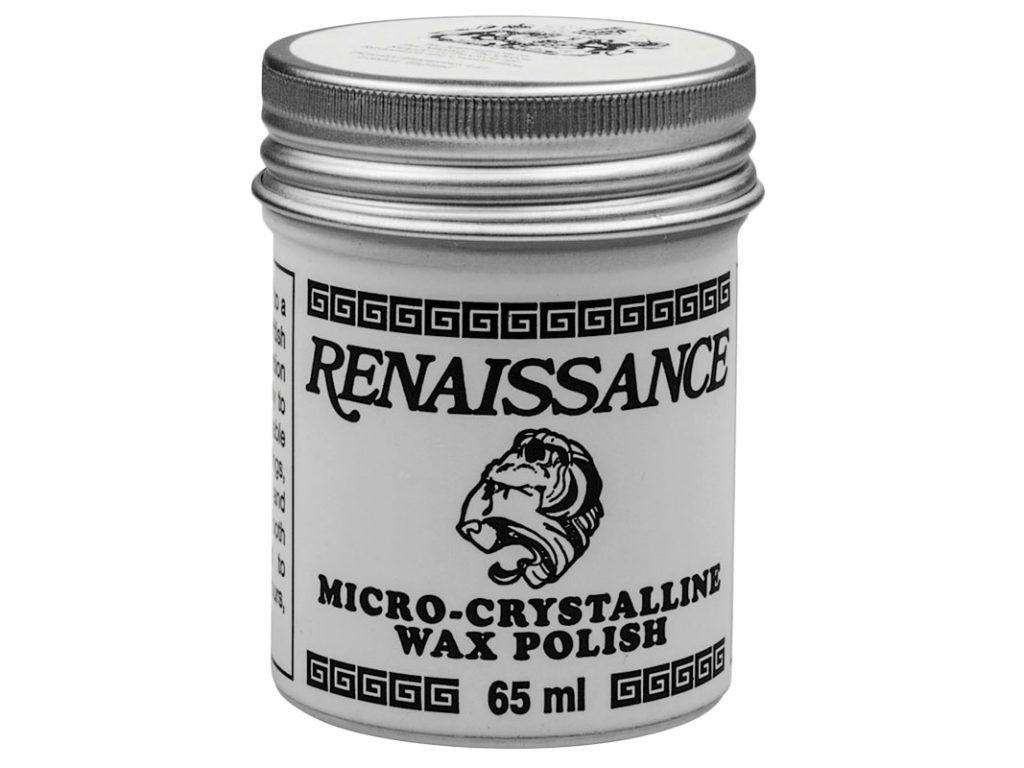
Marble—especially white marble—is enjoying renewed popularity as a work surface despite the fact that it is porous and stains easily. Any marble countertop should be professionally sealed, with the sealer refreshed every few months. Additionally, clean up any oil or acid-related spills (wine, lemon juice, tomatoes) immediately. Avoid cleaning marble, limestone, or any natural stone counter with ammonia-based spray cleaners. Over time, the ammonia builds up on the stone, dulling the finish. To rub out minor scratches and add sheen to marble, apply tin-oxide polishing compound or micro-crystalline wax to the surface. Rub vigorously with a damp cloth.
With proper care, a butcher-block counter will last for decades. (Photo credit: Jessie Walker)
Butcher Block
Butcher-block counters are formed from strips of hard maple or oak bonded together with the grain edge face-up for stability. Some are offered with long-lived permanent sealers, but wood intended as a cutting surface is usually finished with tung or mineral oil.
To clean it, rub the surface with half a cut lemon, squeezing on lots of juice. Then sprinkle with coarse salt and rub the salt in. Rinse and wipe with a clean cloth or paper towels. The acid and salt combination kills any surface microbes, and the lemon juice helps to bleach out minor stains. If the surface begins to show black marks from water penetration, wipe it down with a very dilute solution of chlorine bleach (about 1 ounce in a quart of water).
Even if the surface isn’t used for cutting, refresh the wood every few months (more often if it begins to look dry) with mineral oil. You can also use any food-safe natural oil that won’t turn rancid, such as walnut oil, or a butcher block-specific conditioner. If the surface is damaged—with scratches, heat marks, or bad stains—sand the surface lightly with fine (220-grit) sandpaper using an orbital sander. Clean the surface with a tack cloth and give it a fresh application or two of oil.
Stainless steel won’t stain or rust, but it can get scratched: buff out small abrasions with a nylon scouring pad, working with the grain of the steel. (Photo credit: William Wright)
Stainless Steel
As the name implies, stainless steel won’t stain or rust, lasts practically forever, and is easy to clean. It does scratch and show fingerprints, however. To keep fingerprints to a minimum, clean frequently with mild soap and water, followed by an application of a cleaner or polish specially formulated for metal. Usually, the “cleaner” is a protective oil, but it does make stainless steel gleam!
Laminates like the retro Boomerang pattern are easy care and still available from several manufacturers. (Photo credit: Gross & Daley)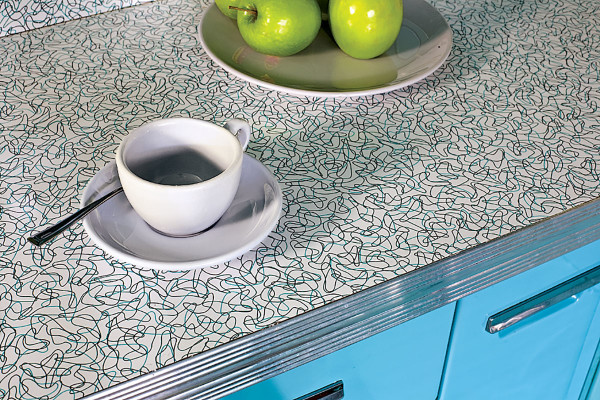
Laminates
Keep original or new tomato-red and “boomerang” countertops spotless with any gentle kitchen or household cleaner. If scratches appear, buff them out with a non-abrasive powdered cleaner like Bon Ami. Laminate surfaces can burn, though, so take extra care when flaming Cherries Jubilee or Bananas Foster.
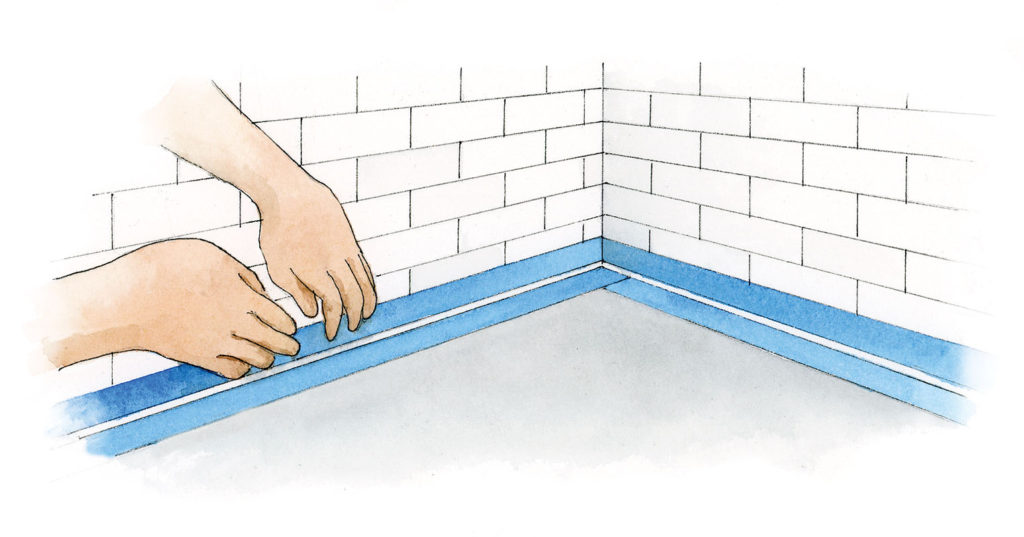
A Tight Bead
To caulk seams between countertops and backsplashes (or countertop and sink), use silicone caulk, which stands up well in wet areas. First remove the old caulk; use a utility knife or razor blade (or even pull it away with your fingers if it’s flexible enough). Choose a color for the new caulk that blends in almost invisibly between the two surfaces.
Unless you’re a tile pro, it’s all but impossible to apply caulk in a straight line freehand. Instead, use this trick: Tape the edges of the counter and backsplash or sink where they meet with painter’s tape, leaving only a small gap between the two runs of easily detachable tape. (1)
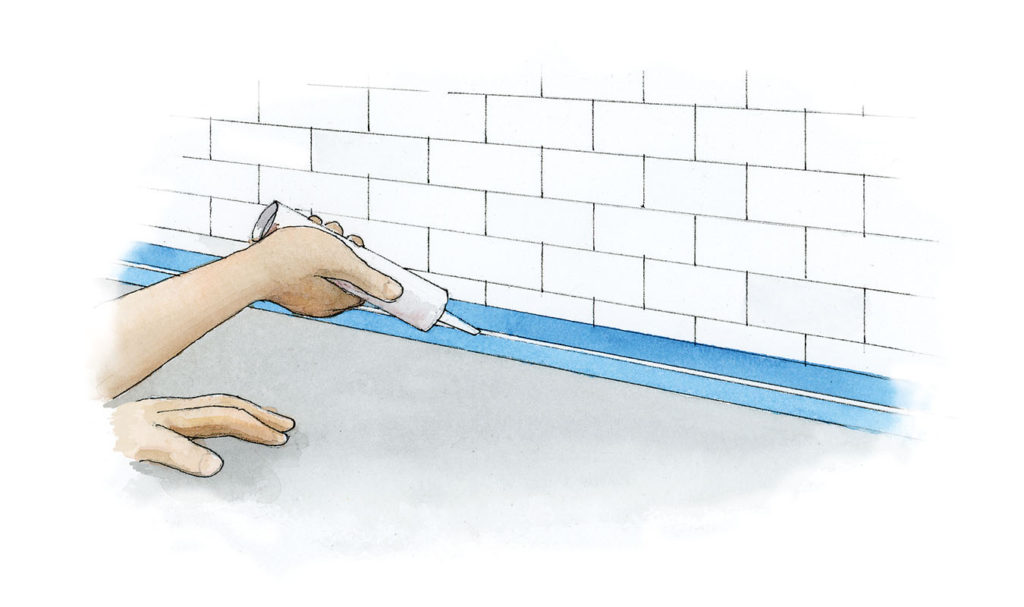
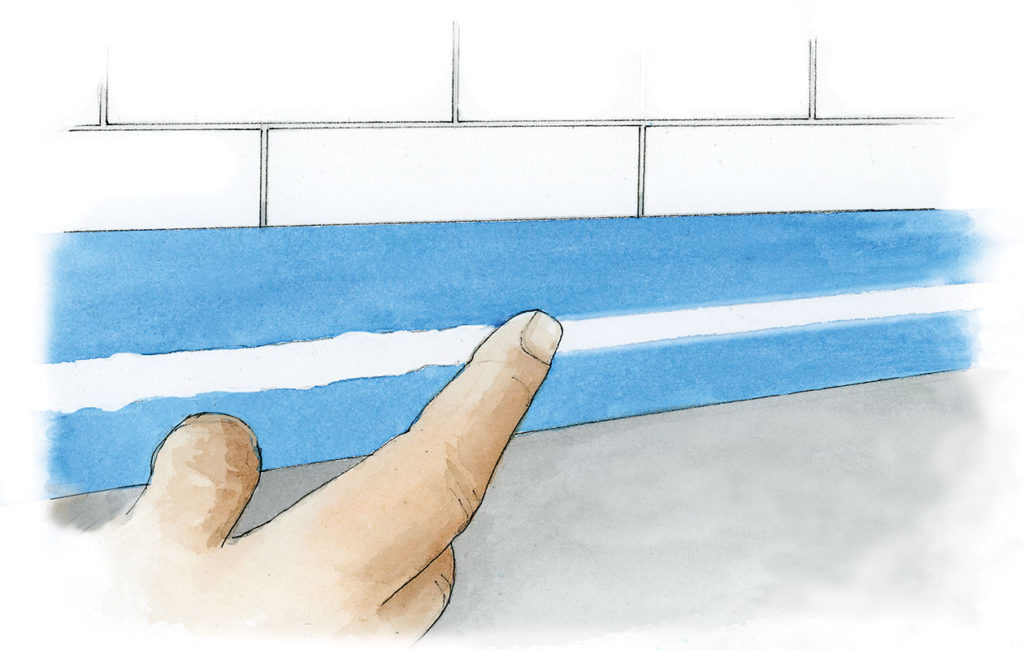
Now apply the caulk, taking care to get full coverage in the gap between the two runs of tape. (2) Smooth over the caulk with your finger to ensure an even bead line. (3)Carefully peel away the top piece of tape, then smooth the caulked bead once again with your finger. Remove the bottom tape, pulling in a long smooth motion so as not to remove the caulk from the seam. Smooth the line once again; the result should be a professional-looking caulk seam.
Grout It Out
To clean and brighten grout, try a mixture of baking soda and hydrogen peroxide. Mix equal parts to form a runny paste, and apply it to the grout lines with an old toothbrush. Let the mixture sit for a few minutes, then rinse it off. Repeat as needed.
To replace cracked grout, clear the damaged areas with a utility knife or (for bigger jobs) an oscillating multi-tool. Brush away any loose material with a stiff nylon or bristle brush. (Do not use a brush with metal bristles that could scratch the tile.) Then regrout, using either premixed grout or a batch you’ve mixed yourself, applied with a float. Be sure to work the fresh grout deep into the gaps.
To clean away excess wet grout, dip a work sponge in clean water and wring it out thoroughly. Wipe perpendicular to the grout lines, not with them. Let dry, and repeat as needed to remove grout haze. Dispose of the wastewater in a utility sink or outdoors, since dried grout can clog smaller water lines.
Blackstoneedge.com
Appliances
Grease, spills, and even dust make it a challenge to keep the stove and fridge gleaming.
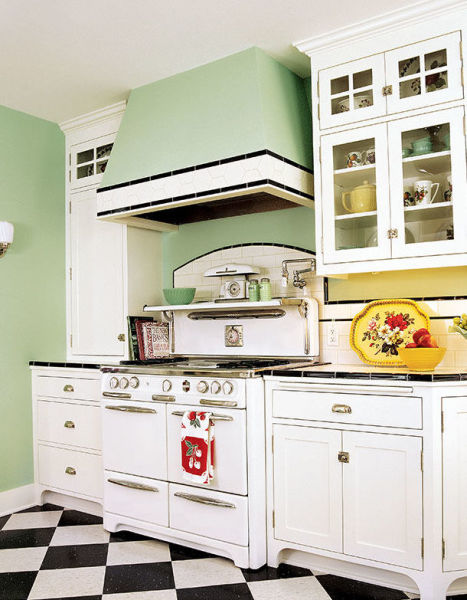
Nickel and Enamel
Whether your range is vintage or reproduction, a little care goes a long way with enameled surfaces and nickel trim. Use non-abrasive cleansers for the porcelain or enameled surface. Choices include warm soapy water, glass cleaners, and ceramic cleaners like those for tile. Wipe up acid-based spills immediately to prevent etching.
The same goes for nickel finishes: lemon juice or tomato sauce may etch the metal. To clean nickel-plated trim, use a non-abrasive metal cleaner such as Flitz, Maas, or Simichrome, available at any good hardware store.
Porcelain
Whether the porcelain surface is on a vintage Fifties range or a sink, clean it with a mild liquid detergent or non-abrasive dry cleanser such as Bon Ami or Bar Keepers Friend. Avoid commercial cleansers that contain silica, which can scratch the surface. For tough stains, form a paste from cream of tartar mixed with hydrogen peroxide, and apply with a soft-bristle brush.
To whiten the surface of a sink, fill the basin with warm water and add a cup of household bleach. To remove rust stains, try rubbing them with lemon.
(Photo credit: Blackstoneedge.com)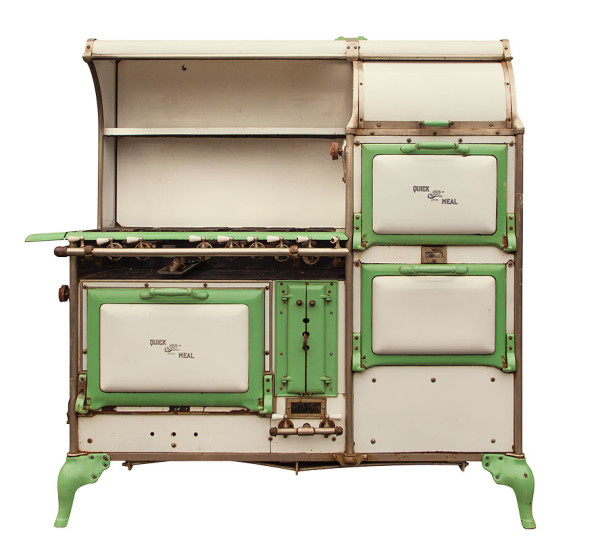
Homemade Oven Cleaner
To clean an enamel or porcelain stove interior, skip the toxic oven cleaner or all-day, high-heat treatment, and instead make your own cleaning paste:
¼ cup dishwashing detergent
1 cup baking soda
½ cup coarse salt
¼ cup white or apple-cider vinegar
Mix all ingredients in a large, non-reactive bowl with warm water as needed to form a paste. The paste should have the consistency of cake icing. Remove the racks from the oven, then apply the paste on all surfaces with a sponge or clean paint brush. (You can apply the cleaner to the racks as well.) Let sit for at least six hours or overnight.
Remove the grimy paste with clean water and a sponge, rinsing the sponge and changing the water as needed.


