

The cast iron question
I once lived in a house with a porcelain-on-cast-iron sink; its basin was rusted through. It was usable, barely, but anyone washing dishes had to take care not to get scraped knuckles. Or tetanus.
Elbow grease will remove the stains in the century-old cast-iron sink in California’s Lanterman House, but rust damage around the drain can only be repaired with a true porcelain restoration. Linda Svendsen Archive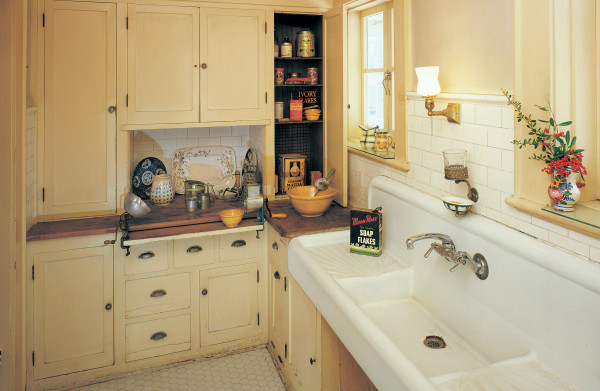
Provided the sink is not so far gone, several strategies may help refurbish a cast-iron sink finished in vitreous enamel. As long as the working part of the sink is free from rust spots and large chips—and isn’t rusting away—the sink can be cleaned of stains, touched up with automotive paint, and waxed to protect the fragile glossy finish. On the other hand, if rust or other heavy damage has invaded the basin, popped up around the pipes, eroded the drain, or affected other heavily used areas, the sink may be ready for new life as a yard planter.
That’s because, outside of a foundry, it’s next to impossible to re-create the high-heat bonding process between cast iron and enamel that took place when the sink was made.
Companies all over the country refurbish ceramic tubs and sinks with enamel or epoxy coatings, usually after etching the surface with chemicals that allow successive coats of paint to bond.
A vintage soapstone sink with a slanted front is perfect in this interpretation of a Colonial kitchen. Gross & Daley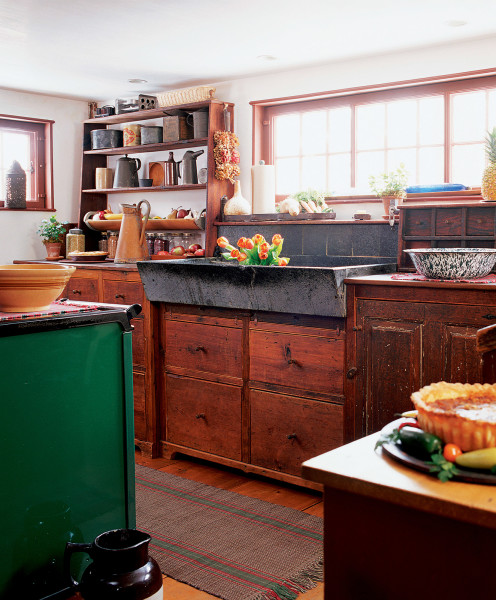
While the best new finish on a tub can last for eight to 10 years, it’s a different story for a hard-working sink. “You can’t put paint—and that’s what all the finishes are—on a surface and expect that it’s going to take cast-iron pans and knives and last,” says Ken Buzzell, the owner of Grampa’s Antique Kitchen.
One of the few places that still does high-heat reporcelainizing is Custom Ceramic Coatings, a company in the Chicago area. The company will sandblast the sink, removing all the original porcelain, then apply a new enamel finish, and bake the sink in a kiln. The results can last a decade or even more. But demand is high (there’s usually a waiting list measured in years rather than months); the heavy sink must be shipped to and from the factory; and the refinishing cost is comparable to the cost of a vintage or new cast-iron sink.
You can have higher hopes if your vintage porcelain sink is made of cast steel, however. A handful of companies around the country will sandblast the porcelain from a cast-steel sink and refinish it with new porcelain, which is then fired to between 1400 and 1600 degrees F. Be aware, though, that for most of these companies, refinishing vintage fixtures is a sideline.
Kitchen sinks made of other materials are more forgiving of daily insults. Stainless-steel sinks are among the easiest to restore, even when the sink is nicked and scratched. Yes, you can damage a stainless-steel sink if you go cleaning and polishing it the wrong way. But as long as you follow some key techniques, you’ll end up with a sink that gleams once more. Always start with the gentlest, least abrasive methods, and always work with the grain of the metal.
As for copper, allow it to develop patina naturally, and the sink will supply decades of successful use.
Because soapstone is nonporous, it is extremely stain resistant. It’s also impervious to chemicals, acids, and heat, so no household products that can harm it. Soapstone likes to be used, adherents say, and small scratches can be rubbed out with the flick of a thumb.
Trimmed with a tile countertop laid in a classic, early-20th century pattern, this wall-mounted porcelain sink has the integral drainboard and backsplash again prized by so many. William Wright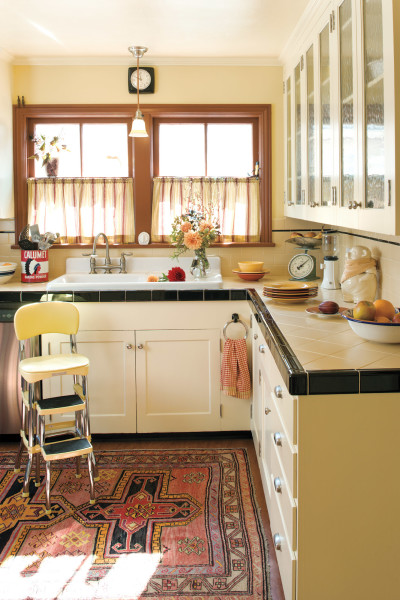
Making a cast-iron sink
Sleek, heavy, and highly durable, cast-iron sinks and tubs appeared in the 1880s. (Cast-iron tubs were first marketed as hog scalders and horse troughs, but American homeowners had other ideas.) The vitreous enamel finish made them easy to clean and sanitary, and cast iron’s heat retention was a real benefit when water had to be heated on the stove.
Creating a cast-iron sink today is an intensely industrial process that takes place in a mechanized factory setting. It begins with the making a two-part casting mold from the steel sink pattern. The first half of the mold is filled with moist sand and some clay, packed in under pressure. The clay helps bond the sand, to hold the correct shape. The sand mold is lifted and transferred to the other half of the mold. The two molds are brought together, leaving a small gap between them.
Next, hot liquid metal (from mostly recycled scrap iron) is poured into openings at the top of the mold, filling the gap at center. The mold is allowed to cool for about 20 minutes, long enough for the iron to solidify.
This 5′-wide drainboard sink with legs is modeled closely on a 1920s original. It’s shipped direct from the factory by Bathroom Machineries.
A shaking device breaks the mold, revealing the newly formed sink. Immediately, the sink is sprayed with a specially formulated glass powder, an undercoat for the porcelain-enamel finish. It’s set on a mechanical pedestal, which rotates rapidly as two more layers of glass powder are applied while the sink is still hot. The powder bonds instantly to the undercoat, forming a permanent bond with the iron casting. Between coats, the sink cools, then goes to a furnace for reheating.
Refurbished sinks from ready to re, like this extra-long-drainboard model, are warrantied for a year.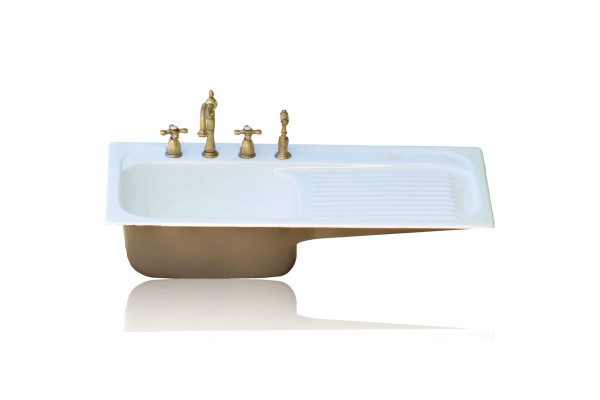
The Vintage Sink Market
Sink too far gone, or is it just wrong for the house? Whether you are looking for a monster cast-iron sink on porcelain legs, a smaller wall-mounted sink with or without drainboards, or a rarity like a true Monel (metal) sink, you have options aplenty. A spate of vintage-sinks specialists offer gently refurbished beauties reaching the 100-year mark. You can source your own sink from a salvage dealer (be sure there’s no rust on critical working parts, and don’t buy a sink that was epoxy-painted). Don’t expect perfection. Or, you can buy a new period-look sink.
A cast-iron sink in “almond” is the centerpiece of this re-created 1930s kitchen. Eric Oxendorf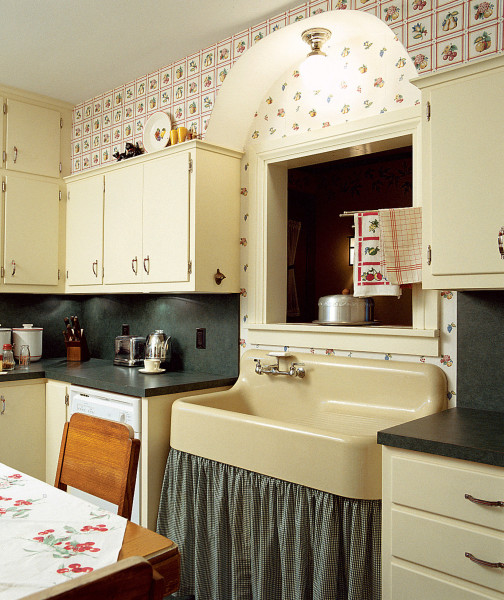
Help for Porcelain
Lots of good-looking cast-iron sinks are still available as salvage. But if an unrefurbished sink has seen better days, are there things you can do yourself?
Plenty, says Ken Buzzell of Grampa’s Antique Kitchen, who buys and refurbishes cast-iron, stainless steel, and other vintage sinks that he knows he can revive and resell. His tips:
- Clean and Wax The glossy finish typical of new porcelain has usually worn off a vintage sink, so it is no longer “sealed” and will stain easily. To remove existing stains, scrub the sink hard with Bar Keepers Friend, or even Comet. For stubborn stains, use vinegar, or phosphoric or tannic acid sparingly and with extreme caution. Then coat basins and porcelain drainboards with Carnauba hard wax, reapplying every two weeks or so. (Buff the wax for more shine.)
The new, enamel-coated cast-iron, wall-hung sink comes from Signature Hardware.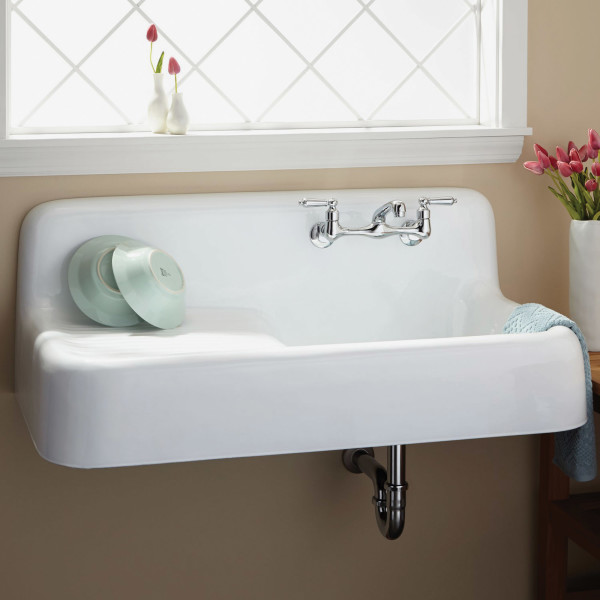
After contact with acidic foods (tomatoes, lemons, coffee), wash the sink with baking soda, rinse well, and dry the surface.
Never allow acids to sit in the sink! For everyday cleaning—this goes for all porcelain sinks, new and old—use a non-abrasive cleanser (not Comet; try a mild liquid). Rinse the sink after use.
- Clean the Underside If the underside is rusty or peeling, remove the sink and wire-brush the area. Wash with soap and water and wipe with mineral spirits. Allow the surface to dry, then apply a rust-inhibiting paint such as Rust-Oleum, using a brush.
NBI Drainboard Sinks reproduces hard-to-find models, like this 1950s-era double bowl/double drainboard sink.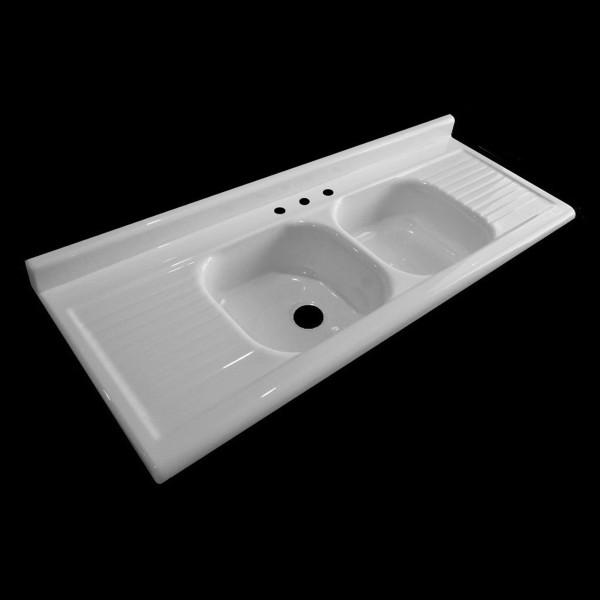
- Repair Chips Touch up small chips or scratches with Porc-A-Fix, or Rust-Oleum Specialty Appliance Touch-Up paint, an epoxy paint that comes in white, almond, biscuit, and black. (Ken Buzzell custom-mixes paint for more exotic colors, using automotive paint with a hardener.) Paint around the drain or in the basin won’t last long if the sink gets regular use.
The Pro Tip: Even a slow leak will eat away porcelain, whether the sink is old or new. If there’s evidence of a leak (such as a spot where the enamel is worn), call a plumber.
Monel apron-front sinks like this one from Grampa’s Antique Kitchen are very rare. They were made in the 1930s, for only a few years, by the American Nickel Co.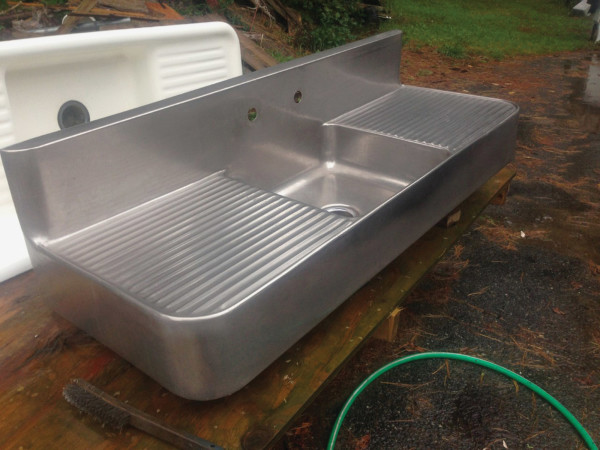
Remedies for Stainless Steel
The best approach to refreshing a scratched stainless-steel surface is to clean and polish the entire sink, using the least abrasive methods possible, plus a lot of elbow grease. Always work with the grain of the metal. Some sinks have matte (brushed) finishes while others are smooth and reflective. It’s especially important to clean in long, uniform strokes, covering the entire surface. Otherwise, you may leave marks.
Clean Start by rinsing the sink with water, then do a quick cleaning with a degreasing detergent such as Dawn dishwashing liquid. For deeper cleaning, use almost any cleanser: one with bleach, a lightly abrasive cleaning powder such as Bon Ami or Bar Keepers Friend, baking soda, whitening toothpaste, or even flour scattered over the surface. Use a scrubbing pad (such as Scotch-Brite Dobie) and work in long smooth strokes, always in the direction of the grain. A thorough cleaning should take at least three to five minutes. The result is a much cleaner, lightly abraded surface.
Remove Scratches You’ll need to use steel wool or a Scotch-Brite pad with some level of abrasiveness in combination with a liquid polish or rubbing compound to remove scratches, such as a stainless-steel cleaner or an automotive chrome or metal polish. (Just be sure not to get Turtle Wax on your countertops, as it may erode them.) For deeper scratches, start with a scouring pad or a slightly coarser grade of steel wool (00 Fine or 0 Fine) and expect to repeat the process.
Add some cleaner to the steel wool and apply it over a large area, then begin to scrub in long strokes, taking care to reach all areas, especially corners and rims. The more even the strokes, the better the finish will look. The pad may turn grey or even black: it’s picking up metal from the sink as part of the smoothing process. Clean up as much of the residue as possible with dry paper towels; avoid rinsing it down the drain. The more time you spend, the smoother the sink will become. If scratches remain, repeat the process with a finer grade of steel wool and more polish. To get a more reflective finish, follow up with a metal or chrome polish and a cotton rag for at least three and up to 15 minutes. Clean up residue with Bar Keepers Friend and a wet paper towel.
Alternative Methods Cleaning and buffing kits are designed for use with a bench grinder or drill, but few are made specifically for sinks. A good kit includes polish formulated for stainless steel, plus sanding pads and soft buffing pads. Or: have the sink professionally sanded and buffed. Check references and make sure the pro you use has experience restoring metal and stainless-steel sinks.
Reviving a Stainless-Steel Sink
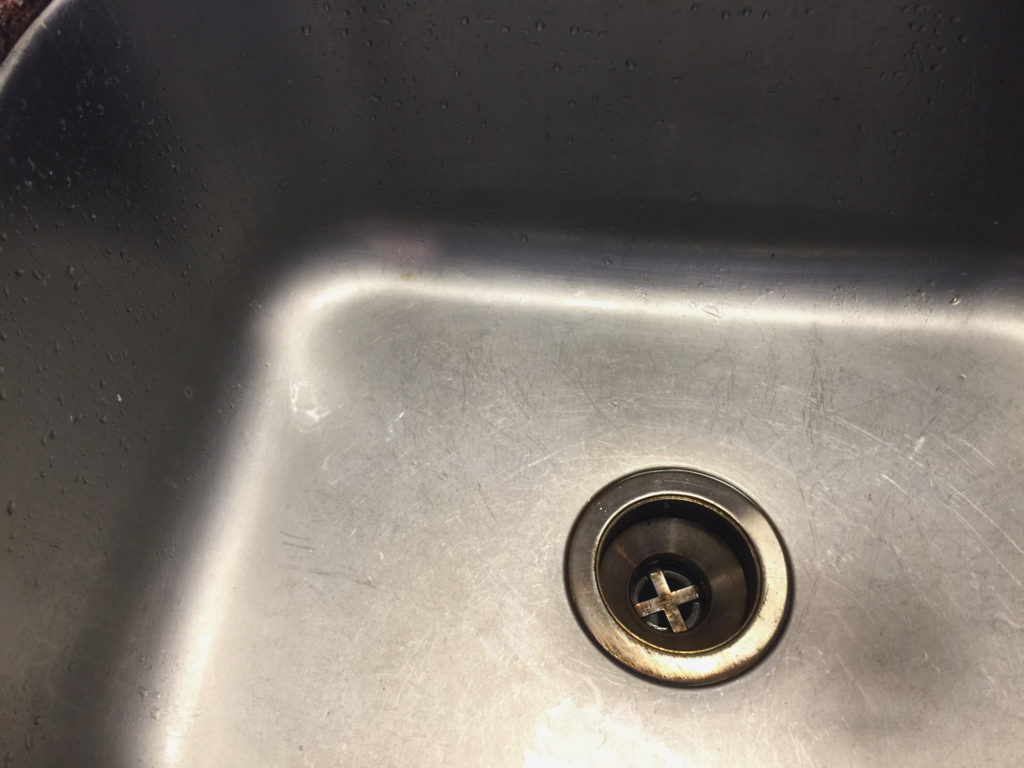
1: Before This sink is less than 10 years old, but it already shows moderate scratching and a drain that’s been rubbed so much, the brass is showing through.
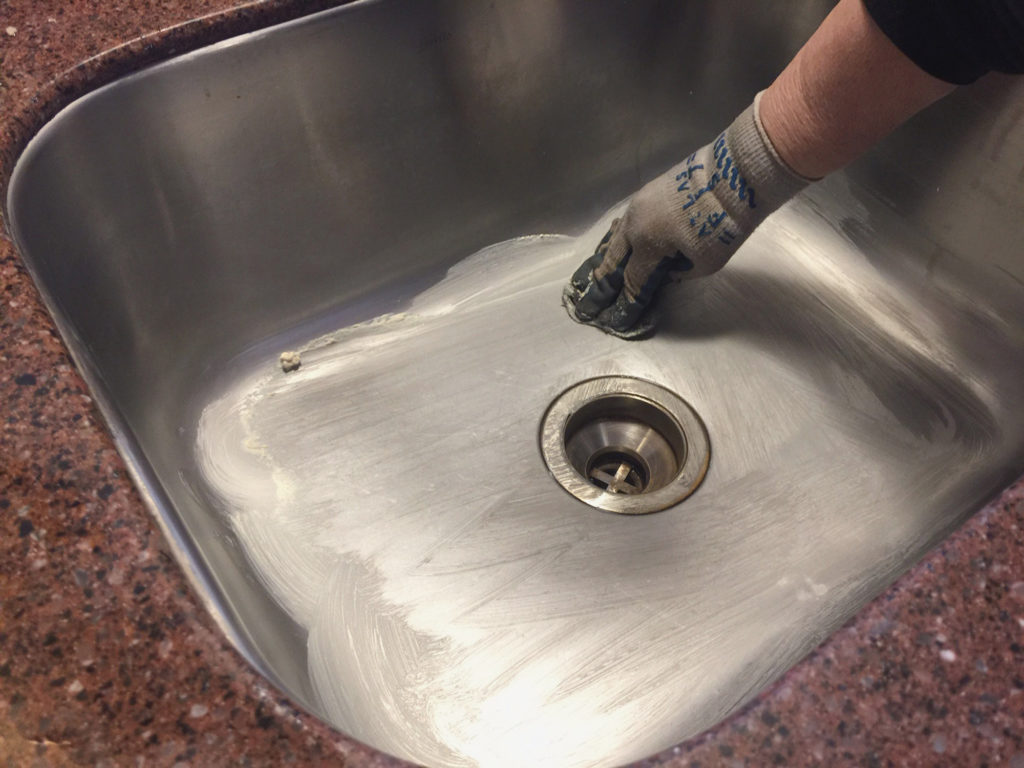
2: Apply polish Rub the polishing agent on the sink in long, smooth strokes.
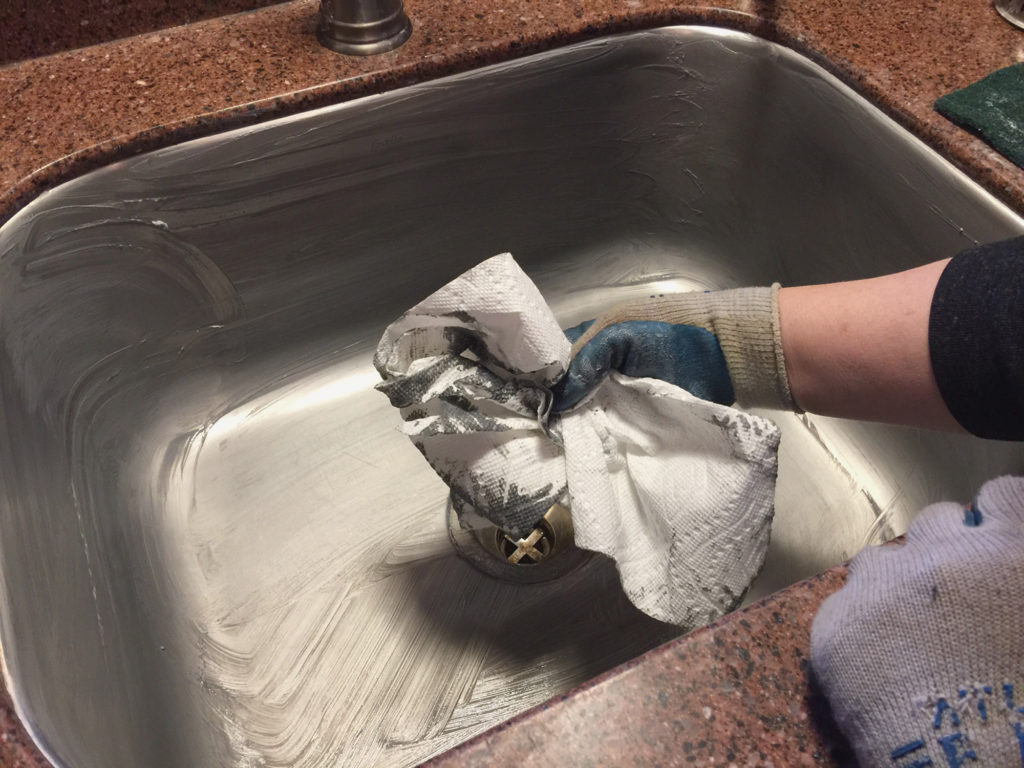
3: Remove debris Remove the worked polish with paper towels to keep it out of the sewage or septic system. The black debris is from fine metal particles that have actually been removed from the sink.
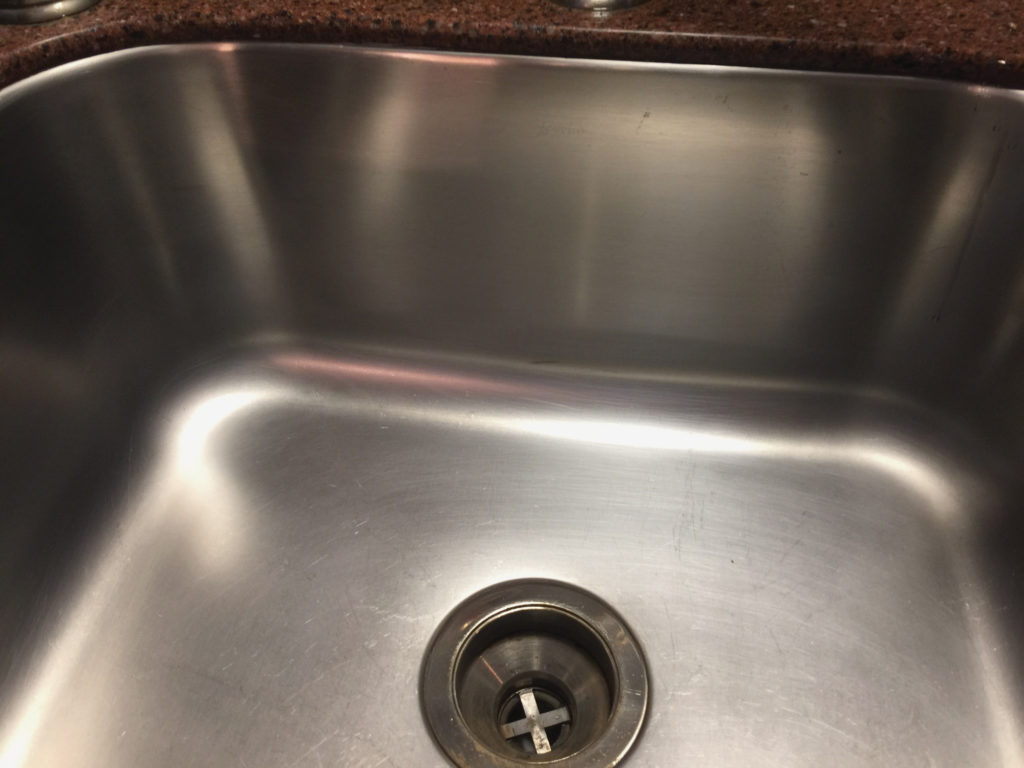
4: After The sink is much cleaner, and many of the scratches have visibly receded.
Refreshing Copper Patina
You’ll need:
- a natural sea sponge, preferably with a random hole pattern
- white vinegar
- a spray bottle (optional)
An excellent choice for pantries then and now, copper sinks eventually mellow to a rich brown patina, which can be revived if it gets stained. Dan Mayers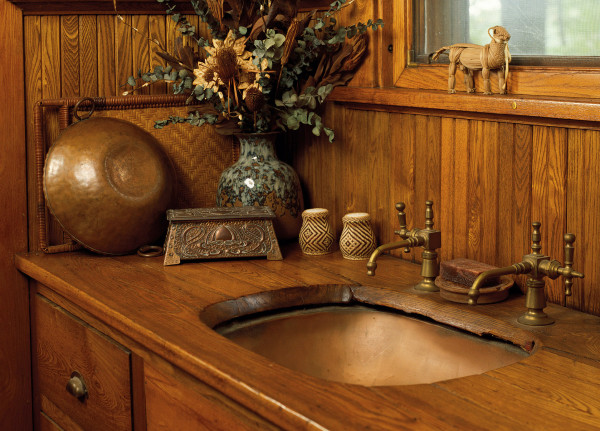
Clean the sink thoroughly with a degreasing detergent, such as Dawn. The sink must be completely free of grease or oil. Then clean with a mildly abrasive scouring pad, such as Scotch-Brite Dobie.
Spray or wet the sponge with vinegar. The sponge should be damp, but not wet enough to drip on the copper. Dab the damp sponge over all areas of the sink that need fresh patina. Try to avoid drip marks. Let dry and reapply three or four times. The copper should begin to turn green.
The copper sink in this late-19th-century pantry is still in good shape, even compared to the marble counter, which shows some staining and pitting.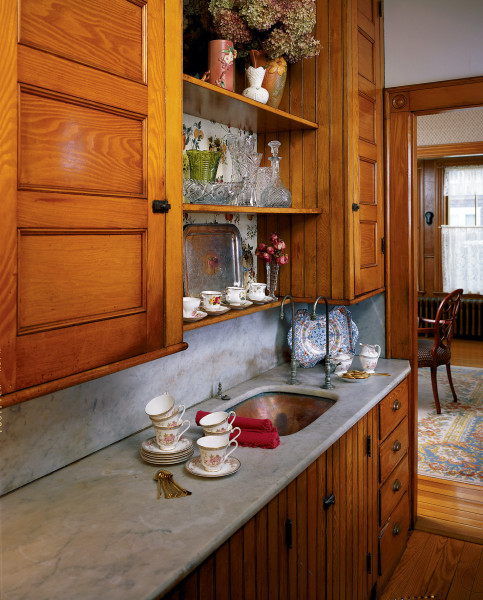
When the sink is mostly green, wet the same sponge with water until thoroughly wetted, but not dripping wet. Rub gently over the dried patina for about five minutes. You will see a soapy-looking, pasty green. Let sit for 10 to 15 minutes. Add water to the sponge and go over the sink one more time. Rinse well. The patina should now be even. To keep the patina in good condition, dry the sink after each use.


