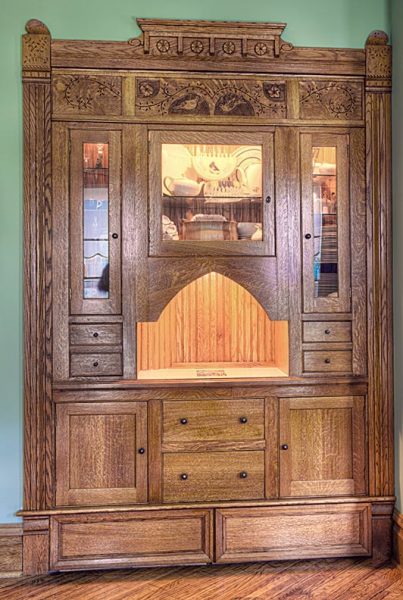
Although the cabinet looks complicated, it was quite simple to build. The trick was combining basic casework with custom moldings.
When Rick and Joy Harter bought their century-old Queen Anne in Bloomington, Indiana, it was difficult to see the once-dignified house beneath the brutal alterations both inside and out. Like all residential kitchens dating to the turn of the 20th century, theirs had been built without space for a modern refrigerator. After considering various possible layouts, Rick and Joy concluded that placing the fridge in a corner at a 45-degree angle made sense in terms of optimizing space and traffic flow.
To fit the refrigerator between a pair of doorways to the entry hall and the dining room, they would have to push the appliance back through the southeast corner into those adjacent rooms. This plan would result in awkwardly angled walls in both spaces. They planned to construct a coat closet in the entry hall, but the dining room posed something of a dilemma.
Its north wall held an ugly built-in closet, cobbled together by a former landlord by mounting two hollow-core doors on bypass sliding hardware. Rick had already used part of the closet’s trapezoidal space by relocating the fridge as a chase for ductwork and plumbing pipes. Now, he realized that the remaining alcove would make a perfect spot for a built-in china cabinet. The Harters wanted the cabinet to fit in with the original woodwork in their home’s formal rooms, which boasted two portières and several gracefully proportioned double-hung windows.
Layout
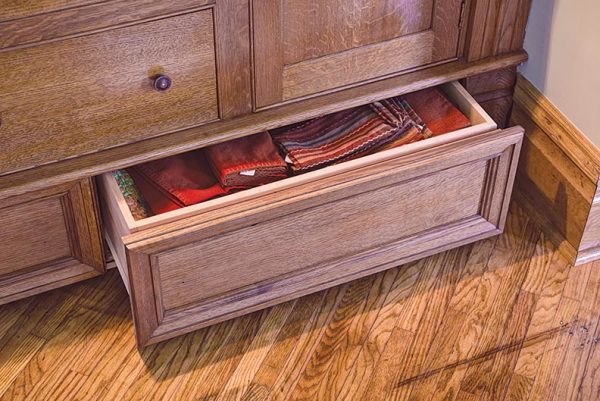
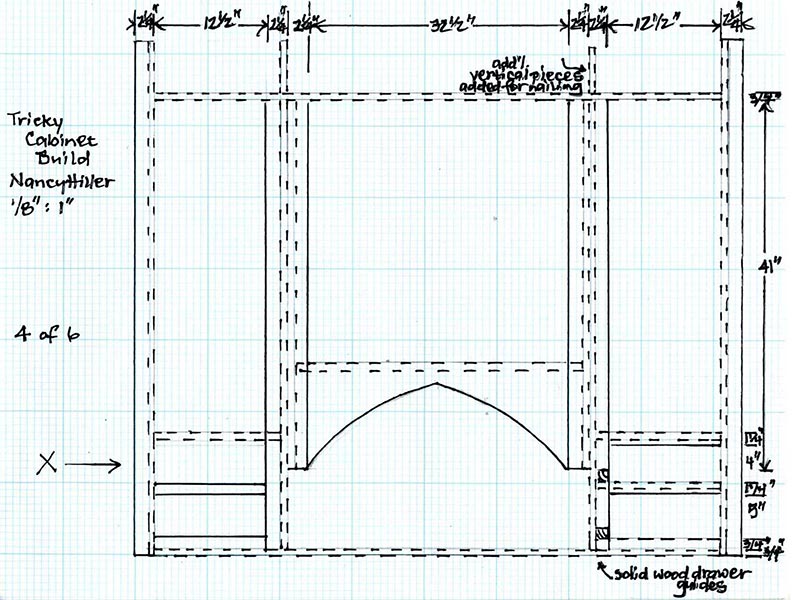
The right panel just above floor level conceals a large drawer, which is mounted on a full-extension mechanical slide.
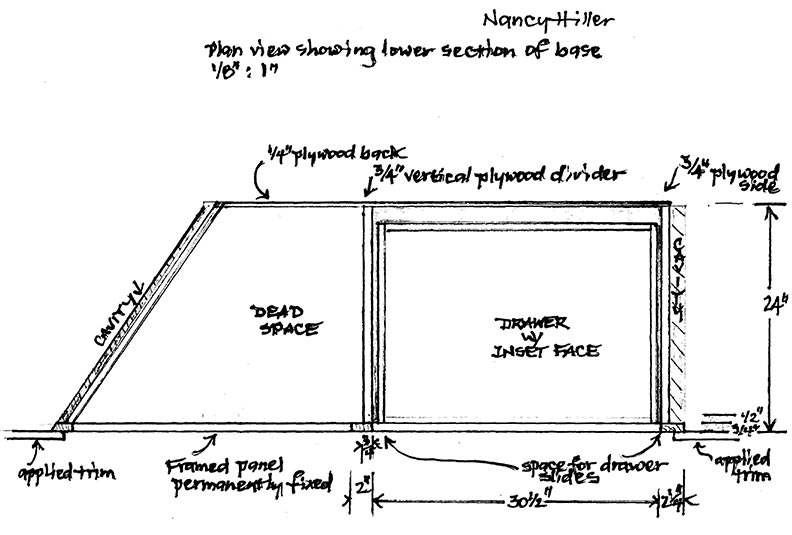
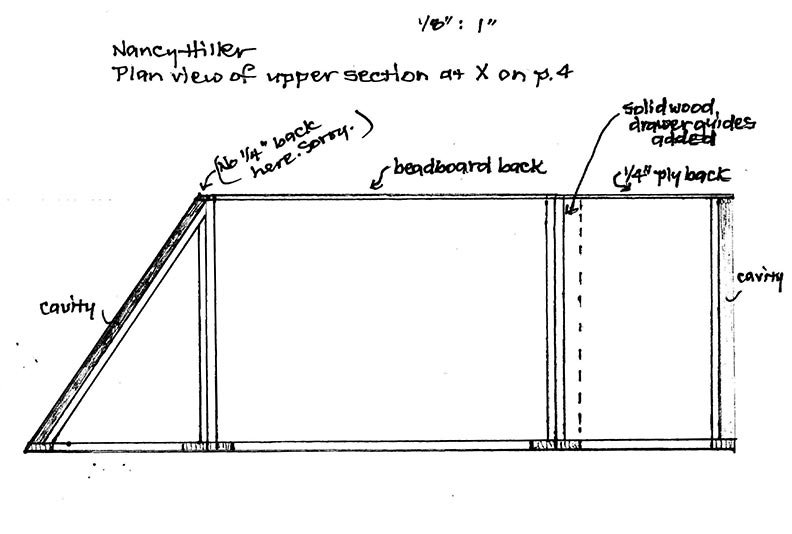
I could have concealed the awkward trapezoidal space by closing off the triangular area behind a decorative front, but that would have wasted about 11 cubic feet of potential storage space. Instead, I built a trapezoidal cabinet that would hide its interior geometry.
Casework
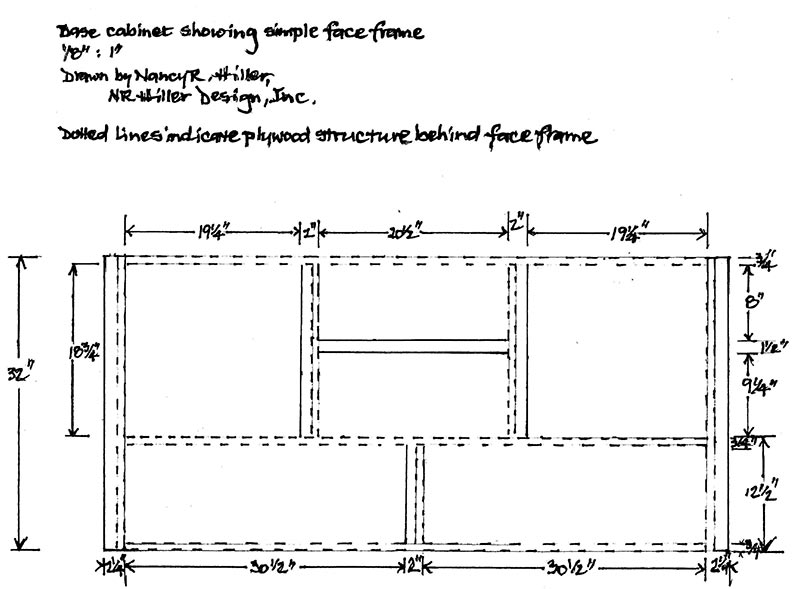
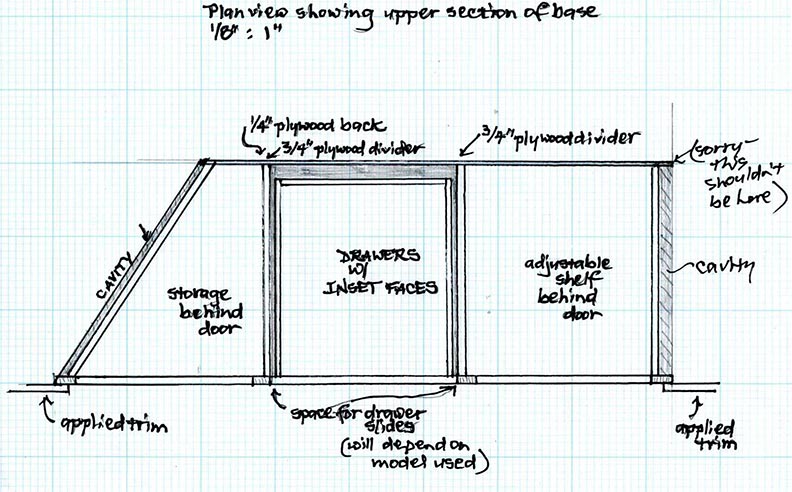
I built the casework in four main sections: a trapezoidal base and three upper cases. The base cabinet is subdivided into a lower section, which corresponds to the paneling below the room’s windows, and the primary storage section, in which a pair of doors flank two deep drawers. The upper section contains three separate cases, which are little more than boxes, really—a pair of narrow cabinets flanking a central storage area with a beadboard back and interior light. I made these cabinets using the same materials and techniques as I used for the base cabinet, but incorporating a cleat at the top of each that would allow me to screw the cases into the rear wall.
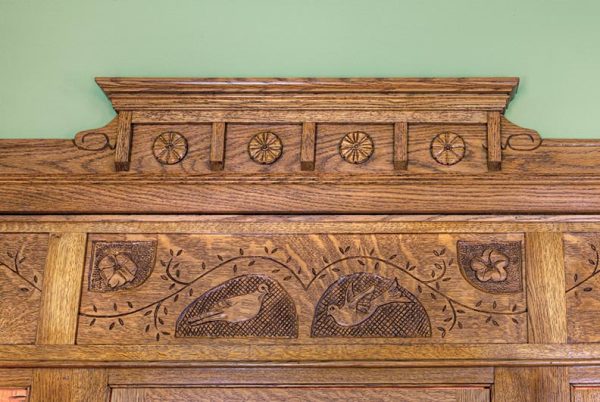
The carved design in the three-panel frieze was inspired by a pair of mourning doves that had nested in hanging baskets on the Harters’ porch.
Materials
I built the casework using ¾”-thick veneer core plywood assembled with spline joints, glue, and twinfast cabinet screws. I finished the front with a solid oak face frame and used ¼” plywood for the back. The cabinet was stained with a 50:50 mix of Minwax oil-based wiping stain in Early American and Golden Oak, topped with a coat of Zinsser Bull’s Eye amber shellac and buffed with paste wax.
Moldings
Completing the picture are the generously proportioned custom moldings. Based on others in the house, they feature fluted vertical casings topped with corner blocks featuring a simple chip-carved leaf pattern with elliptical “ears.” Rick and I cut and applied the trim panels and moldings on site after the cases had been installed.
Online Bonus: Cabinet Plans