

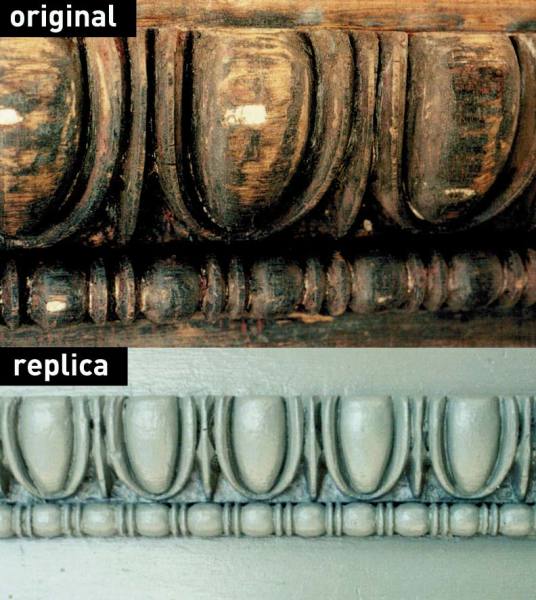
Houses (and furniture) from the earliest settlements to the first quarter of the 20th century often were adorned with carved moldings. Although complex moldings abound, many are simple in design and achieve their aesthetic effect through repetition—like the egg-and-dart pattern, a Colonial Revival favorite. Tracking down an appropriate replacement for missing pieces can be difficult, but it’s possible to make your own with a little patience and a few simple tools.
Before You Start
Choose your wood. If you’re replacing a clear-finished piece of wood, you’ll need to choose a species and grain orientation that matches the surrounding originals. If you’ll be painting the wood, then you can choose from a number of readily available species. The best woods for carving are usually basswood, Honduras mahogany, walnut, cherry, and poplar.
Tools & Supplies
- Pencil
- Clamp(s)
- Wood milled with an ovolo or quarter-round profile—this may be available as stock molding or cut from a larger piece of molding. This profile is readily made from wood stock.
- Several curved chisels: a 12 mm #1 sweep straight chisel, an 8 mm #1 sweep skew cut chisel (for clearing corners), and a 12 mm #7 or #8 sweep gouge (for outlining the pattern in the wood). The size and curve of these will vary based on the size of the carving.
- Sharp carving knife, such as a straight chip carving knife
- Small rasps (rifflers) with flat taper and half-round profiles
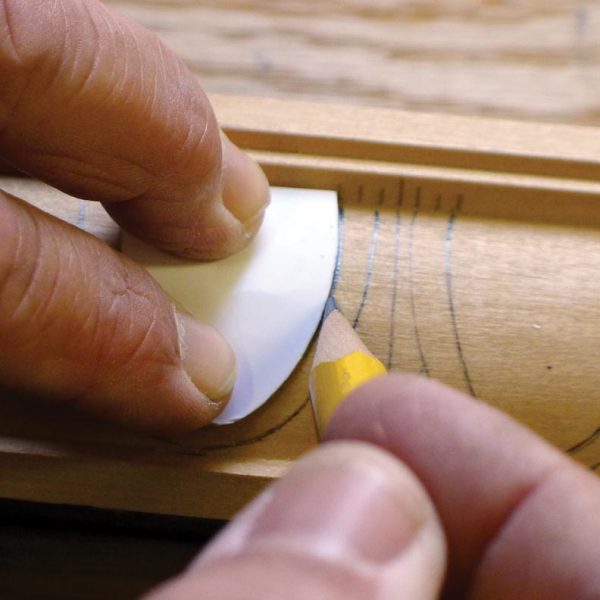
Tracing the egg-and-dart pattern.
Step 1
Start by measuring the size of egg and dart needed. Make an egg pattern from light card stock, and use a pencil to mark the eggs along the length that you need. Match it to the existing molding by measuring the distance between high and low points on the original. Transfer these points to the new wood using tiny pencil marks, or ticks, above the carved work. These guide the placement of the egg template and define the center ridge of the dart. Next, draw in the darts between each egg, being careful to follow the spacing of the original.
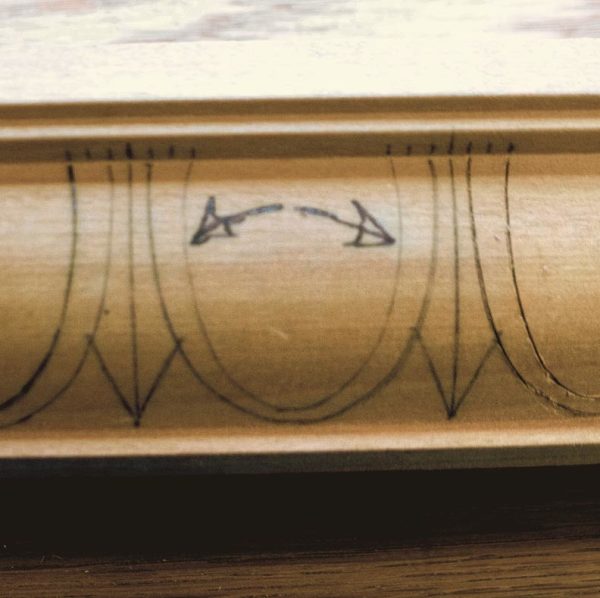
Lines showing the direction of the cuts on egg-and-dart molding.
Step 2
Clamp the stock molding to a sturdy table or bench, and get oriented. Eggs and darts will be three-dimensional. The arrows pictured above show the direction that cuts will be made and how they will travel down to the outline. Then, gather your carving tools—you’ll want to use curved chisels and a sharp carving knife to cut out the design.
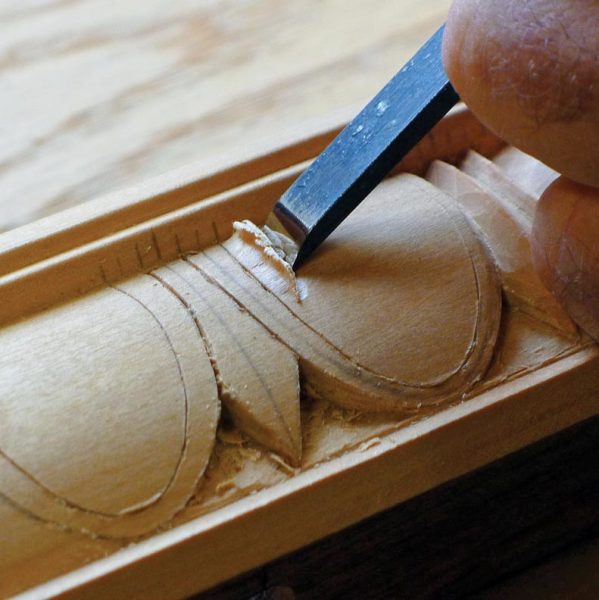
Cutting out the egg-and-dart pattern with a chisel.
Step 3
Carefully cut along the edges of the design using your carving knife and curved chisels that match the curvature of the individual elements. Work from the high points to the low areas, carving out around the eggs and darts to the “ground,” or uniform background depth of the molding. Take your time, working slowly and methodically.
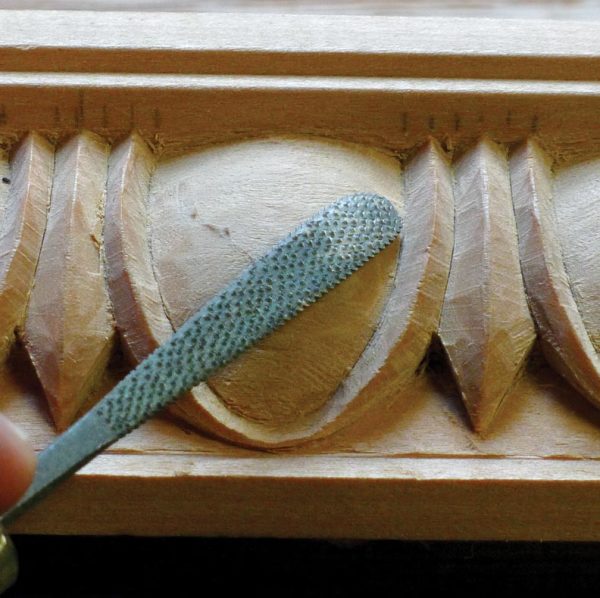
Filing the egg-and-dart molding with a riffler.
Step 4
Carefully shape the eggs by slicing in all directions. If your chisel is sharp, you might be surprised to find that it’s easier to control cuts across the wood grain rather than with it. Carve material away from the high ridge of the dart and down to the outside of the basket, the outer enveloping material surrounding each egg. When you’re done, refine and smooth the surfaces a bit using a series of small rasps called rifflers. You’ll then be ready for painting.


