

William Wright
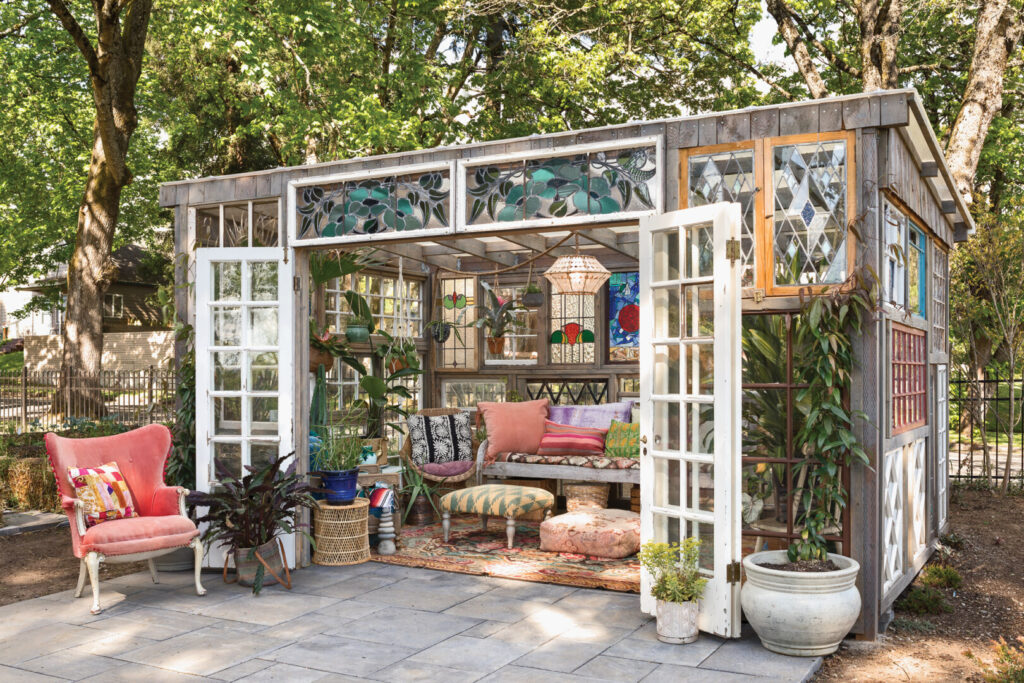
When family and newborn photographer Erin Tole [erintolephotography.com] purchased a 19th-century house in Vancouver, Washington, its big corner lot was a main attraction. Beyond her vegetable and flower gardens, the edges of the yard were leveled with a stone retaining wall and a stone patio laid over well-drained gravel and sand. For years, Erin had been collecting vintage windows with leaded, clear, stained, and colored glass. (Her recommended source is Aurora Mills Architectural Salvage, auroramills.com.) This collection was incorporated into a “she shed” at the edge of the patio. Favorite stained glass pieces were placed in front and centered on the back wall; two sets of hinged French doors open wide or provide ventilation. The polycarbonate roof is translucent.
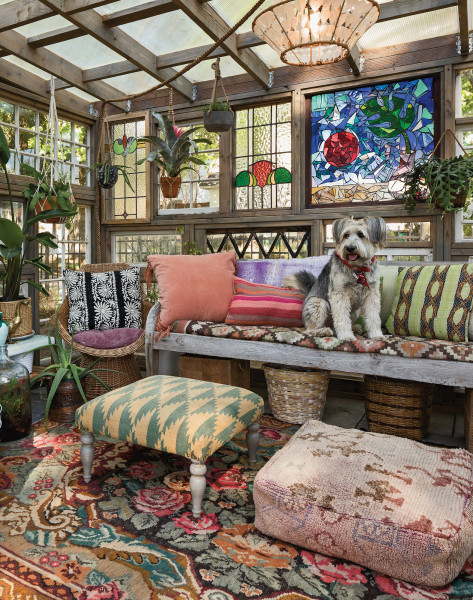
Whose she-shed is it? Darby (a Sapsali rescued from the South Korean dog-meat trade) enjoys relaxing on the Asian daybed filled with a rotating assortment of Moroccan textiles and thrift-store finds.
William Wright
For a Similar Project
1. ZONING AND LAYOUT
Always start by checking your local zoning ordinances, as setbacks, height and size, and foundation requirements vary by state, city, and even neighborhood. If you’ve collected odd windows to use in shed walls, create a layout to determine the best placement for each. Filler shims and caulk can bridge a gap of an inch or two between frames. Consider size and placement of a door. You could scrape and repaint, or upgrade the hardware, but keeping the mismatched bits creates interest.
2.CONSTRUCTION
Good drainage is essential, even for a small structure. This shed on patio stone has an underlayment of several layers of crushed gravel over a 6 mil Visqueen polyethylene vapor barrier, which prevents ground moisture from wicking into the floor and walls.
Framing: Hefty 6″ x 6″ treated corner posts help keep the frame solid. Drop them into the ground by boring holes 4′ feet deep with a post-hole digger (a fence installation company can do this for you).
Set posts in concrete for strength and to prevent movement and wind shear. Build the frame for the walls with 2×4 and 4×4 studs, using exterior screws or galvanized nails, bracing and checking for plumb.
Install salvaged windows into the framing using coated wood screws. (Screws make access easier, in case you need to change out or remove a window if it cracks.) Gaps can be filled with wood shims and caulk or additional glass.
Frame the roof, making sure it has proper pitch to prevent water from collecting: / is a good minimum. This shed has a polycarbonate roof chosen for its insulation value. Assure support and seal roof seams with silicone sealant.
Choosing a Glazed Roof
- GLASS is traditional and lasts for decades, but needs sturdy support. A poor insulator and breakable, it’s relatively expensive.
- ACRYLIC (e.g., Plexiglas), good for locations with snow and heavy winds, lasts 20 years. Acrylic glazing comes in many thicknesses, with a UV block, and can be treated to prevent condensation.
- FIBERGLASS, clear or translucent, lasts about 10 years but as it deteriorates the exposed fibers catch dirt.
- POLYCARBONATE Strong and lightweight, it lasts about 10 years, and is treated to prevent yellowing. Available in single, double, and triple layers with insulating air space.


