

Flooring takes the brunt of surface wear and tear, but woodwork gets its share of abuse as well. (Photo: Fotolia.com/Ruggiero Scardigno)
Finishes For Floors
Wood floors in early America were cleaned frequently but seldom treated to anything approaching today’s finish options. The earliest wood floors were composed of plain wide planks, about 1½” thick, sawn from Eastern white pine in the North, yellow pine or cypress in the South. Colonials scrubbed their bare-board floors regularly with lye and water, giving the wood a matte, grey-brown cast. In 18th-century Georgian houses, the wide-plank floors were more sophisticated in construction, with splines or dowels joining the boards, but still the boards most often were left bare.
When it was available, paint was applied to floors in patterns, bringing color and visual appeal suggestive of other, more costly materials—such as checkerboards or geometrics that mimicked marble tiles, striped patterns evoking Venetian carpets, or stenciled borders to suggest area rugs.
Whether painted or naked, wide-board softwoods held the floor in houses grand and small, well into the middle of the 19th century. What radically changed the look of floors during the second half of the 19th century was the shift to tongue-and-groove strip flooring. Long, narrow boards, about 3″ in width, in rich hardwoods including oak or walnut, lent themselves to clear, glossy, oil-based varnishes, especially when the lumber was rift-sawn to maximize desirable grain effects.
Early wood floors were cleaned frequently, but seldom surface-finished, save for a coat of wax. (Photo: Gross & Daley)
The oil-based varnishes were made from resin from a tree, such as pine, cooked and dissolved in linseed oil, a natural, film-forming, drying oil that is the basis of traditional paint. As the varnish dries and cures, the molecules of the combined resin and oil link up to form a tough, elastic film that withstands water and many common solvents.
The 1890s to 1920s stands out as the golden age of wood strip floors. To achieve a deep, rich, glass-like “cabinet finish” on oak or other hardwoods, the finisher first meticulously hand scraped the boards to reveal the full grain character of the wood. Next, the floor was rubbed with filler to level the pin-sized pores in open-grain woods such as oak and mahogany. Then, after meticulous cleaning, the finish was completed with at least three coats of varnish. These oil-based finishes gave flooring both shine and depth, a hallmark of late Victorian houses and a look that’s still prized for historic floors today.
After 1900, the tides of taste turned toward more subtle finishes. The Arts & Crafts ethos in particular shunned the shiny, as well as “dishonest” decoration like faux graining. Yet even Gustav Stickley, the sage of the Craftsman movement, conceded that novel concepts of the era, such as ammonia fuming to darken oak woodwork and grey-green finishes on paneling, were less applicable to floors. He recommended conventional filling and finishing to make floors “entirely smooth and nonabsorbent.”
Finishing wood floors has remained, in general, the same process since, but with increasingly industrialized tools and materials. Mechanical sanding eliminated hand scraping for all but the most special floors after World War I. (Now hand-scraping is making a comeback as a design element in contemporary wood floors.) Natural varnish resins were replaced by synthetic alkyd varnishes developed for paint in the 1920s. In the 1970s, alkyd varnishes began to be eclipsed by polyurethane, a polymer made by vegetable oil (such as linseed, soya, or safflower) reacting with other chemicals.
Although the first polyurethane varnishes proved to be incredibly tough and resistant to water and detergents, they looked plastic on a floor—fine for gymnasiums, less so for houses—and showed scratches readily. Later polyurethanes were oil-modified to incorporate some of the traditional oil base into the varnish to mitigate these problems. While water-based polyurethanes produce a clear finish that won’t darken over time, oil-modified polyurethanes are usually amber. They also cross-link to the surface of a wood floor, creating the sought-after deep finish associated with floors in older homes. For the most authentic look, choose a satin finish rather than a glossy one; they wear equally well.
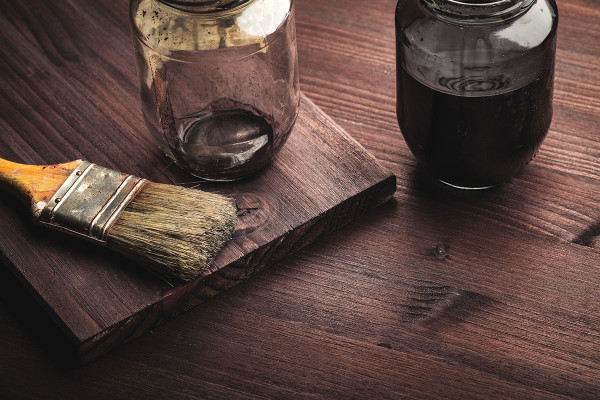
Shellac flakes in ready-to-mix form. You call also buy pre-mixed liquid shellac.
The Pro Tip
Wax wears quickly in traffic areas and turns dark in seldom-used ones. For a similar look with better protection, apply a light coating of tung oil, which actually penetrates the wood. Although curing times are long, tung oil affords moderate protection without looking like a urethane finish, and is easy to touch up.
Triage for Damage
Depending on what the wood has been exposed to in its history, freshly sanded floors may stain blotchy. If the floor shows evidence of old water or pet-urine stains after sanding, it’s best to opt for a darker color stain. Always test the chosen color in an inconspicuous spot before covering a large area.
If the damage is localized to a small area, you may be able to cut in replacement pieces. Make the repair with the same species and cut of wood. The wood should also have a similar tightness or looseness to the grain: if you’re replacing boards in a flat-sawn fir floor, for instance, heart pine won’t look anything like it.
Finishes For Woodwork
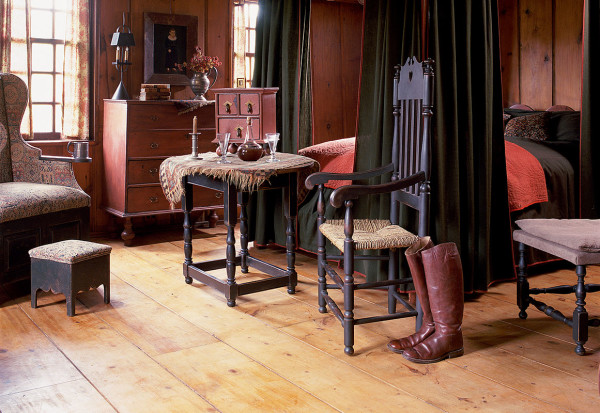
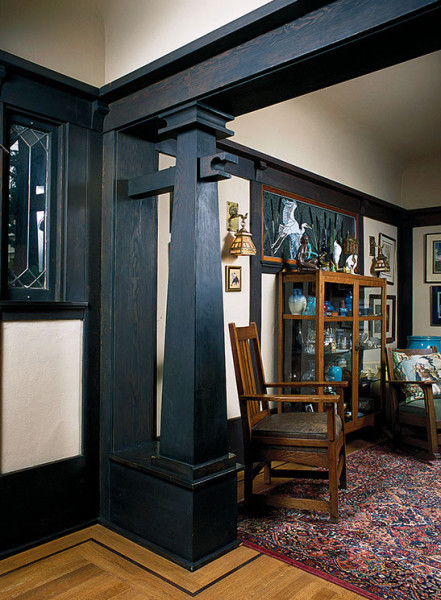
From door and window casings to paneling and staircases, the woodwork in almost every house built between roughly 1860 and World War II was cut and shaped from clear, old-growth heartwood. While regional variations and date of construction meant that the trim might be pine, oak, chestnut, heart pine, walnut, Douglas fir, or gumwood, this is quality material.
Initially, any woodwork or trim that wasn’t painted was either left bare or treated to a protective mixture of linseed oil and wax. In the last quarter of the 19th century and well into the 20th, however, these gorgeous woods were more likely to be finished with either varnish or, more frequently, shellac.
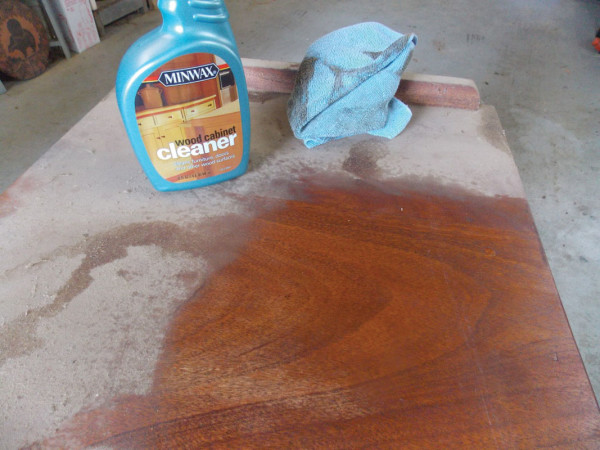
To protect the finish of cabinets and other woodwork, use cleaners specifically formulated for cabinets. (Courtesy: Minwax)
From about 1880 through the 1920s, “a lot of the woodwork was finished with what we call orange shellac,” says Bruce Johnson, a spokesman for Minwax and the author of The Weekend Refinisher and other books on woodwork. “It didn’t matter what kind of wood it was.”
Shellac, a natural material harvested from lac beetles, comes as flakes that dissolve in denatured alcohol. Unlike modern polyurethanes and some varnishes, shellac is easy to refresh. “New shellac melts old shellac, so it’s easy to do a touchup,” says Johnson.
Later woodwork and flooring may be coated with varnish, the precursor to polyurethanes. “Varnishes are finishes in which resins are dissolved in an oil base, carried by mineral spirits; in the case of a waterborne varnish, the resins are carried by water,” Johnson continues. “In both cases, the varnish dries by evaporation and leaves a clear layer of resins, linked together chemically.”
When refinishing a varnished surface, it’s important to stir, not shake, the varnish. “You want to keep the resins evenly suspended in the medium. Keep them stirred up as you work.”
In the 1950s and ’60s, woodwork, paneling, and doors were often finished with microcellular lacquer rather than varnish, an effect that gave woods like Philippine mahogany (or lauan, as it is more commonly known) a higher-gloss finish. Applied by brushing or spraying, “lacquer is a stronger version of shellac,” Johnson says. “It is more water resistant and alcoholic than shellac,” but it suffers from wear over time. Like shellac, however, it’s easy to refresh. “The same as shellac, a new coat melts the previous coat.”
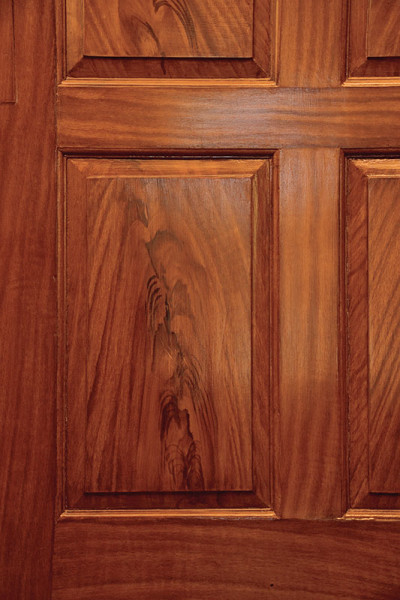
Re-creation of ca. 1760s grain figure simulating mahogany, at the Georgian-era Schuyler Mansion in Albany, New York. (Photo: Andy Olenick)
About Graining
The painted treatment that marks doors and woodwork of all economic levels in the 18th and first half of the 19th century is graining—decorative painting that cunningly simulates figured wood. Faux painting was both a folk art and a fine art. In an era when Americans were fascinated by pattern, faux grained finishes approximated the grain patterns, color, and subtlety of real wood, especially fine or heavily figured woods like walnut, oak, and bird’s-eye or tiger maple. Early designs were sometimes naïve, but by the second half of the 19th century, paneling, doors, and other woodwork were treated to highly sophisticated techniques that produced realistic imitations of luxurious woods like book-matched crotch mahogany and rosewood.
Refreshing a grained surface is a complex, multi-step process. As with stained surfaces, the decorative coat went under the final finish rather than on top of it. Any attempt at restoration requires an understanding of the many layers involved.
A grained finish begins with sanding and cleaning the surface. This is followed by a layer of enamel, topped by an oil-based ground coat. After a light sanding, the glaze layer is applied. Neither a paint nor a stain, glaze is a transparent medium for creating the grained design. Once the artistic part of the work is finished, the design is allowed to dry and then sealed with a protective coat of varnish or polyurethane.
The Pro Tip
Before you begin working with strippers, finishes, or stains, put on a respirator! Surgical-style masks won’t protect your lungs and other sensitive tissues from the chemicals like VOCs (volatile organic compounds) that exist in low to high amounts in many strippers. Even water-based or eco-conscious finishes may be harmful to the skin or eyes. Open the windows and make sure the workspace is well ventilated.
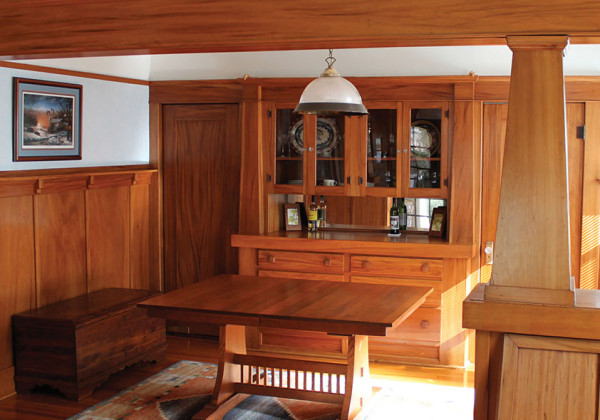
The dining room in a San Diego bungalow, completely outfitted in a highly figured red gumwood, restored by Craftsman Wood Finishing. (Photo: Michael Good)
What is Gumwood?
Depending on whom you ask, gumwood is a wood species treasured for interior woodwork in early 20th century houses…a cheap wood used for painted trim in houses of similar vintage…or a weedy tree despised by Southern lumber growers a century ago. Or possibly all three, according to Michael Good, a professional woodworker and columnist for the San Diego Uptown News.
What it is not is eucalyptus. Harvested from the American sweetgum tree (Liquidambar styraciflua), gumwood is a hardwood that grows from Florida to Connecticut in the East and, according to Good, is a common street tree in southern California. If you grew up in the Southeast, you’re most familiar with its spiky fruit, the ubiquitous gumboil.
In the 1910s and ’20s, the Southern lumber industry heavily advertised gumwood in national design magazines, creating an aura around it that didn’t exist where it grew. Gumwood used for trim is golden or bright reddish-brown in color, with a black grain sometimes appearing at its heart. It is heavy, straight, satiny, close-grained, and takes a beautiful polish, which is no doubt why it was used to trim thousands of houses throughout the U.S. Carpenters still use it for trim, sometimes calling it satin walnut. Ideal for clear finishes, gumwood also takes paint well.
The heartwood that was used in the 1920s is hard to find today, Good says. Only the highly figured variety is available, and not very widely at that.
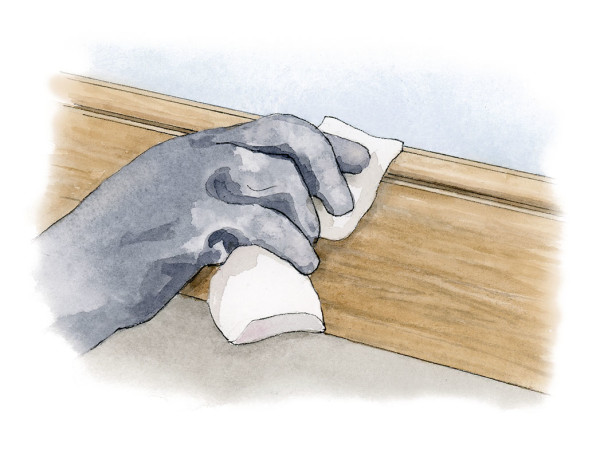
(Illustration: Rob Leanna)
Waxing Shellac
To keep shellacked finishes looking great, avoid using any sort of harsh cleaner on the refreshed finish. For surfaces subject to heavy wear, such as baseboards, Bruce Johnson recommends applying a coat of hard paste wax to protect the shellac. Use a brand that requires some elbow grease, such as Johnson, Butcher’s, or Minwax. “A good quality wax over an orange shellac finish or a new shellac finish will go a long way toward protecting it and helping to duplicate that old patina.”
Stain Matching
Take it from wood-finishing maven Bruce Johnson: replicating the appearance of old stained wood is tricky. “Matching an original stain is hard, there’s no doubt about it,” says Johnson. “You have to experiment.”
Think of the colors on a stain card only as a way to get you going in the right direction, he says. Pay no attention to the names: a nut-brown stain for Arts & Crafts woodwork, for example, might be called “Colonial Pine” or even “American Walnut.”
A tried-and-true method for approximating an existing stain is to test stain combinations on wood samples similar to the wood you have, especially if you are making a repair. The wood samples should closely match the existing wood in terms of species, density of the wood, grain tightness, and cut (i.e., quarter-sawn or flat-sawn).
Strip wood floors in the Victorian era were dressed up with expensive inlays and treated to the first oil-based varnish finishes. (Photo: Linda Svendsen)
“The trick to matching old heart pine or cherry or quarter-sawn oak is to go to places where professional woodworkers buy wood,” Johnson says. Buy small cans of stain in several colors, or ask an experienced hand at the paint store or lumberyard to help you do the color matching. Sometimes stains that look nothing like the color you are seeking can add just the right tint to a blend of other stain colors. Then experiment, mixing a little of one color in with another, until you get a close match. “Then go home to experiment on your particular wood.”
If you’re working with a finish application that can take stain, like shellac, you might be tempted to add tint to the finish rather than stain as a first step. Don’t, unless you’re a pro. “The problem with tinting is that you are putting the color in the finish, which can give you a cloudy effect, even a muddy effect.”
As you apply a tinted stain, lap marks and errant brush strokes will show, too. “Stain first, let it dry, then put your finish on top,” Johnson advises.
Are You Fuming?
Tempted to try fuming on Arts & Crafts woodwork? Think again. Fuming is very dangerous, says author Bruce Johnson, better known as the originator and director of the annual Arts & Crafts Conference in Asheville, N.C. A successful fuming technique requires a very strong formula of 28 percent ammonia. (Over-the-counter ammonias contain 3 percent.) “If you want that dark look, it’s better to get it with a stain.”
Finishing School
Clear finishes for woodwork typically are blends of natural plant or nut-based resins or oils suspended in (or mixed with) oil, alcohol, solvents, or water. Historical finishes like shellac and tung oil may not wear as long as modern polyurethanes, but they have their own desirable characteristics.
A Clean Finish
The steps to refinishing woodwork are simple, but require care.
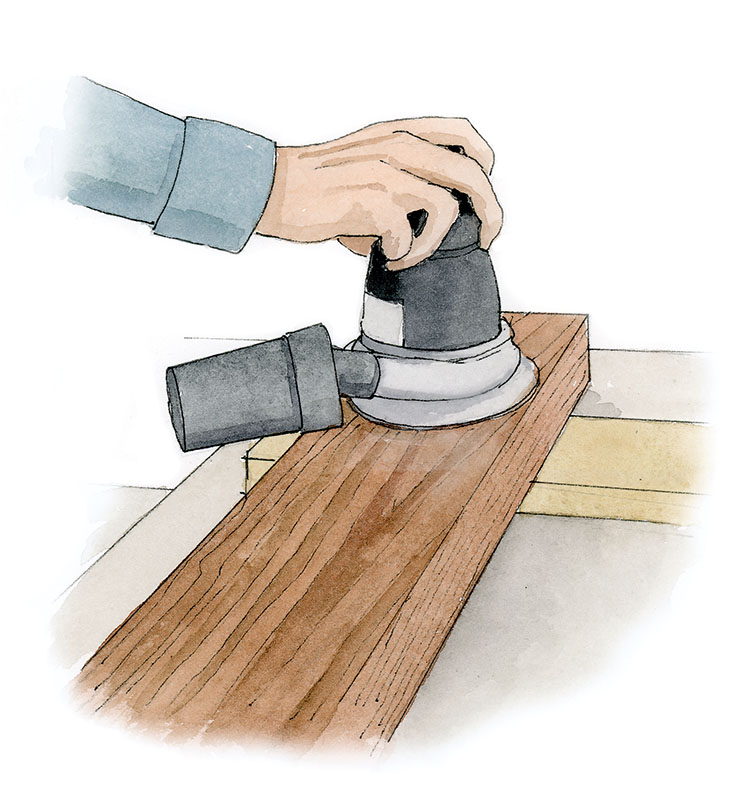
1. Prepare the wood by sanding it to a smooth finish. Rub with a tack cloth to remove every last speck of dust.
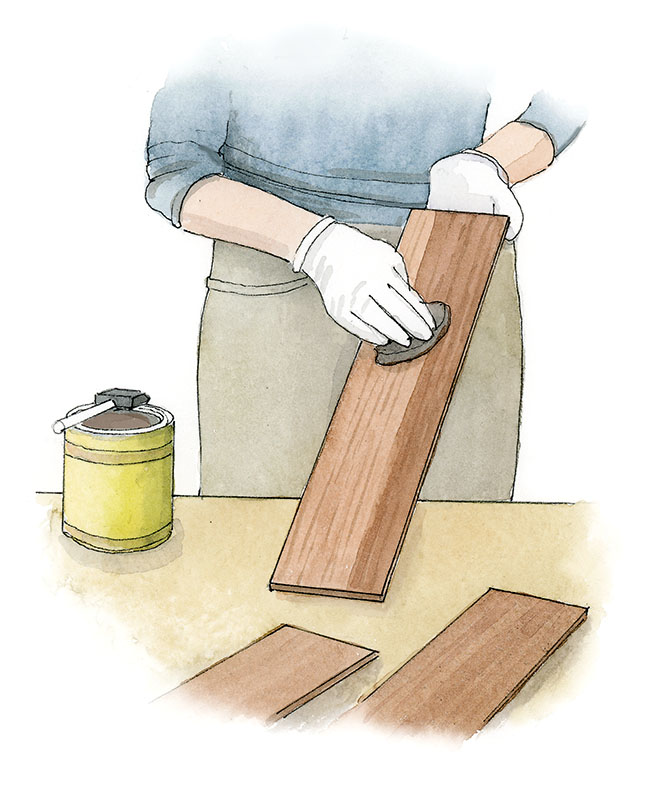
2. Apply the stain, working with the grain of the wood. Let dry. Lightly sand, clean with tack cloth, and reapply stain as desired.
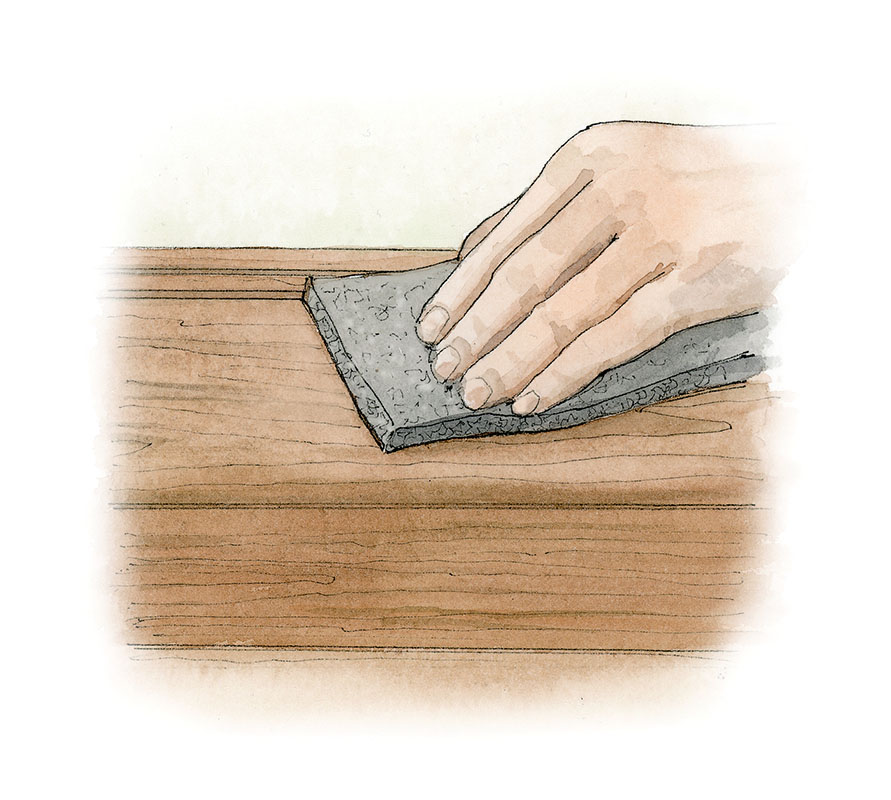
3. Once the woodwork is in place, spot sand any rough areas and meticulously clean with a tack cloth.
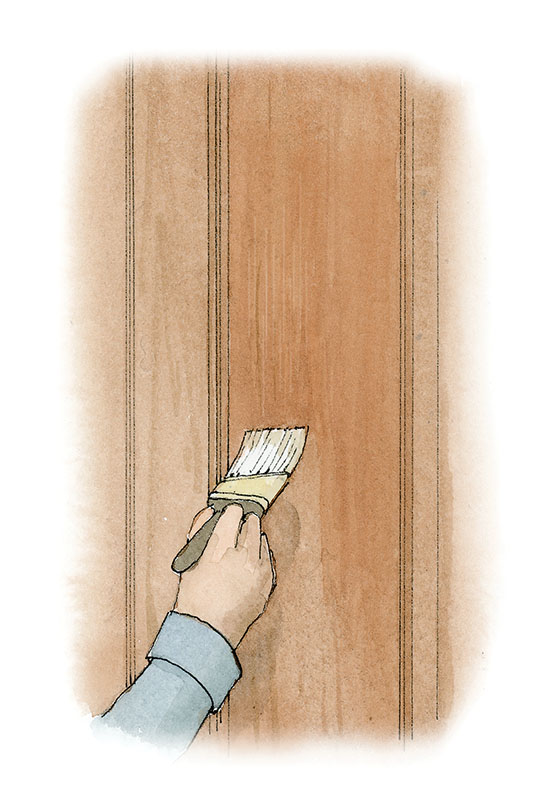
4. Apply a clear topcoat with smooth, even strokes, again working with the grain of the wood. Apply additional coats to reach desired sheen.


