

It’s a rare house that doesn’t have a drop of paint on original quarter-sawn oak or Douglas fir woodwork. Conversely, many homes built before 1950 were trimmed with wood that was specifically paint-grade—meaning it is supposed to be painted. The trouble comes in when incompatible paints or finishes (literally) gum up the works. Surface problems are legion (calcimine paint, anyone?)
Here, we’ll explore how two different homeowners approached the stripping process. In the first house, a late-19th-century transitional Colonial Revival, Stacy Grinsfelder struggles with an incompatible coating over paint-grade wood. In the second project, Gina Bellous laboriously strips casings, doors, and baseboards in an 1895 Queen Anne. Her goal is to stain and varnish the hand-stripped wood. (That’s a story we plan to publish in a future issue). —Mary Ellen Polson
Stripping Paint-gradewood
The grand entry staircase is one of the jewels of my 1895 transitional Colonial Revival home. After my husband and I refinished the stair treads and landings, as part of a floor-refinishing project, the shabby condition of the balusters (which have three distinct turned patterns) stood out. Fashioned from paint-grade Douglas fir, the balusters, wainscot, and decorative tread trim had been given a quick coat of latex over old oil-based, shortly before we moved in. The paint began to crack and flake almost immediately.
All the stair elements were meant to be painted, but there was no way to remove the failing latex without disturbing the oil-based paint underneath. I considered sending the balusters out for dip-stripping, going so far as to make an appointment with a stripper in a nearby state. For the uninitiated, this is a method of stripping old paint and varnish off wood or metal by dipping elements in a vat of chemical stripper that may contain methylene chloride or other caustic chemicals. The dipped pieces emerge ready (after neutralizing and sometimes sanding) for refinishing. It is an aggressive method of stripping wood, but useful for something like my turned balusters, which have so many nooks and crannies.
For good reason, my state of New York and several others ban the practice as an environmental hazard. Already uneasy about the dipping process and worried about the fragile condition of the softwood balusters, I changed my mind. My friend John Rodgers of Phoenix Preservation had pointed out that the chemicals could potentially alter the wood surface so that paint would not adhere properly.
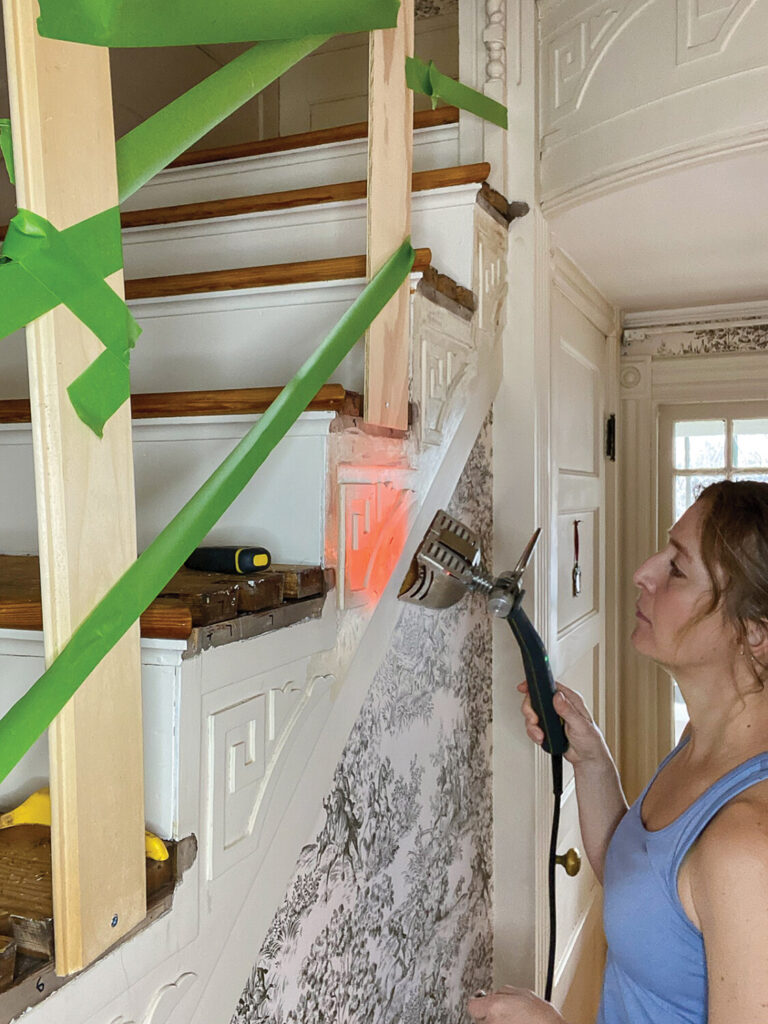
One baluster at a time, I experimented with chemical strippers. While liquid stripper removed most of the paint, the application of gentle heat from a Cobra infrared paint removal tool worked just as well. Since the latex never bonded to the oil-based layers, it came off without much muscle. I started using the Cobra on the Greek-key accents, and the latex layer crackled and practically leapt off the wood. —Stacy Grinsfelder
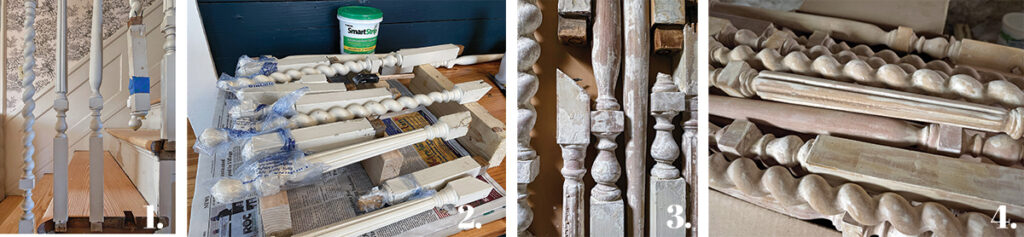
2. Balusters ready for stripping.
3. Balusters in various states of stripping and repair.
4. Completely stripped and sanded, these balusters are ready for primer and eventual reinstallation.
Stripping Turned Elements
My stripping method is laborious but not difficult. All it takes is time and patience:
- For the turned balusters, I first soften the paint using a stripper such as Peel Away or Smart Strip and cover it with wax paper, for about 24 hours.
- Then I remove most of the Peel Away using an offset-handle, nylon-bristle brush (e.g. Allway Tools) meant for stripping or grouting. I scrub the wood with mineral spirits and a clean dishwashing brush and allow it to dry completely.
- The remaining residue becomes powdery when dry, so it’s easy to scrape it out of the curves, cracks, and crevices.
- I wear a P100 respirator and use a HEPA shop vac. I rely on a variety of tools, from crevice and dental tools to a flat-head screwdriver. Finally, I sand down surfaces using 120- or 220-grit sandpaper, depending on whether the wood feels spongy or solid.
—s.g.
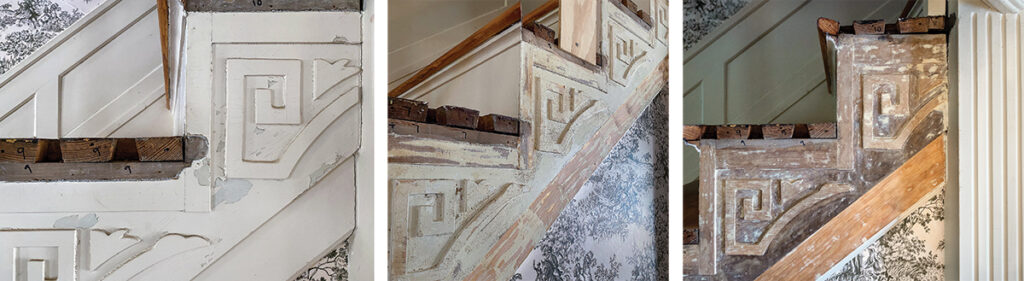
Left: Latex paint pops and chips away from older oil-based coats on the decorative key detail on the spandrels. Middle: Partially removed paint after the first pass. The low heat causes the paint to bubble and soften. Right: The stair after treatment with infrared heat and a cleaning with mineral spirits.
Stripping Details
Since the Greek-key detail beneath the treads is flat and the oil-based layers now mostly gone, I stripped the paint using a Cobra infrared paint remover and a scraper, keeping the tool moving on the uniform surface. (This didn’t work well on the balusters because they are dry and spongy—I’ve found infrared heat relies on oil and moisture in the paint to work effectively. The time it took the Cobra to work on the balusters increased the risk of scorching.) The rest of the process is similar to methods used for the turned balusters, including scrubbing down with mineral spirits, allowing the wood to dry, then picking out the residue. with various tools and brushes.
Stripping Varnished Wood
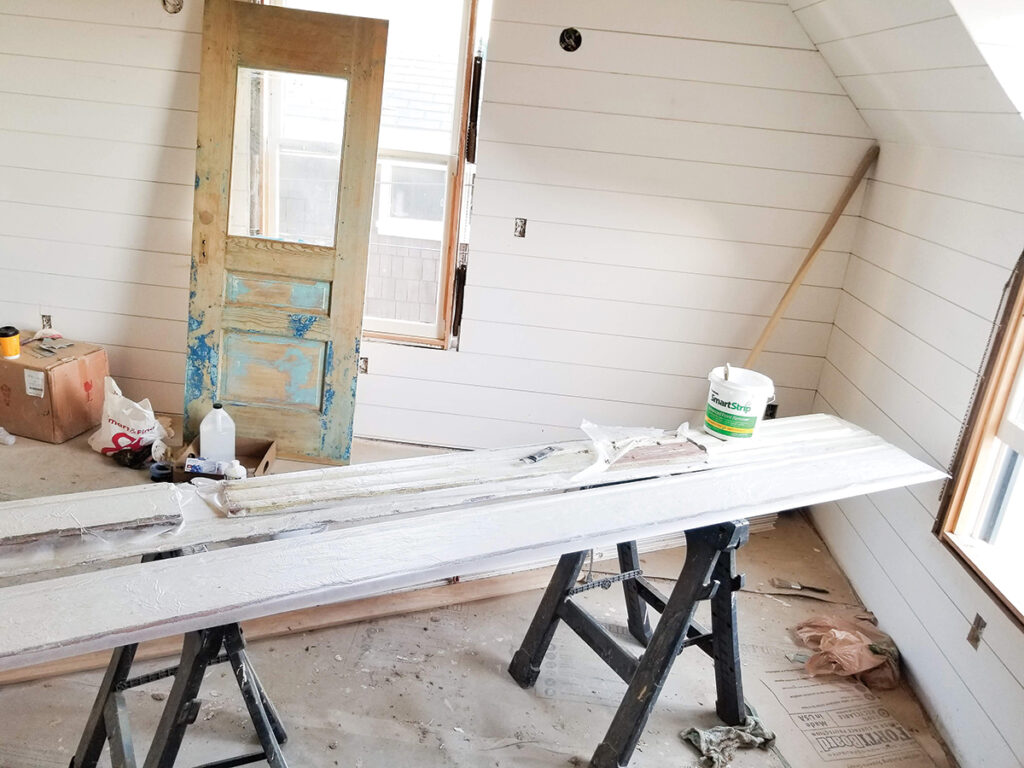
The wood trim in my 1895 Queen Anne was never meant to be painted, but it came to me with six to eight gloppy coats of paint. Since all the original plaster was failing and had to come down, I carefully salvaged and stored the pine and Douglas fir doors, baseboards, and door and window casings before the drywall went in. I strip woodwork in my free time, eventually getting it to where I can apply fresh stain and shellac. The project is taking years, but that hasn’t stopped me.
Early on I discovered that most of the trim had been sanded before painting. That decades-old prep work made the paint really stick to the wood. In one room, I was overjoyed to discover woodwork that hadn’t been sanded before it was painted. After I applied stripper, multiple coats of paint just slid off the old varnish, leaving very little paint behind. Over time, I’ve streamlined the stripping process so that it’s efficient, if still time consuming.
I begin by applying a thick layer of stripper (usually Smart Strip, a low-toxicity stripper that’s odor-free and stays in place well) over a piece of trim, such as a door casing or baseboard. I cover the stripper with ordinary wax paper or plastic to keep the stripper from drying out.
After about 24 hours, I remove the old paint with a putty knife that’s a little dull so that there’s less chance of gouges. The paint comes off easily all the way to the varnish layer. To remove paint from crevices, I carefully angle the putty knife sideways to remove as much material possible without damaging the wood.
If any residue remains, I use a bristle brush dipped in a little water to clean
it away. The water slightly raises the grain, but the wood will be sanded before it receives stain and varnish. A quick wipe with a damp rag removes any remaining stripper. The wood feels clean and squeaky to the touch once it’s thoroughly clean.
I pick out any remaining paint from cracks and crevices, with a series of tools, before the wood dries, using mineral spirits to help loosen it if it’s stubborn. This is very labor intensive! Dark bits of stain and shellac left untouched by the stripper are often embedded under the paint, so I pick them out bit by bit using the contour scraper with a sharp point. It’s a slow and delicate process. I make sure to get all the paint out of the crevices before it dries. Then I sand flat areas with an orbital sander. I sand contoured areas by hand. —gina bellous
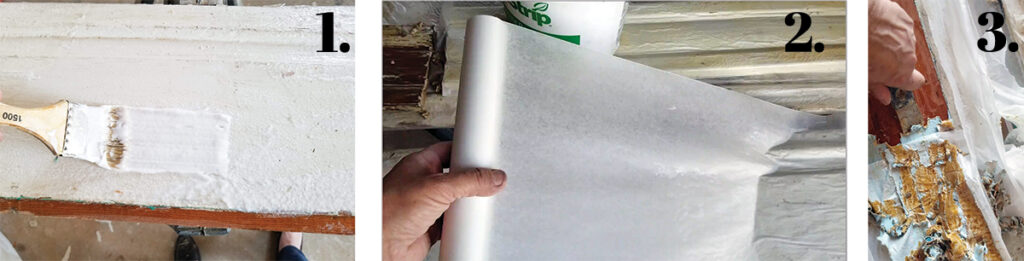
1. Gina Bellous applies stripper with a paint brush, working it into the entire surface. above
2. She then covers it carefully with household wax paper, taking care to remove bubbles.
3. After the stripper does its work, it peels away from the trim easily with a putty knife, leaving only small amounts of residue.
Bellous has stripped all of the trim on the top floor of her Queen Anne home.
Striptech
Since the early years of OHJ, stripping technology has evolved—from caustic, high-VOC chemical strippers and heat guns to more earth-friendly methods today. At least one chemical giant makes stripping alternatives that vary in makeup from those containing some caustics to other products that contain almost none. Here are some of the options for the DIY stripping arsenal, with tips on how to assess them. Chemical Strippers Avoid any paint stripper that contains highly toxic solvents including methylene chloride or N-Methyl-2-pyrrolidon (NMP). Overexposure can cause damage to the eyes, internal organs, and nervous system, and may cause cancer or even death.
Read the specifications of any stripper under consideration to see what toxins it contains. In any case, wear a protective respirator, eyewear, and gloves if you suspect the stripper contains hazardous chemicals. Ventilate the area.
Non-solvent Strippers
Much more friendly to the environment, your skin, and your nose, solvent-free strippers can effectively remove multiple layers of caked-on paint and varnish, but they’re not as fast as more caustic products.
Strippers including Dumond Chemical’s Smart Strip (Advanced and Pro formulations) and WB Barr’s CitriStrip are among the lowest in toxicity, but both can cause skin irritation and are dangerous to the eyes.
Infrared Heat Tools
These tools are the environmentally friendly heirs to the old heat gun. Good ones are expensive, but they safely and effectively soften and liquefy old paint formulations (including lead paint) at temperatures between 400 and 600 degrees F. This is lower than the temperature (900 to 1000 degrees F) at which the lead in paint turns into invisible toxic fumes.
When using an infrared heater, wear heat-protective gloves, eye protection, and a respirator. Dispose of any suspected lead paint properly and legally. —mep
Resources
strip/refinish
American Building Restoration Products
abrp.com
Cleaners & enhancers for wood etc.
Citrustrip
citristrip.com
Paint & varnish stripping gels
Dumond Chemicals
dumondglobal.com
Makers of Smart Strip, Peel Away & Safe ‘n Easy paint removers
Earth+Flax Paints
earthandflax.com
Ottosson, Viking, Allback linseed-oil paints & wood conditioners
Franmar
franmar.com
Eco-friendly gel-based paint & urethane strippers from soy
Howard Products
howardproducts.com
Wood–finish restorers & cleaners
Minwax
minwax.com
Wood finishes, stains, cleaners
Rubio Monocoat
rubiomonocoat.com
Natural pre-treatments (aging, fuming) & finishes for wood
Waterlox
waterlox.com
Original tung oil finish from 1910; resin-modified & color-infused tung oils
Wood Care USA
wocawoodcare.com
Wood oil pre-treatments & finishes
Velvit Products
velvitproducts.com
Stains & oil finishes for wood flooring & surfaces
Vermont Natural Coatings
vermontnaturalcoatings.com
All-natural floor finishes, stains & sealers
tools
American International Tool
paintshaver.com
PaintShaver EPA-approved paint removal tool
Eco-Strip
eco-strip.com
Speedheater and Speedheater Cobra infrared paint removal tools; Brouns & Co. scrapers
EnviroSafety
environsafetyproducts.com
P100 and N100 particulate masks & respirators
Festool
festool.com
Rotary sanders, HEPA dust extractors
Hyde Tools
hydetools.com
Contour & other scrapers
Jasco Products
jasco-help.com
Strippers, cleaners, odorless mineral spirits
SRS Hardware
srshardware.com
Paint stripper tools, especially for windows
Viking Sales
silentpaintremover.com
Silent Paint Remover tool works with infrared heat


