

Before embarking on any maintenance or repairs to old radiators, it is important to know whether you have steam or hot-water radiators. The simplest way to tell is to look at the number of pipes coming from your radiator: if there is only one pipe, then it is a steam system. Two pipes could indicate either steam or hot-water, with the condensed or cooled water returning to the boiler from the second pipe.
A hot-water radiator in Ruthmere, a 1910 Beaux Arts house in Elkhart, Indiana, displays a typical bottom-end pipe connection. Joseph Hilliard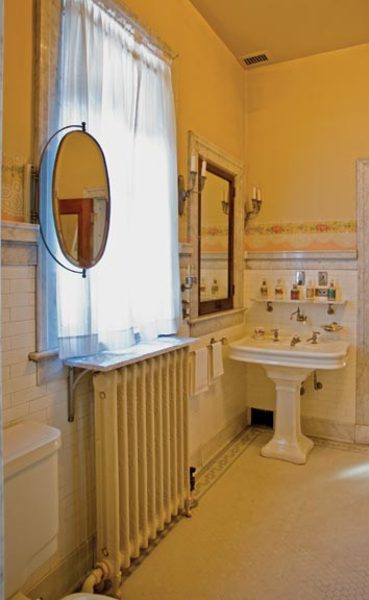
Hot-Water Radiators 101
In hot-water radiators, a pressure-reducing valve between the city water and your hot-water heating system keeps it filled all the time. Most two-story homes need 12-psi pressure, and that’s the factory setting of the valve. If your old house has three stories and there are radiators on the top floor, you may need to adjust the valve to feed water at 18-psi pressure to make sure the radiators at the top are full.
Once filled, a circulating pump moves the heated water from your boiler to your radiators and back. In the old days, many hot-water heating systems didn’t have circulating pumps; the water flowed by gravity, with hot water rising and cold water falling. Because of this, many freestanding, cast-iron radiators have their pipe connections at the bottom of the radiator. The heated water enters the radiator and rises by convection, while the cooler water inside the radiator falls back to the boiler.
Before circulating pumps arrived, the path of least resistance for the water was always the top-floor radiators. The old-timers slowed the flow to the uppermost radiators by inserting a metal orifice (a nickel-size piece of metal with a small hole) inside the radiator’s supply valve. A contractor friend told me his grandfather would make these from Prince Albert tobacco tins. He would use tin snips to cut a circle and then punch a hole with a nail—worked like a charm.
The challenge, though, is that when you add a pump to the system, the path of least resistance shifts to the radiators on the first floor, and that often causes the radiators upstairs to be cold. Where there is no flow of hot water, there is no heat. If you vent and don’t get any air, and the radiator still doesn’t get hot, this is most likely the problem. The pros know this, and on a troubleshooting call, most will remove the orifices from the upper-floor radiators and install them on the lower-floor radiators to help balance the system.
Steam Radiators 101
If you have steam heat, each of your radiators will have either one or two pipes. All steam radiators take advantage of gravity to get the condensed steam (called “condensate”) back to the boiler. The key to making it all work is to keep the system pressure low. If you can’t heat your old house with 2-psi pressure or less (that’s the pressure the Empire State Building uses), something is wrong.
High-pressure steam can hold the air vents on a one-pipe steam system closed, and with the vents locked closed, the air can’t leave the system. If the air can’t get out, the steam can’t get in. High pressure also can cause the condensate to stay up in the system, and this can lead to hammering sounds and high fuel bills.
The device that controls the pressure is the “pressuretrol,” and it’s on the boiler. For house heating, it should always be on its lowest possible setting.
One-Pipe Steam Radiators
One-pipe steam radiator sections often are connected only across their bottoms. A section is like an individual slice in a loaf of bread. Steam is lighter than air, so when it enters a one-pipe steam radiator through the supply valve at the bottom of the radiator, it will rise, pushing the air ahead of itself. The air will leave the radiator through the air vent, which is on the last section, and about a third of the way down from the top. Why? If the vent were at the very top of that last section, the lighter-than-air steam would close it before most of the radiator got hot. Remember, if the air can’t get out, the steam can’t get in.
Two-Pipe Steam Radiators
Two-pipe steam radiators have the steam-supply valve on either the top of the radiator or (more rarely) on the bottom. The return—the pipe the condensate uses to return by gravity to your boiler—is always at the bottom of the radiator. This might take the form of a steam trap, or it might be what we call a “vapor” device, which is found in dozens of shapes and sizes.
Unlike one-pipe radiators, you can adjust the supply valve on a two-pipe radiator to let in more or less steam, which is the main advantage of this system. In a one-pipe radiator, the steam and condensate share that confined space within the one-pipe supply valve, and if you throttle that valve, you’ll get a lot of banging noises and squirting air vents as the steam tosses the water around in the tight confines of the partially closed valve.
Steam radiators connected across both the top and bottom can be converted easily to run on hot water. Clare Martin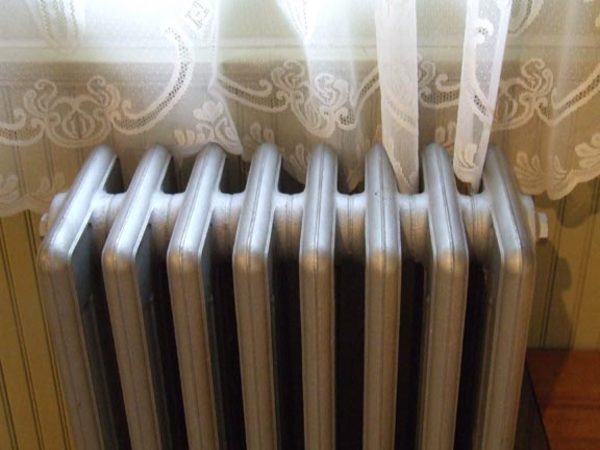
Converting Radiators
Because two-pipe steam radiators have connections across both the top and bottom of each radiator section, they can be converted to run on hot water. (One-pipe radiators, on the other hand, can’t be converted, primarily because they’re only connected on the bottom.)
Old steam radiators typically require more maintenance than their hot-water counterparts (including flushing the boiler’s low-water cutoff once a week so the boiler doesn’t clog and burn out), which is why many contractors recommend conversion.
There’s much to consider before you do this, though. Because hot-water radiators have to run at a lower temperature, your radiator needs to be large enough to deliver ample heat on the coldest days. Since most steam radiators are oversized to begin with (see “Appearance Is Everything,” below), this usually isn’t a problem.
The biggest question to consider is whether your steam radiators and old pipes can take the 12- to 18-psi pressure required by a hot-water system. Up until now, that old steam system has been working with less than 2-psi pressure. If there are any leaks, you’ll notice them when you switch to hot water, so it’s best to look for leaks while you still have steam. A simple way to do this is to raise the pressure (only temporarily!) to 10 psi and conduct a thorough search for leaks.
Appearance Is Everything
Wooden covers, such as this one from the Wooden Radiator Cabinet Co., provide an attractive way to disguise radiators, but they also cut down on output by as much as 30 percent.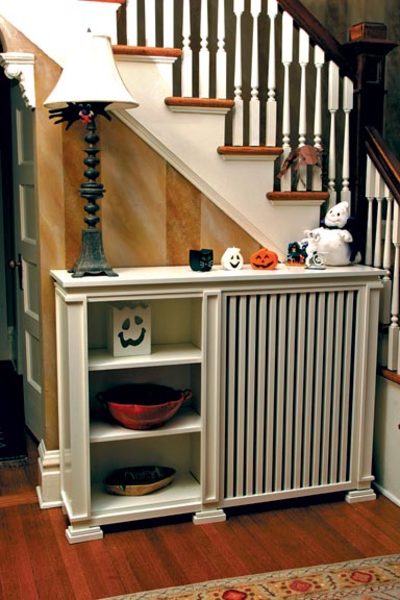
Oversized Radiators
When the airborne Spanish Influenza pandemic of 1918 arrived and took the lives of 675,000 Americans, many people became afraid of the air within their homes—and for good reason. The Board of Health responded in 1919 by insisting that people keep their windows cracked open during the winter to let in fresh air. Consequently, radiators got bigger—big enough to heat an entire house on the coldest winter day, often with the windows open. (On milder days, the thermostat will shut off one-pipe steam radiators before they can get hot all the way across.)
Oversizing radiators was the norm during the Roaring ’20s, but when the Great Depression arrived—and because the Spanish Influenza never returned—people began shutting their windows to save fuel, and all those oversized radiators working overtime made it pretty hot inside.
Bronzing Radiators
People soon learned, thanks to a 1935 National Bureau of Standards report, that paint containing metal flakes could cut a radiator’s output by up to 20 percent. They began bronzing their radiators with either aluminum or gold bronzing paint, which is why many old radiators are colored either silver or bronze.
Radiator Enclosures
People also discovered that putting an enclosure over a radiator would cut down on its output. A simple shelf over the top of a cast iron radiator cuts 20 percent of its output. The classic radiator enclosure, which has a solid top and a metal, perforated front, will reduce output by 30 percent, which is why we find them in so many houses.
Bleeding a radiator.
Repairing Radiators: Bleeding
If you find your hot-water radiators aren’t as warm as you’d like, they might need bleeding. Because cold water holds more air than hot water, when the water is heated, that air comes out of the solution and rises to the top, usually finding a home in the radiators. Once there, it can block the flow of water, causing some radiators to remain cold. “Bleeding” is the process of opening an air vent to allow the trapped air to escape so that flow can continue.
How to bleed a hot-water radiator:
- look for the air vent near the top.
- Turn down your thermostat to stop the water from flowing.
- Have a small bucket and a rag ready to catch any squirts, and then open the vent with a screwdriver or a vent key (old-fashioned clock-winding keys often fit radiator vents).
- Once the air stops sputtering and the water begins to flow, you’re done.
All steam radiators start out completely filled with air, and they will bleed themselves automatically as long as the system is working properly. One-pipe radiators bleed through their air vents; two-pipe radiators bleed through the device you see on the outlet side of the radiator (that’s the pipe closest to the floor).
Repairing Radiators: Leaks
When it comes to fixing leaking radiators, there’s no easy solution—it all depends on where the leak is and how severe it is. Steam radiators, because they’re under much less pressure than hot water radiators, are usually the easier of the two to fix.
To begin, first determine where the leak is. An inspection mirror (available at your local hardware store) can help, since it will allow you to see around corners and up into spaces not easily viewed. If the leak is just a pinhole, and not a major disaster from a hard freeze, you may be able to fix it.
There are no products you can pour into a radiator to stop a leak, but a representative from J-B Weld Company of Sulphur Springs, Texas, says many of their customers have had great success using J-B Weld to fix old cast-iron radiators. Several professionals I’ve spoken with also report having used it to successfully repair radiator leaks. The process is a bit involved, though.
How to Fix a Radiator Leak:
- First, drain the radiator and remove any paint, primer, or rust from the area of the leak.
- Clean the surface with a non-petroleum-based cleaner, such as acetone or lacquer thinner, to remove all dirt, grease, and oil.
- Rough up the surface with a file.
- Mix the two elements of the product together in 50/50 proportions, and apply it to a thickness of no less than 1/32 inch, being careful not to get any on your skin or in your eyes.
- After letting it dry for at least 15 hours, you can check and see what you’ve got.
I asked if the product could handle the fluctuations in temperature—and resulting expansion and contraction—common in cast-iron radiators. The rep told me the product actually “softens” when heated, and will move with the metal. It’s not the sort of softening you’ll notice, though. You’d have to get the temperature up to 400° F to see that happen (the product is good up to 500°). Typically, a steam radiator will top out at about 229°, and a hot-water radiator at about 180°. As long as you can access the leak (and are willing to put in the effort), it sounds like this might be a good solution.


