

I hate to admit it, but sometimes the only road to restoration is through the gatehouse of removal. Sometimes it’s stuff we happily unload—like the hollow-core slab doors, iridescent vinyl flooring, and plywood paneling that once besmirched my home. Other times, more precious material has seen better days—i.e., the day before the termites or water found it.
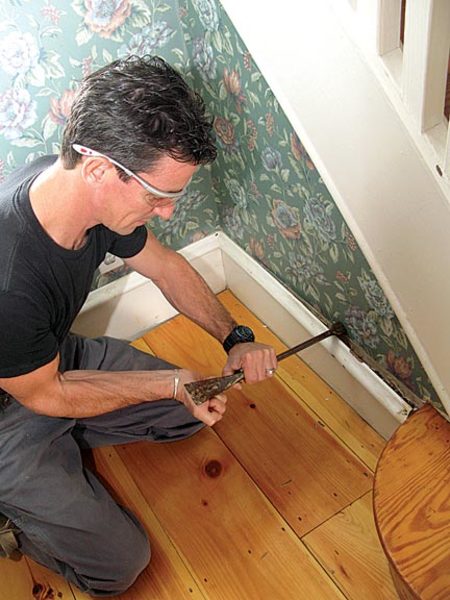
Prying trim with pry bar.
Whatever the scenario, Part A must often be detached from Item B without destroying what’s around it. My frontline tool for this is a pry bar. While it seems like an unimprovably simple tool, not all pry bars are created equal—or for the same work.
What To Look For
There are three basic pry-bar configurations: a piece of flat bar-stock steel bent with a 90-degree head on one end and a chisel on the other; an I-beam body with head and chisel; and more specialized, heavier duty demolition tools with a “jaw” and meaty chisel on each end. Bar lengths range from 5″ to about 24″.
For restoration work, an 18″, I-beam pry bar delivers the best combination of features. The I-beam body adds strength without adding weight. It also stiffens the tool for levering, pulling, and prying, allowing me to get a much firmer grip. Because of their greater surface area, I-beams also dampen impact vibration from hammer blows.
I prefer a bar with a forged (not bent) head and claw. Cutting teeth that are angled a full 90 degrees to the body of the bar have the most efficient angle of attack, and a head with a striking surface further enhances the tool’s efficiency.
Where To Use It
Most bars have a chisel that angles about 20 degrees off the tool body. I don’t often hammer the chisel (impact energy is lost in the length of the bar), but I do use it to get into and under things: shoe molding, a stubborn floorboard, or behind a cabinet. I can even use it as a lever to wedge or lift a door I’m hanging. The angle of the wide, flat chisel is also ideal for roof work—not only for separating roof shingles from one another, but also for getting under the courses above the repair site and popping up nails without doing too much damage to the shingles above them.
The Bottom Line
Once you’ve found the perfect pry bar, keep it working well. Teeth dull after extended use, so regular touch-ups on a bench grinder will revive them. Sharp tools help make the rip-it-out part of restoration work easier, getting us through that gateway of removal so we can start building it back again.
Carpenter Mark Clement is working on his century-old American Foursquare in Ambler, Pennsylvania, and is the author of The Carpenter’s Notebook.


