

What’s under the vinyl siding? It’s possible to restore exterior cladding and trim with good results. Courtesy of Gregory MacNeil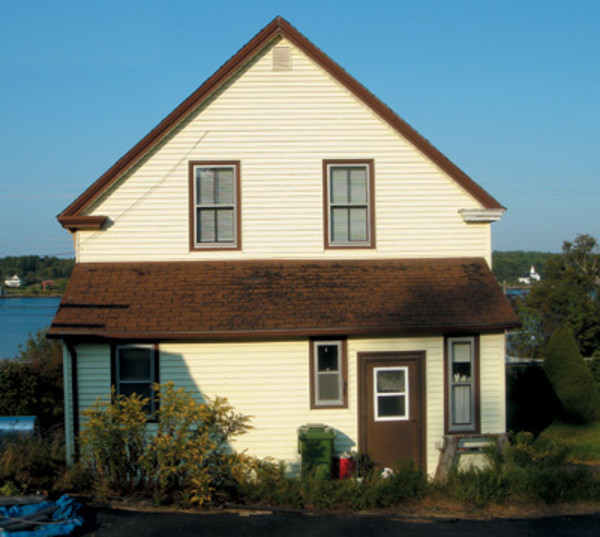
Back in 1997, when I bought some woodlands on the southern Atlantic shore of Nova Scotia, I also became the owner of a small 1916 farmhouse and its little outbuildings. Though the balloon-framed house was structurally stable, it had been covered in the late 1970s with vinyl siding and aluminum storm sashes, and like many preservation-minded folks might do, I discounted it at first.
Surely, the historic siding was decaying from the inside out because of the moisture trapped behind the vinyl veneer and, no doubt, any decorative details had been ruined beyond repair by the installers. In fact, I was so positive that the building was secretly self-destructing that I ordered two pallets of replacement wood shingles and proceeded to peel off the siding before it could do any more damage.
Removing vinyl siding revealed wood shingles—surprisingly intact, but still due for repainting. Courtesy of Gregory MacNeil
To my surprise, many of my assumptions proved largely untrue. I found no rot under the plastic second skin, just the reason for the installation in the first place: a shingled exterior in need of a thorough prep-and-paint job. What’s more, the damage from the siding installers was substantially less than I expected (after all, they do no more than what’s needed to flatten walls for speedy residing).
Ultimately, restoring the shingles, windows, and other parts of the farmhouse became a six-year preservation experiment and a source of techniques and ideas that can be applied to many old-house exteriors.
Stripping Decades of Paint
Removing paint from shingles is tricky. If you eliminate power washing, sandblasting, and open flame, all of which are inappropriate for stripping shingles, you’re left with four paint-removal methods: hand-scraping, chemical strippers, power paint shavers, and infrared heating technology. I find that power paint shavers combined with hand scraping can do the vast proportion of the job. Traditionally, shingles installed with a 4 1/2″ exposure are scraped by hand. Considering that the most natural stroke for hand-scraping is 12″ to 18″, scraping a third of this distance—the traditional amount of shingle to the weather—is laborious, time-consuming, and inefficient. If you try to improve efficiency by scraping wood shingles horizontally across their grain, you risk tearing the shingle faces and edges, or even splitting the shingles, especially if they’re old and fragile.
Removing the vinyl siding revealed wood shingles—surprisingly intact, but still due for repainting. The siding installers’ legacy included window sill ends cut back to the casings and headers completely lost but for their paint ghosts. If handled correctly, power paint shavers can be very productive tools for removing decades of paint with minimal damage to the surface. Though some models are best designed for working on surfaces 6 or wider, such as clapboards, others are well-adapted to the smaller widths of shingles. Then, by working horizontally, you can remove a full 24″ of paint from the shingles with a single, efficient pass. In fact, using two or three tools, with each adjusted for progressively less aggressive cuts, speeds production while remaining sensitive to the wood.
For instance, we used two Metabo 724S shavers—one adjusted for an initial rough cut and the other for a shallow, cleaner cut—with the tool operators following each other along the facade. The objective was to remove only the bulk of the paint with a pass of the first tool, and then return for a pass with a second tool to strip most of the remaining paint. Although these tools are readily adjusted, the cutting head depth marks become harder to see as you use the tool, so we set the depth once and labeled the tools accordingly.
We practiced our technique first on a nearby barn and found it was best to hold the first tool horizontally and the second tool either vertically or horizontally as the undulations in the shingle surfaces demanded. With a two-person crew, production rates can exceed 450 square feet per day.However, if you attempt to remove all of the paint with these tools, you’ll invariably remove an excessive amount of substrate. At this point we switched to hand scrapers for any paint left within concave surfaces, followed by a sash chisel and specialty scraper to address shingle butts.
Another paint-stripping method we employed was “wooding,” an idea we borrowed from the shipbuilding and repair industry. Traditionally, a wooding tool is made from a worn-out 10″ or 12″ mill file that is heated, bent, tempered, and sharpened to form a heavy ship scraper. The tool is struck or tapped along the paint surface to either scar or chip off multiple layers at a time. We assembled our wooding tool by attaching a common plane iron to the handle of a carpenter’s bench axe, thereby improving balance and scraping power. The key to the tool’s success in both its traditional form and our design was that its weight dampened vibration and aided in cutting and chipping. The tool excelled at removing thick paint films from dense wood substrates. In addition, because a wooding tool can be used with only one hand, your free hand can hold a cordless vacuum next to the surface to easily move around a building for small-scale, localized paint removal.
After removing the paint, we finish-sanded the shingles using a random-orbit sander equipped with soft contour hookand- loop backer pads. Though the edges of these soft pads degrade if you allow them to touch the shingle butts, their advantage is they conform well to the shingle surface. (It’s better to lose a few easily replaceable pads than the shingles themselves.) When used with only light pressure, 40-grit sandpaper leaves a good surface for paint adhesion. For all our methods, we made sure any tool operated with two hands had built-in dust collection. For single-handed tools, the user held a vacuum hose with his free hand. If you are removing vinyl or aluminum siding from a building constructed before 1978, you must assume that you’ll be dealing with lead-based paint underneath until tests prove otherwise. With that in mind, we worked with Tyvek suits, nitrile gloves worn under standard work gloves, and other personal safety equipment. The latter included a positive-pressure, air-supplied breathing apparatus equipped with HEPA filtration, protection that is the next step up from a half-face respirator.
Making Missing Parts
We initially expected that reconstructing damaged or missing stylistic elements would require a large volume of material, especially given the appearance of the house once we removed the vinyl siding.To our surprise, the new material for missing bed molds, soffit brackets, window caps, and the ends of window sills amounted to less than half the payload of a compact pickup truck. In fact,we restored all exterior facades with lumber from a single tree felled on the property, sawed on site with a chainsaw mill, and then air-dried for a year before use.
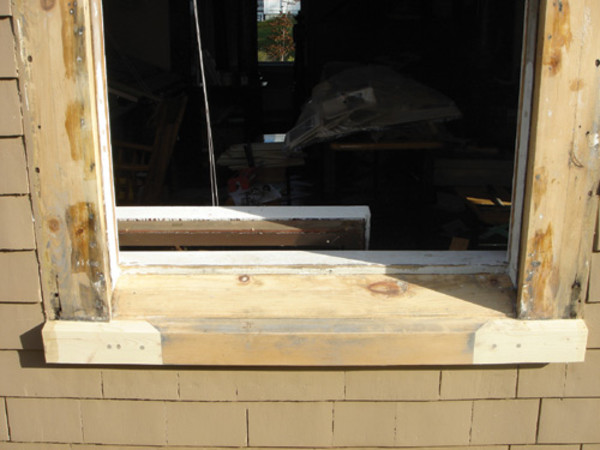
The challenge of the sill ends was to create a joint that would minimize weather exposure while making a good mechanical connection. The solution was to rout the sill back under the casing (to cover much of the joint), and into the middle of the window a couple of inches at a bevel.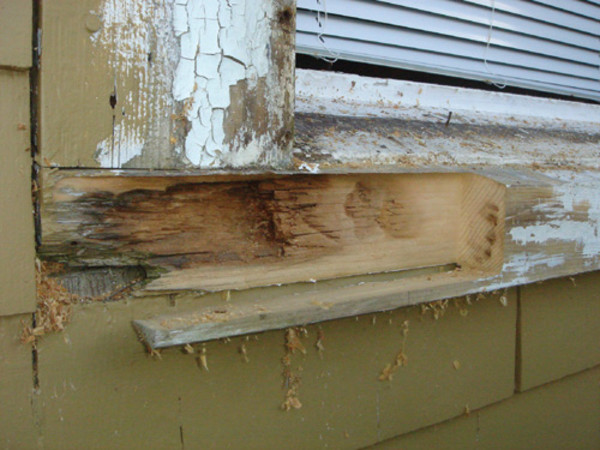
Like many vinyl-clad houses, the ends of the 40 window sills on my house were knocked off years ago so that siding could be placed right over the window casing. Rather than restore each end individually with a hand-fit Dutchman patch,we developed a jig that clamped to the sill face so we could cut back the sill to a uniform shape with a 1/2 plunge router.
We set the plunge cut to a depth just behind the window casing so that the joint was almost completely weather protected. We designed the jig to handle both left and right sill ends and sized it for the narrowest window in the house. We prepared in advance replacement side overhangs for the window sills to uniform dimensions. With a two-person crew, we were able to fit, install, and prime the 40 replacement window sill ends in less than 14 hours.We secured the precut replacement window sill ends with two countersunk Spax screws (fasteners that bore their own pilot holes and come in lengths up to 7″), and concealed the heads with epoxy plugs. One pass with an electric planer along the sill face and a few passes with a sanding block was all that was needed for final cleanup before priming and painting.
We documented many different examples of 2 1/2″-wide window backband profiles, both contemporary and period, from nearby houses. However, finding consistent examples of backband molding profiles on our house proved problematic. Unlike crown mold and soffit brackets that are full-bodied, backband moldings are finely detailed and the examples were damaged from years of scraping and overpainting. So, opting for some conjectural restoration, we examined the shadows associated with the historic profiles we collected and then created a molding profile with a historically compatible shadow line using an ogee raised-panel router bit along with a 1/4″ core box bit.
Under fresh coats of paint, reproduction backband molding meets a rebuilt sill to accurately and effectively restore the window’s period details.
Preparation and Paint
To ensure consistent paint color and compatibility between coats, it pays to choose a reputable manufacturer and supplier. When you purchase paint on an as-needed basis for a multi-year project, you can sometimes find minor color discrepancies over time.Where possible, we primed and top-coated the millwork made during the winter months.We used an alkyd oil-based primer with a 100-percent acrylic waterbased top coat.
Because most substitute siding is installed with 3″-long nails, it leaves the original exterior peppered with nail holes 16″ to 24″ apart in horizontal courses about 8″ above each other. We filled these holes with exterior-rated, two-part wood filler that sands and scrapes easily, takes paint well, and does not bleed through paint.
To paint the shingles we used a roll-and-brush method, first applying the paint with a 4″- or 6″-wide “hot dog” roller, before smoothing it out with a quality 4″-wide brush. The long, 27″ handle of the roller reduces back strain, and the 1″ diameter roller is ideal for wetting the butts and faces of the shingles. Plus, if you can find Whiz brand rollers (originally made in Germany), they are fully covered on one end so that you can roll either vertically or horizontally and still provide good shingle butt coverage.We find that a 6″ roller just about matches the output of a painter following up with a 4″ brush, so that no member of a two-person team gets ahead of the other.
In historic restoration projects we like to date-stamp all new work with a branding iron. Although we manufacture our own branding irons, it’s not hard to find electric- and torch-heated branding irons from woodworking supply houses at reasonable prices. We typically brand the work before applying the top coat of paint. Though these branding marks are not visible at a distance, upon close examination they provide an in situ record of all the repairs that helped give an exterior a second life after being freed of its second skin.
Gregory J. MacNeil is a partner in Jerry MacNeil Architects Ltd. in Halifax, Nova Scotia.


