

After a century of use, leaking gaskets on sink fittings are a common problem.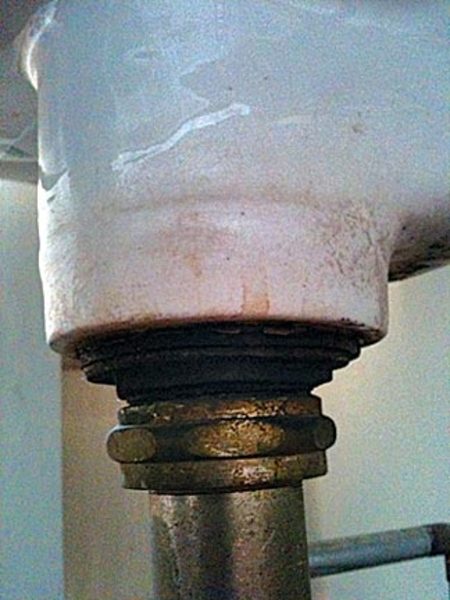
Don Hooper: Your question pertains specifically to the drain assembly, but it also could apply to the faucet connections. When drain fittings or faucet connections are leaking and you’ve tried all the Band-Aid approaches you can think of to no avail, you’ve reached the point of no return on your sink.
You must now either find a plumber or handyman to disassemble the fixture and undertake a restoration project on the fittings, or do it yourself. No matter where the leak is, you’ll need to restore the whole system, perhaps including the water shutoff valves, in order to have a sink that doesn’t continually leak.
Start by taking the sink out of service. Disconnect the water supply lines above the shutoff valves and at the trap. If it’s a wall sink without a pedestal blocking the connections underneath, you can do this without removing the sink from the wall. If it’s a pedestal sink, pull it away from the wall to get behind and see inside the pedestal, then reach up inside the base (in front of the drain) and unscrew the nut/bolt holding the top of the sink to the base.
Next, remove the faucet handles and trim to prevent them from being damaged. Faucet fixtures are normally loosened from the top by unscrewing handles and trim down to the nuts holding them in place.
You can use lubricant or even some heat from a heat gun (carefully) or propane torch (very carefully) to warm the connector nuts underneath the sink top in order to unscrew and disconnect all the water lines and remove the valves from the underside of the sink. Once you’ve separated these parts, gently lift the top off of the base and set it on a blanket on the workbench or the floor.
To separate the drain assembly, apply lubricant at the connections, then carefully apply heat to make the brass parts expand ever so slightly. Never put direct heat on the cast-iron enamel or china fixture itself, as it will shatter or crack. Some parts may not come apart without breaking, and sometimes the drain assembly won’t budge and has to be cut apart. If that’s the case, keep the parts; they can be brazed back together and re-machined to work again like new.
A fine hacksaw blade can be used to carefully cut out the old gasket where it comes in contact with the body of the sink.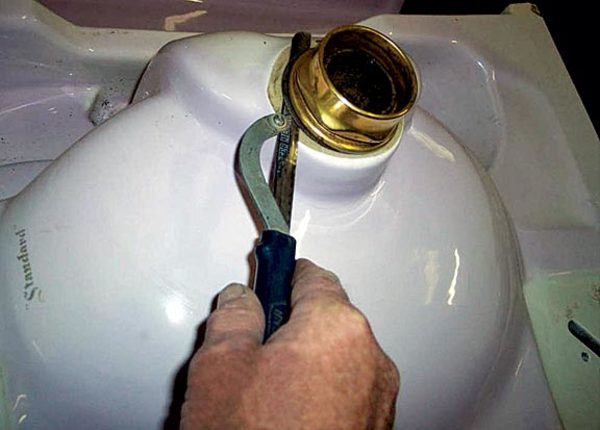
Try not to mangle the parts by wrenching on them with heavy, toothy steel wrenches. Old faucet parts are made of soft brass and are somewhat fragile—they don’t take well to heavy pipe wrenches with sharp teeth. To replace your leaking drain gasket, you also must remove the drain fitting from the sink. Sometimes I’ll use a fine hacksaw blade to saw out the old, hardened gasket where it’s in contact with the china or iron body of the sink. You’ll know you’ve cut out all the old rubber when you start seeing gold-colored (brass) debris. Try to cut only the rubber and not the brass fitting. With the old gasket removed, squirt WD-40 or Liquid Wrench into the threads at the nut to help you unscrew the parts.
Once all the parts are off the sink, take an inventory. Which parts are damaged and must be replaced? There are shops that stock used parts, or might even be able to get new replacement parts. There are also shops that have the ability to remake discontinued parts. Here at Vintage Plumbing, we sometimes recast them, but more often have them custom-machined by a fabricator. Any metal part can be refabricated, even odd-sized nuts.
Once all the parts are accounted for in usable condition, it’s time to have the faucet and drain assembly restored. The finished trim parts should go to a chrome-plating shop to be stripped, polished, and chrome- or nickel-plated, per originals. Make a list of all your parts before dropping them off at the plating shop so you can ensure that all parts are returned to you when the job is finished. All other parts can be washed and brushed clean in a bucket of water-diluted CLR (aka Calcium, Lime, Rust) Cleaner or Lime Away.
Once the replated parts are done, you must reassemble and rebuild the valves with new washers, packings, and gaskets. Then, reinstall the parts on the sink again with new gaskets and seals to prevent leaks. If direct replacement gaskets aren’t available, you can custom-cut them from rubber sheet gasket material. Finally, reassemble the sink in the reverse order of how you took it apart and reinstall it in the bathroom.
Almost anyone who owns an old house has the hands-on skills needed to take sink fittings apart. A few specialized tools are required, and there are some tricks to getting some parts separated, but the job really isn’t that complicated if you’re patient and methodical.
Don Hooper,owner of Vintage Plumbing Bathroom Antiques, has been collecting, selling, and restoring antique bathroom fixtures for more than 35 years.


